
I made this peppermint oreo bark at 11 PM on a Tuesday because I found a forgotten bag of Oreo Thins and the idea of turning on the oven felt genuinely offensive. My jeans have been mad at me since December 1, and this recipe does not help. I told myself I would give most of it away, then ate the equivalent of three cookies while cleaning up.
This easy holiday candy bark uses Oreo Thins, white chocolate melting wafers, dark chocolate melting wafers, and peppermint bits. You dip the cookie bottoms in white chocolate, cover them with more white chocolate, swirl dark chocolate over the top, and sprinkle on peppermint bits. The bark sets in about 1 hour at room temperature or 20 minutes in the refrigerator. No oven required.
Why You’ll Love This Recipe
- 15 minutes of actual work: The rest is waiting for the chocolate to set.
- No oven required: Keep the oven off while you make the bark.
- Looks fancy, costs little: People will think you spent hours making it.
- Kid-friendly chaos: Children can sprinkle the peppermint bits.
- Hostess-gift ready: Stack a few pieces in a cellophane bag and tie it with ribbon.
Tools You’ll Need
Nothing fancy, I promise.
- Sheet pan: Use an 11×15 pan. A 9×13 pan works, though the bark becomes thicker.
- Parchment paper or foil: Line the pan so the chocolate releases easily.
- Heatproof bowls: Melt the chocolate in dry glass or metal bowls.
Ingredients
- 1 (10-ounce) package Oreo Thins – About 35-40 cookies. Regular Oreos work too, but they’re thicker and you’ll get fewer in the pan.
- 2 (10-ounce) bags white chocolate melting wafers – Use good quality. Cheap white chocolate tastes like wax and you will regret it.
- 1 (10-ounce) bag chocolate melting wafers – Dark or semi-sweet, your call. I like dark for the contrast.
- ¼ cup peppermint bits – The crushed candy cane kind, not extract. Don’t confuse them or you’ll be very sad.
How To Make Peppermint Oreo Bark
Set up your station, melt some chocolate, and try not to eat all the cookies before they hit the pan.
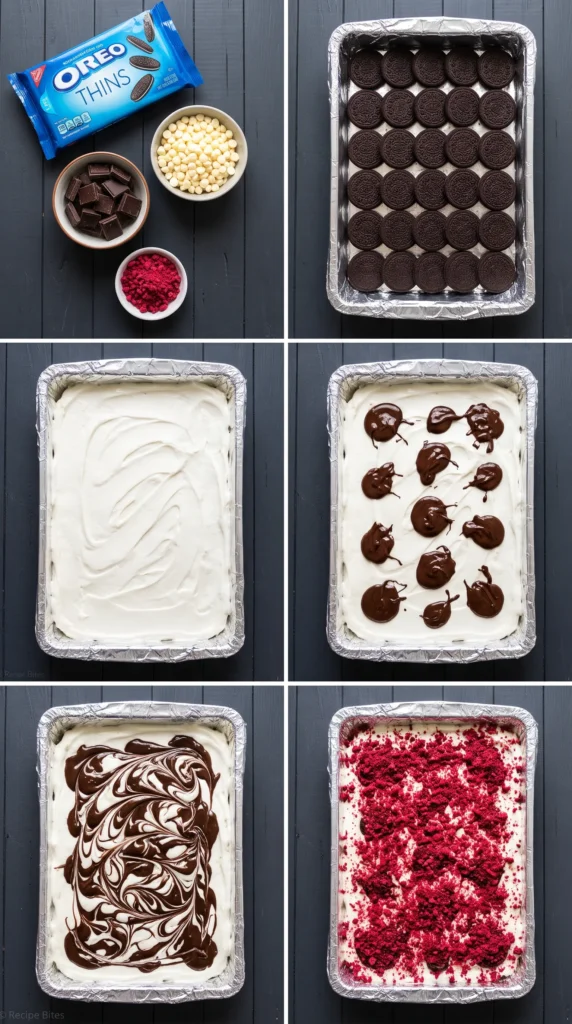
- Prep your pan: Line an 11×15 sheet pan with foil. If you use parchment, make sure it lies flat – wrinkles will show up in your bark and you’ll be annoyed. Foil is more forgiving.
- Melt the chocolate: Place 2 ½ cups white chocolate melts and 1 cup dark chocolate melting wafers in two separate bowls and melt each bowl according to the package directions. Go slow in the microwave – 30-second bursts, stir in between. Burnt chocolate smells terrible and there’s no saving it.
- Dip the cookies: Dip the bottoms of the cookies in the melted white chocolate and lay them flat on the foil lined tray. Continue until all the cookies are laying flat and side by side. This step keeps them from sliding around later. If a few overlap, that’s fine – it’s bark, not a geometry exam.
- Cover with white chocolate: Spread the rest of the white chocolate over the top of the cookies using a flat spatula. Don’t stress about perfection. You’re going to cover it with more chocolate anyway.
- Add the dark chocolate: Drop the melted dark chocolate by spoonfuls over the top. Swirl gently until you get the pattern you like. A butter knife works great here. Swirl too much and it turns muddy – stop while it still looks pretty.
- Finish with peppermint: Sprinkle with peppermint bits and let set. This takes about an hour at room temperature, or 20 minutes in the fridge if you’re impatient like me. Just don’t put it in the freezer – the chocolate will sweat when it comes out.
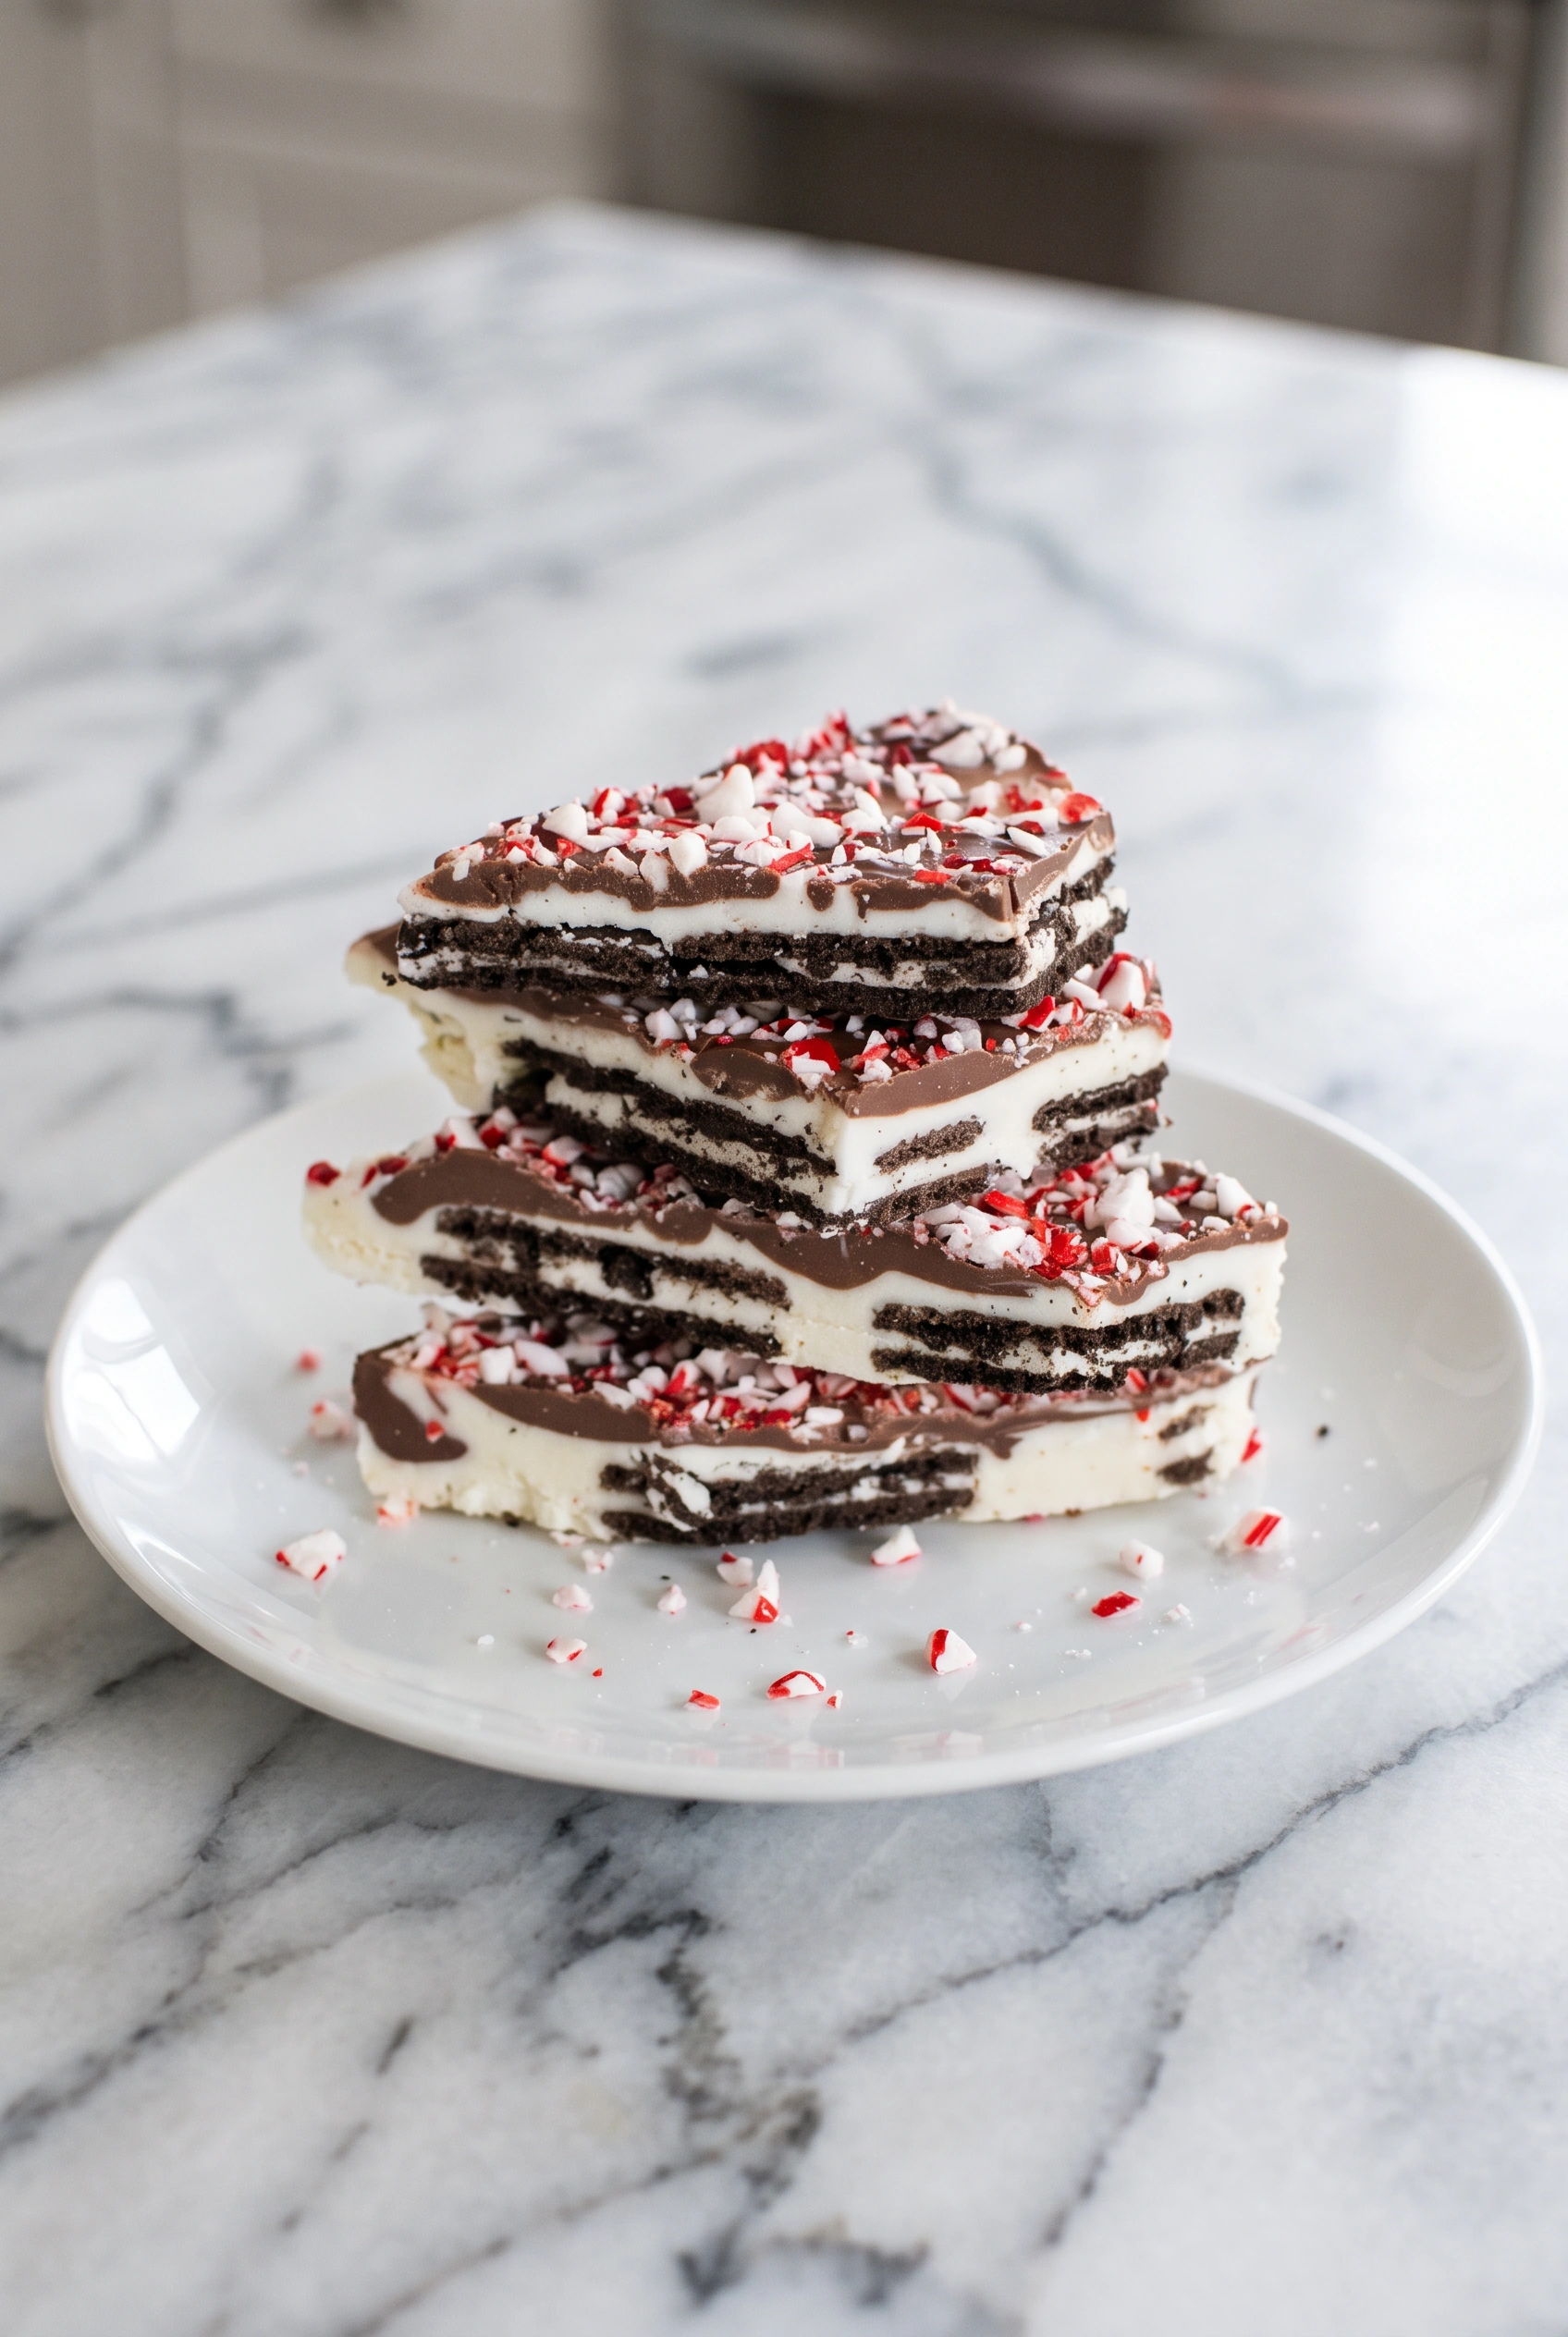
- Cut and store: Use a large knife to cut the chocolate bark into pieces. Store in a sealed container. Triangles look nice, but squares are easier. Your call.
♥ The Misfit Tips!
- Do not rush the set: Give the bark the full hour before cutting it.
- Use a sharp knife: A dull knife shatters the bark into shards. Wipe the blade between cuts for cleaner edges.
- Make it ahead: Keep the bark for a week in a sealed container at room temperature.
- Refrigerate for a party: Make it two days ahead and store it in the refrigerator. Let it come to room temperature before serving.
- Dip the cookie bottoms: The white chocolate acts as glue and keeps the cookies from sliding.
Perfect Pairings
These go perfectly with…
- A cold glass of milk washes down the chocolate.
- Hot cocoa with extra marshmallows doubles the peppermint flavor.
- A game day spread makes the bark disappear before halftime.
- A hostess gift gains a festive chocolate treat with almost no effort.
How to Store
❤
- Fridge: Store the bark in an airtight container for up to 2 weeks. Let it sit at room temperature for 10 minutes before eating because the chocolate becomes harder.
- Freezer: Freeze the bark tightly wrapped for up to 3 months. Thaw it in the refrigerator overnight. The texture may change slightly.
- Reheat: Do not reheat the bark. Bring it to room temperature if it has been in the refrigerator.
- Note: Peppermint bits soften in humid conditions. Keep the bark in a cool, dry place.
Peppermint Oreo Bark
Ingredients
Equipment
Method
- Prepare the PanLine an 11 × 15-inch sheet pan with aluminum foil, making sure it lies as flat as possible. If you prefer parchment paper, smooth out any wrinkles before starting. Wrinkles can show in the finished chocolate bark, while foil is generally more forgiving and easier to work with.
- Melt the ChocolatePlace 2 1/2 cups of white chocolate melts in one microwave-safe bowl and 1 cup of dark chocolate melting wafers in a separate bowl. Melt each bowl according to the package instructions. If using the microwave, heat the chocolate in 30-second intervals, stirring well between each burst until smooth. Be careful not to overheat the chocolate. Burnt chocolate develops an unpleasant smell and cannot be salvaged.
- Dip the CookiesDip the bottoms of the cookies into the melted white chocolate, then arrange them flat and side by side on the foil-lined sheet pan. Continue until all the cookies are arranged across the pan. This step helps anchor the cookies in place so they do not slide around when you spread the remaining chocolate over them. A little overlapping is fine if needed.
- Cover with White ChocolateSpread the remaining melted white chocolate evenly over the tops of the cookies using a flat spatula. Do not worry about achieving a perfectly smooth surface. The dark chocolate will cover much of the white chocolate, and the swirled pattern will give the bark its finished look.
- Add the Dark ChocolateSpoon the melted dark chocolate over the white chocolate layer in small dollops. Using a butter knife, gently swirl the dark chocolate through the white chocolate until you achieve a pattern you like. Avoid overmixing, as the two chocolates can blend together and create a muddy appearance instead of distinct swirls.
- Finish with PeppermintSprinkle the peppermint bits evenly over the chocolate bark while the chocolate is still soft enough for them to stick. Let the bark set at room temperature for about 1 hour, or place it in the refrigerator for approximately 20 minutes until firm. Avoid freezing the bark, as condensation can form on the chocolate when it is removed from the freezer.
- Cut and StoreOnce the chocolate is completely set, use a large, sharp knife to cut the bark into pieces. Triangles make a pretty presentation, while squares are generally easier to cut. Store the finished bark in a sealed, airtight container to keep it fresh.