
I made these at two in the afternoon on a Tuesday because my dentist suggested I cut back on sweets, and my immediate, mature response was to walk into the kitchen and bake chocolate.
My previous attempts at sugar free brownies produced something that tasted like chocolate-scented drywall, including one legendary batch I brought to a potluck where three separate people found creative ways to spit them into napkins without making eye contact with me.
These brownies work in a way those did not, because they rely on enough fat from avocado oil, enough intensity from quality cocoa powder, and one genuinely strange fridge-cooling step to distract you completely from the absence of traditional sugar. Here is exactly how I do it.
reader review
“Fudgy Fudgy and Fudgy. I pulled them at 14 minutes exactly like the recipe says and did the fridge trick and they came out perfect. My husband could not believe there was no sugar in them. He asked me to make them every week. Thank you Thank you Thank you!!!!!” – Denise W.
Loved this too? Add your reviewWhy You’ll Love This Recipe
- Zero sugar crash. You get the full chocolate fix without the blood sugar spike and subsequent afternoon slump that follows a conventional brownie.
- One bowl after prep. You beat the eggs and sweetener in the same bowl you mix the batter, and the pan goes into the oven without dirtying a second container.
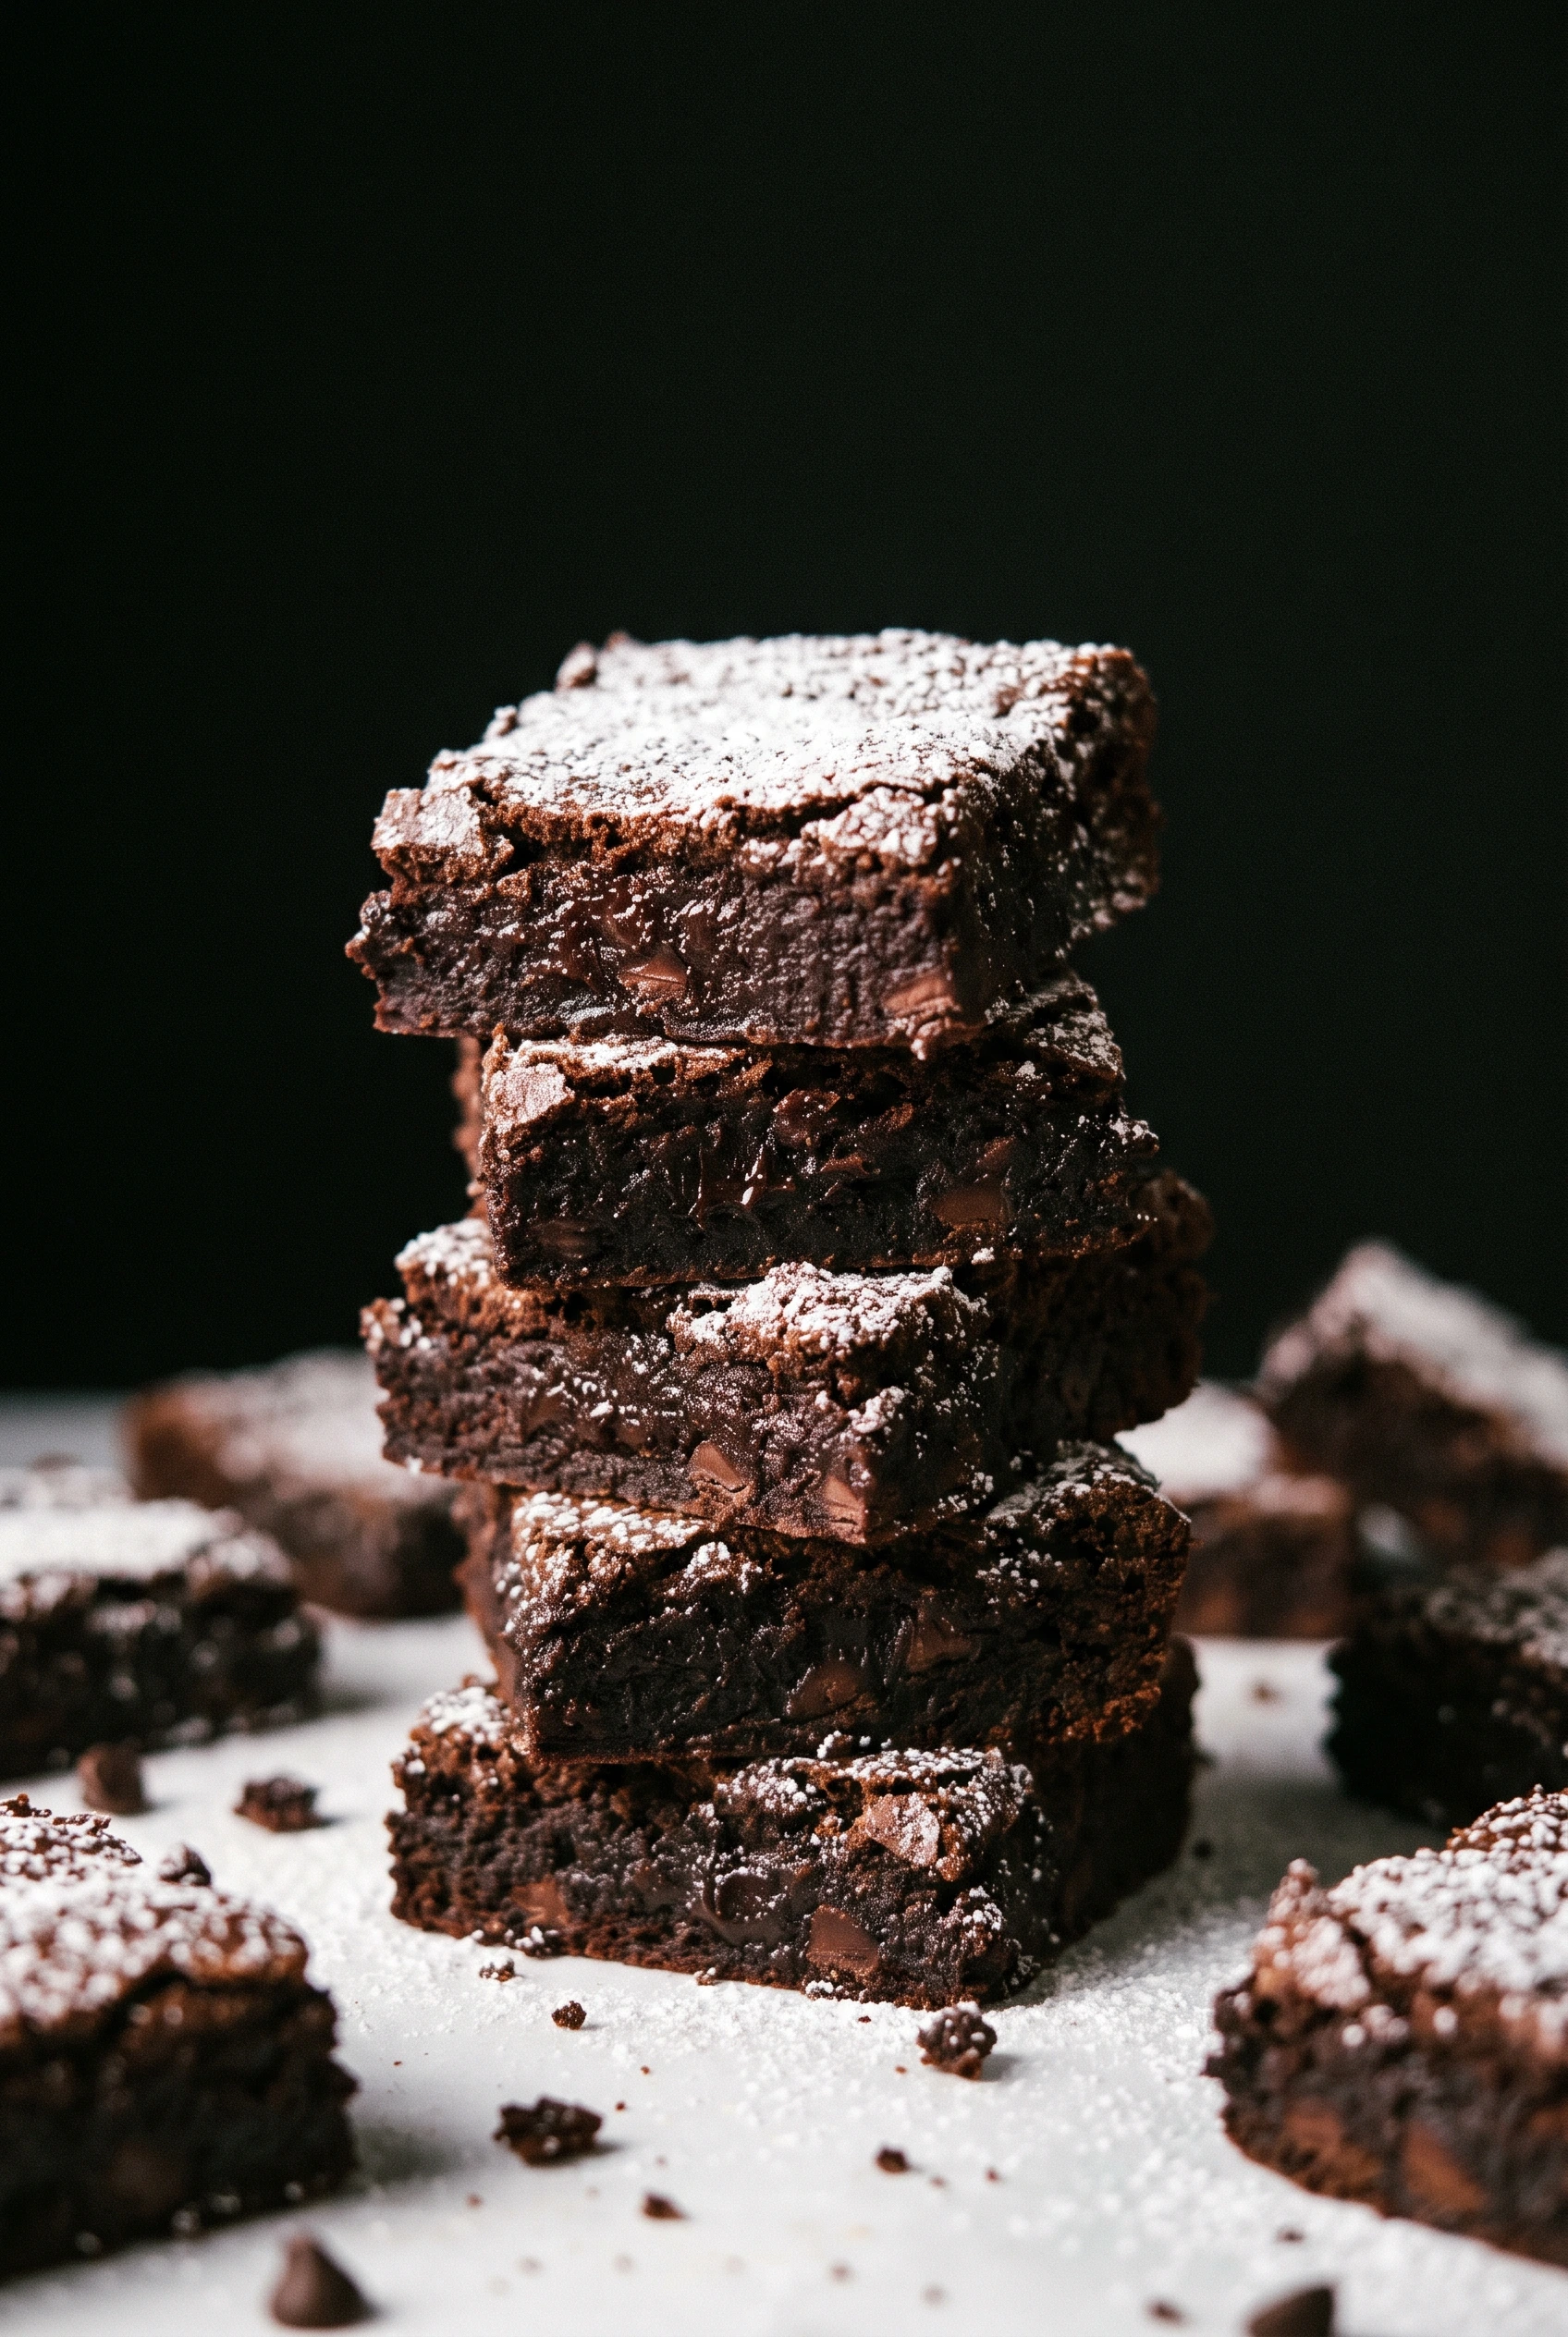
- Genuinely fudgy texture. These do not produce the dry, crumbly result that most no sugar brownies deliver. The avocado oil and extra egg yolk keep the center dense and almost truffle-like after the fridge cooling step.
- Fast bake time. Fourteen to sixteen minutes in the oven plus fifteen minutes in the fridge gets you a sliceable brownie faster than most conventional recipes finish baking.
Tools You’ll Need
Nothing fancy, I promise.
- 8×8-inch metal baking pan. Metal conducts heat more evenly than glass and produces crispier edges with a properly set center in the short bake time this recipe uses. Glass pans work with an extra two to three minutes added to the bake time.
- Electric hand mixer. You beat the eggs, oil, sweetener, and vanilla for one full minute to start the emulsification that gives these brownies their structure. A whisk substitutes with significantly more effort and produces a slightly less uniform result.
- Parchment paper with overhang on two sides. You lift the entire slab out of the pan cleanly after cooling without crumbling the edges. Skipping the parchment and relying on greased metal alone produces a stuck brownie that you chip out in pieces.
- Thick trivet or silicone hot pad. You place this in the fridge before the pan comes out of the oven so the hot metal sits on a protective surface rather than directly on the refrigerator shelf.
Ingredients
- 1 egg – Room temperature if you remember, straight from the fridge if you are impatient like me.
- 1 egg yolk – The secret to fudgy texture; do not throw away the white, save it for an omelet you will inevitably forget to make.
- 1/2 cup avocado oil – Neutral flavor is key here, so please do not use that robust olive oil you brought back from Italy.
- 1/2 cup Truvia – The magic ingredient for a sugar free chocolate brownies experience that doesn’t taste like sadness.
- 1 teaspoon vanilla extract – Measure with your heart, but a teaspoon is a good start.
- 1/3 cup all-purpose flour – Just enough to hold things together.
- 1/3 cup cocoa powder – Use a good quality one, it does all the heavy lifting here. Read up on cocoa powder if you want to geek out on why fat content matters.
- 1/4 teaspoon salt – Essential to balance out the intense chocolate.
- 1/8 teaspoon baking soda – Barely any, just to give it a tiny lift.
- 1/4 cup mini chocolate chips – Make sure these are sugar-free too if you are strictly avoiding sugar.
Instructions
Trust the process here, even if the batter looks a little different than boxed mix.
- Prep the pan: Heat your oven to 350°F and line an 8×8-inch pan with parchment paper. Leaving an overhang makes it so much easier to lift them out later, preventing the tragic stuck-brownie crumble.
- Whip it good: In a large bowl using an electric hand mixer, beat the eggs, oil, Truvia, and vanilla extract until the mixture begins to lighten in color, about 1 minute. If you skip the mixer and use a whisk, prepare for an unwanted arm workout.
- Add the dry stuff: Stir in the flour, cocoa powder, salt, and baking soda, then fold in the chocolate chips. Be gentle here; overmixing is exactly how you end up with tough, rubbery squares.
- Bake it: Pour into the pan and bake until the top is JUST set, about 14-16 minutes. They will look slightly underdone in the middle, and that is exactly what you want for a fudgy sugar free brownies recipe.
- The weird chill step: Place a hot pad or trivet into the refrigerator and place the pan inside immediately for 15 minutes. This shock-cooling stops the baking process dead in its tracks, locking in the fudge factor.
- Wait patiently: After 15 minutes, allow the brownies to cool on the counter completely. Cutting them while warm will result in a delicious, sloppy lava puddle, which honestly isn’t the worst fate.
♥ The Misfit Tips!
- Pull the pan at fourteen minutes. I once left a batch in for twenty minutes while distracted by a true crime documentary and produced chocolate hockey pucks. Fourteen minutes with a slightly underdone center and the fridge step produces the fudgy result this recipe promises.
- Use a baking-specific sweetener blend. Pure erythritol at this volume in this sugar free chocolate brownies recipe leaves a pronounced cooling aftertaste in the finished square. A Truvia baking blend or erythritol-monk fruit combination eliminates the problem without changing the baking behavior.
- Protect the fridge shelf. The hot pan needs a thick silicone trivet between it and the refrigerator shelf. Placing a hot metal pan directly on glass shelving risks cracking the shelf from thermal shock. Thirty seconds of setup before baking prevents this entirely.
Make it yours
- Nut addition. You press one-third cup of roughly chopped toasted pecans into the top of the batter before the pan goes into the oven for crunch and a slight bitterness that plays well against the sweetener.
- Espresso boost. You dissolve half a teaspoon of instant espresso powder in the teaspoon of vanilla extract before adding it to the bowl and the coffee amplifies the cocoa flavor without contributing a noticeable coffee taste.
- Dairy-free version. You substitute dairy-free sugar-free chocolate chips and the recipe produces a comparable result with the same fudgy center and set edges.
Perfect Pairings
These brownies suit anything that complements or cuts the deep cocoa flavor.
- A cold glass of whole milk provides the contrast that makes each square taste richer and more complex.
- Smeared with natural peanut butter straight from the fridge at an unreasonable hour, which requires no justification and produces a genuinely good result.
How to Store Sugar Free Brownies
❤
- Fridge. You store cut squares in an airtight container for up to one week. Cold storage makes the texture denser and more truffle-like, which suits this recipe particularly well given the oil-based fat structure.
- Freezer. You wrap individual squares in plastic wrap, place them in a zip-top freezer bag, and freeze for up to three months. You thaw one square at a time on the counter for one hour rather than repeatedly freezing and thawing the whole batch, because sugar-free chocolate chips develop a chalky texture after multiple freeze-thaw cycles.
- Reheat. You microwave one square for ten seconds for a warm, soft center. Longer than ten seconds melts the chocolate chips into lava and makes the edges tough.
Sugar Free Brownies
Ingredients
Equipment
Method
- Prep the pan and ovenYou preheat the oven to 350°F and line the 8×8-inch metal pan with parchment paper, leaving a two-inch overhang on two opposite sides. You place a thick trivet or silicone hot pad on a shelf in the refrigerator now so it reaches the ambient fridge temperature before the pan comes out of the oven.
- Beat the wet ingredientsYou add the whole egg, egg yolk, avocado oil, Truvia, and vanilla extract to a large mixing bowl and beat with an electric hand mixer on medium speed for one full minute. The mixture lightens slightly in color and thickens into a uniform, glossy liquid. This short beating step emulsifies the oil and eggs, which contributes to the fudgy, cohesive texture of the finished brownie.
- Add the dry ingredientsYou add the flour, cocoa powder, salt, and baking soda to the bowl and stir with a spatula until no dry streaks remain. You fold in the mini chocolate chips with three or four slow strokes. Overmixing develops gluten in the flour and produces tough, rubbery squares rather than tender, fudgy ones. You stop stirring the moment the batter looks uniform.
- BakeYou pour the batter into the prepared pan and spread it into the corners with the spatula, smoothing the top flat. You slide the pan into the center rack and bake for fourteen to sixteen minutes. The top looks just set and the center appears slightly underdone when you pull the pan out. This is the correct moment to stop baking. A toothpick inserted into the center comes out with moist, fudgy crumbs rather than wet batter, which confirms the brownies are ready for the cooling step.
- The fridge cooling trickYou transfer the hot pan immediately from the oven to the trivet in the refrigerator and close the door. The cold air stops the residual baking process that would continue if the pan sat on the counter and cooks the center past the fudgy stage. You leave the pan in the fridge for fifteen minutes exactly. Skipping this step and letting the pan cool on the counter produces a drier, more cakey center from the carryover heat.
- Cool and cutYou remove the pan from the fridge after fifteen minutes and let the brownies finish cooling on the counter until the pan reaches room temperature, about thirty additional minutes. You lift the slab out by the parchment overhang, place it on a cutting board, and cut into squares with a sharp knife pulled straight down. Cutting before the brownies reach room temperature produces soft, smeared edges rather than clean cuts.