
Three hours before a neighborhood potluck, standing in my bathrobe staring at two blocks of cream cheese and a container of heavy cream, I made the best decision of that entire week and produced these no bake mini cheesecake instead of panicking into a grocery store run.
This no bake mini cheesecake recipe skips the water bath, the springform pan, and every crack-related anxiety that comes with traditional cheesecake baking. Each cup sets in the muffin tin, serves itself at the party, and requires exactly zero baking skill beyond the ability to operate a hand mixer. Here is exactly how I do it.
Why You’ll Love This Recipe
- Zero oven required. No water bath, no temperature anxiety, no cracked surface to hide under a layer of fruit. The refrigerator handles everything after the five-minute assembly.
- Pre-portioned by design. A muffin tin produces twenty-four individual servings that guests pick up and eat with their hands. Nobody awkwardly slices a pie with a plastic knife.
- Mousse-like texture in every cup. Folding whipped cream into the cream cheese filling produces a result that tastes closer to a fancy mousse than a standard dense cheesecake.
- Fully customizable toppings. Set out strawberry sauce, lemon curd, and fresh berries alongside the platter and let guests top their own cups at the table.
Tools You’ll Need
- Two 12-count muffin pans. This recipe fills twenty-four cups. One pan works if you bake in two rounds, but both pans refrigerating simultaneously saves an hour.
- Cupcake liners. Non-negotiable. Cheesecake filling bonds to unlined muffin tin cups and requires a spoon to excavate rather than a clean peel.
- Electric hand mixer or stand mixer. Whipping 1 cup of heavy cream to stiff peaks by hand takes eight minutes and produces unreliable results. A mixer handles it in three.
Ingredients
For the Crust
- 2 cups graham cracker crumbs – Buy the pre-crushed ones if you hate doing dishes, otherwise a food processor works.
- 1/3 cup brown sugar – The moisture in brown sugar helps glue the crust together, do not swap for white sugar.
- 1/2 cup unsalted butter – The delicious cement that holds our graham cracker dreams intact.
For the Filling
- 1 cup cold heavy cream – It must be cold, like, straight out of the fridge cold, or it will refuse to whip.
- 16 ounces full-fat brick cream cheese – Do not use the tub spread unless you want cheesecake soup. You can read up on the difference in moisture content of cream cheese varieties if you are bored, but just trust me on the bricks.
- 1/3 cup granulated sugar – Just enough sweetness to balance the tang.
- 2 Tablespoons sour cream – Adds that classic cheesecake bite.
- 1 teaspoon fresh lemon juice – It will not taste like lemon, it just wakes up the other flavors.
- 1/2 teaspoon pure vanilla extract – The good stuff if you have it, the fake stuff if you don’t, we are not snobs here.
Instructions
Clear some space in your fridge first, because playing Tetris with two muffin tins while holding a bowl of dairy is a dangerous game.
- Prep your pans: Line two 12-count muffin pans with paper liners. Do not skip the liners, or you will be serving your guests scooped cheesecake mush out of a tin.
- Mix the crust: Combine the graham cracker crumbs, brown sugar, and melted butter until it looks like wet sand. Spoon a tablespoon and a half into each liner and pack it down hard—if some gets on the counter, just wipe it into your hand and eat it, I won’t tell.
- The optional bake: You can bake the crusts at 350°F for 5 minutes if you want them extra sturdy. If the oven is your enemy today, just skip it—a slightly crumbly crust never hurt anybody.
- Whip the cream: Beat the cold heavy cream until stiff peaks form, then set it aside. If you over-whip it into butter, well, congratulations on your homemade sweet butter, but you will need to start over for the cheesecake.
- Make the filling: Beat the softened cream cheese and sugar until smooth, then mix in the sour cream, lemon juice, and vanilla. Gently fold in your whipped cream with a spatula—do this slowly, or you will murder all the lovely air bubbles you just worked so hard to whip into the cream.
- Fill the cups: Spoon or pipe the filling onto your crusts and smooth the tops. Piping it out of a ziplock bag with the corner snipped off makes you feel like a pastry genius and keeps the edges neat.
- Chill out: Refrigerate the pans for at least 3 hours. Do not put them in the freezer to speed things up, because biting into a rock-hard frozen graham cracker crust will make your dentist very wealthy.
♥ The Misfit Tips!
- Do not rush the chill I once tried to serve these after barely an hour in the fridge because I have zero impulse control. The wrappers peeled off, taking half the gooey cheesecake with them. Give it the full three hours.
- Temperature matters If your cream cheese is cold, your filling will have little cheese lumps in it. It still tastes fine, but it looks like cottage cheese. Leave the bricks on the counter for a couple of hours first.
- The freezer trick You can actually freeze these once they are fully set in the fridge. I like keeping a stash in a Tupperware container for emergency dessert situations. Just let them thaw in the fridge before eating.
Easy Variations to Try
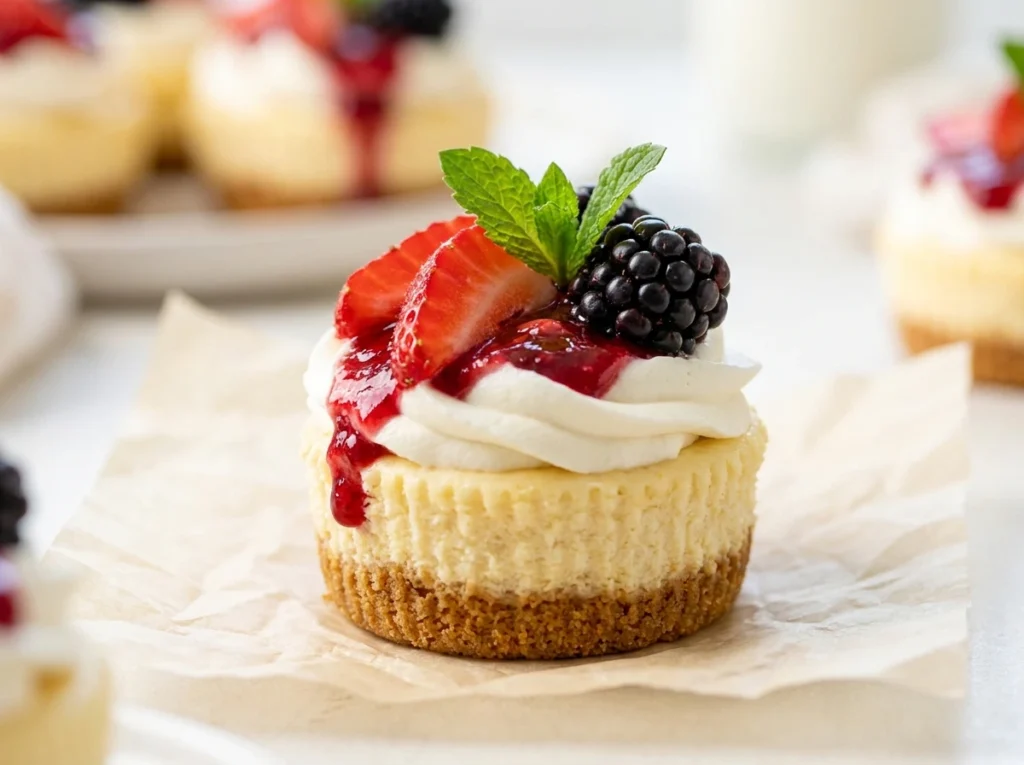
Top each chilled cup with a spoonful of macerated strawberries and a small dollop of whipped cream for individual no bake cheesecake mini desserts that look like restaurant plated desserts.
Swap the graham cracker crust for crushed Biscoff cookies mixed with melted butter and fold 2 tablespoons of Biscoff spread into the cream cheese filling for a spiced caramel variation that disappears faster than the original at any party
. Cooks who want a citrus version stir 1 teaspoon of lemon zest into the filling and top each cup with a small spoonful of lemon curd right before serving. The Philadelphia Cream Cheese recipe collection covers additional no-bake filling variations that work directly in this muffin tin format.
Perfect Pairings
These no bake mini cheesecakes work beautifully alongside:
- A heavy pour of store-bought strawberry sauce that looks homemade the moment it hits the white filling
- A strong cup of black coffee that cuts through the sweet, tangy cream cheese filling
How to Store mini cheesecakes
❤
- Fridge: Up to 5 days in an airtight container. The crust will get slightly softer by day four, but they still taste amazing.
- Freezer: Yes! Once set, freeze them in a single layer in a container for up to 3 months. Thaw them in the fridge for 24 hours before you want to eat them.
- Reheat: Do not reheat these. Ever. Unless you want a puddle of warm dairy.
- Note: If you are adding fresh fruit toppings, wait until right before serving. Berries will bleed juice all over your pristine white cheesecakes in the fridge.

Mini No-Bake Cheesecakes
Ingredients
Equipment
Method
- Prep the pansLine two 12-count muffin pans with paper cupcake liners. Clear enough fridge space to fit both pans flat before starting the filling.
- Make the crustStir the graham cracker crumbs, brown sugar, and melted butter together until every crumb looks damp and the mixture holds together when pressed. Spoon 1½ tablespoons into each liner and press firmly with the flat bottom of a shot glass or a small measuring cup. Pack hard. A loosely pressed crust crumbles when bitten.
- Optional crust bakeBake the crusts at 350°F for 5 minutes for a firmer, more cohesive base. Skip this step entirely if the oven stays off today. An unbaked crust softens slightly overnight but still holds together adequately.
- Whip the cold heavy creamBeat the cold heavy cream with a mixer on medium-high speed until stiff peaks form, about 3 to 4 minutes. Set aside.
- Make the fillingBeat the room-temperature cream cheese and granulated sugar together on medium speed until completely smooth, about 2 minutes. Add the sour cream, lemon juice, and vanilla extract and beat for another minute. Fold the whipped cream into the cream cheese mixture with a silicone spatula using slow, sweeping strokes from the bottom of the bowl upward. Aggressive stirring deflates the whipped cream and produces a dense, heavy filling.
- Fill the cupsSpoon or pipe the filling onto each crust and smooth the tops. A zip-lock bag with one corner snipped off produces cleaner edges than a spoon and makes each cup look professionally finished.
- ChillRefrigerate both pans for at least 3 hours. The freezer speeds things up but produces an icy, grainy texture rather than the smooth, creamy result the full chill delivers.