
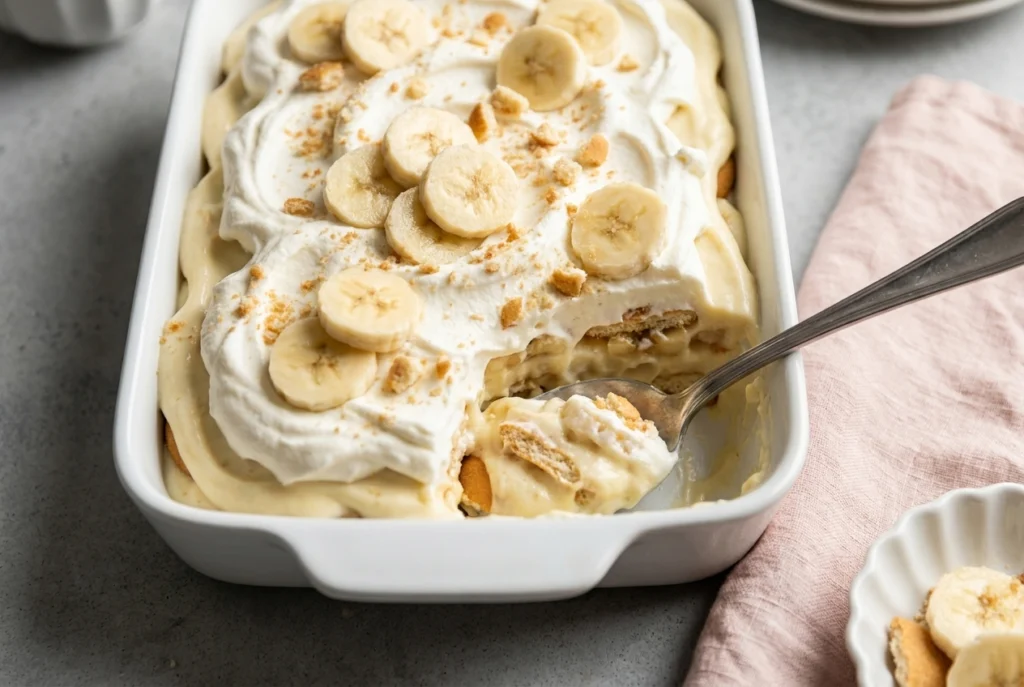
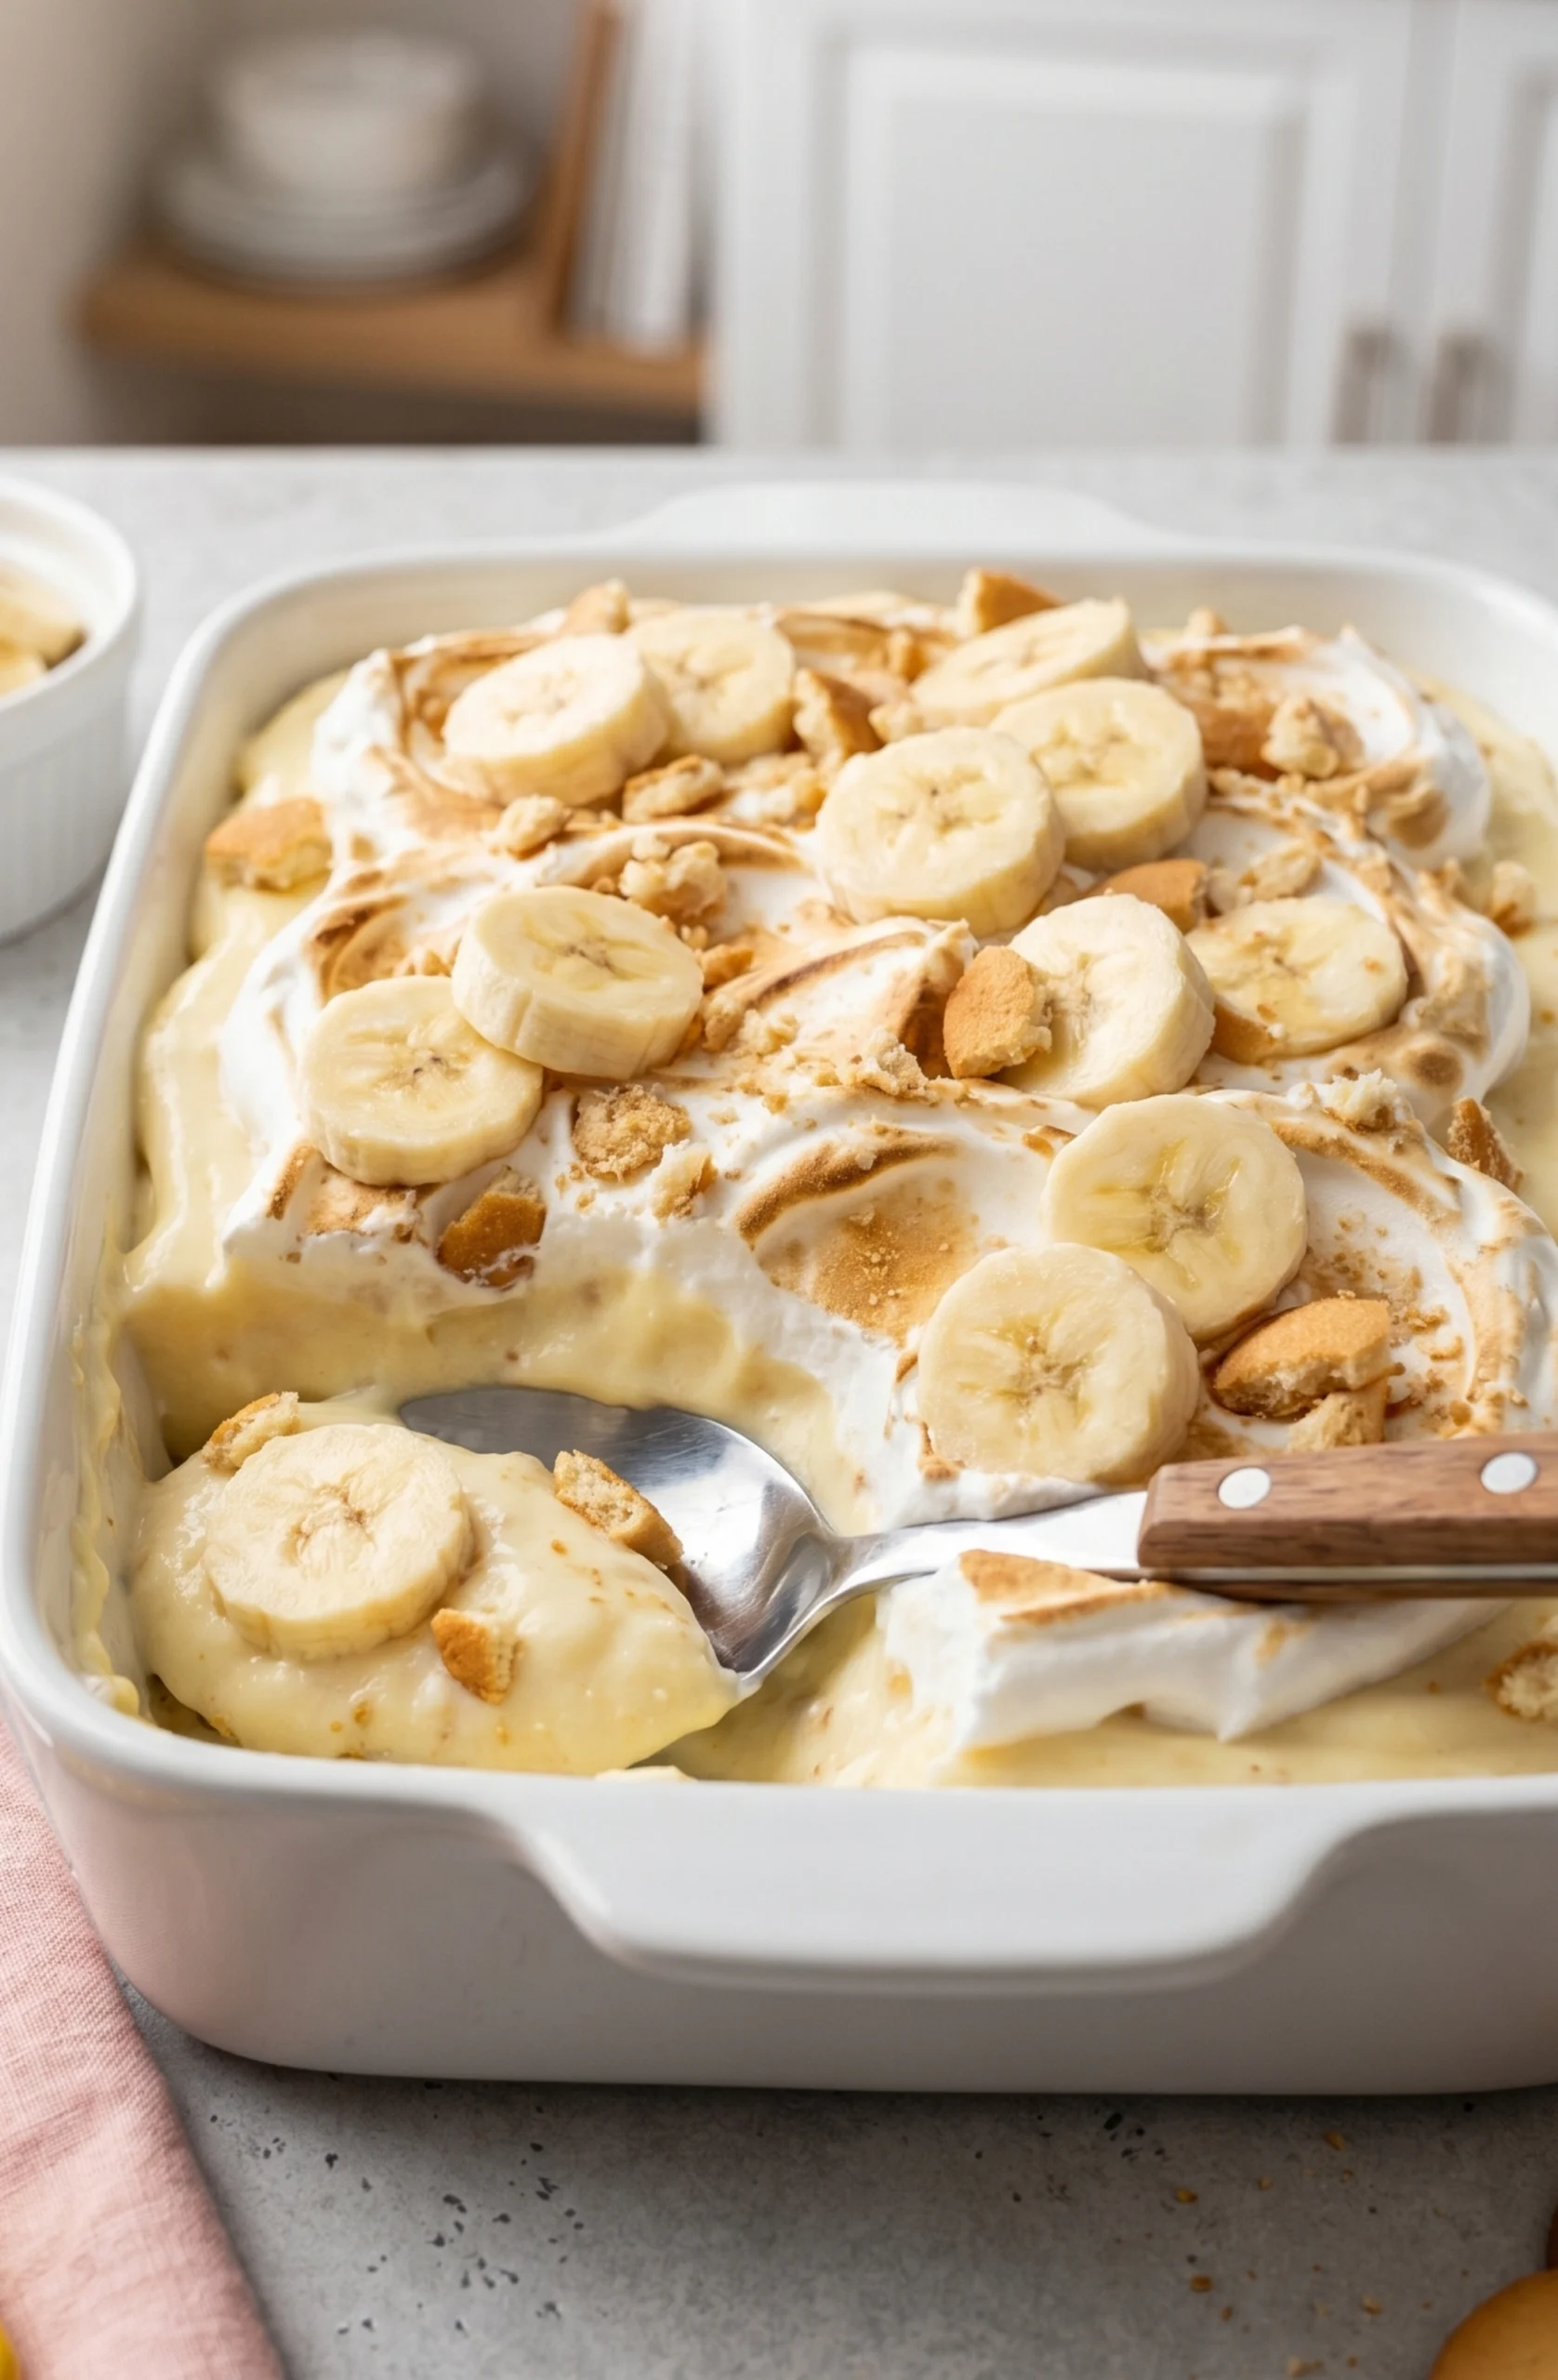
Caramelized Banana Pudding
At 4 PM on the day of a neighborhood barbecue, standing in my kitchen covered in cornstarch, praying the pudding would thicken before I had to walk out the door, I accidentally made the best banana pudding recipe I have ever produced.
This caramelized banana pudding layers buttery brown sugar bananas, homemade vanilla custard, and cinnamon whipped cream over a full box of vanilla wafers, and it requires zero oven time. The caramelized fruit takes four minutes in a skillet and transforms ordinary yellow bananas into something that tastes like it came from a restaurant. Here is exactly how I do it.
reader review
“This is actual magic. You pour water on top and it makes its OWN hot fudge sauce underneath?? I didn’t believe it until I dug my spoon in. One pan, 40 minutes, and the gooiest chocolate dessert ever. My husband ate half the dish straight out of the pan. So so good!!!!” – Rachel P.
Loved this too? Add your reviewWhy You’ll Love This Recipe
- No oven required. The entire dessert comes together on the stovetop and in the refrigerator. The oven stays off.
- Make-ahead by design. This easy recipe for banana pudding improves after four hours in the refrigerator and tastes significantly better the next day, making it the ideal dessert to build the night before an event.
- Crowd-pleasing without effort. A trifle dish filled with visible golden layers of banana, cream, and cookies looks impressive without requiring any technique beyond basic stirring.
- Budget-friendly ingredients. The entire dessert runs on whole milk, eggs, bananas, and one box of vanilla wafers.
Tools You’ll Need
Nothing fancy, I promise.
- Large nonstick skillet. A nonstick surface lets the caramelized sugar release from the pan rather than bonding to it. Stainless steel works but requires more attention.
- Medium saucepan. Heavy-bottomed if you have one, since a thin pan scorches the milk mixture on the bottom before the custard finishes cooking.
- Whisk. A sturdy balloon whisk rather than a thin sauce whisk. You will use it continuously for several minutes and a flimsy one bends under the pressure of thick custard.
- 2.5-quart trifle dish or 9×13 baking pan. A trifle dish shows off the layers through the sides. A 9×13 pan feeds a larger crowd with less visual drama.
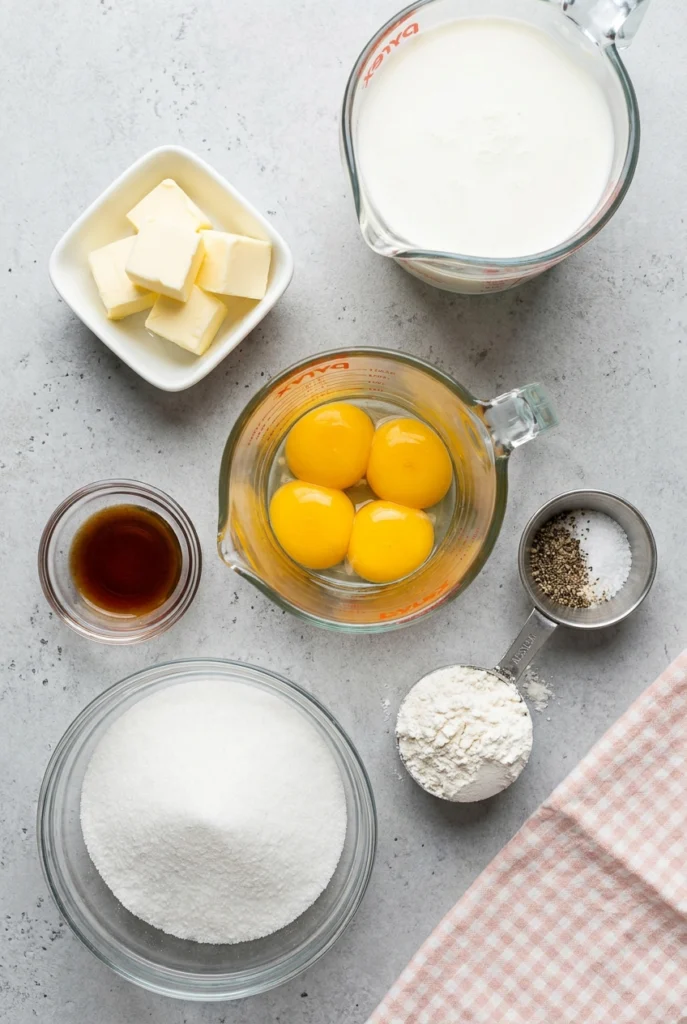
Ingredients
Caramelized Bananas
- 1/4 cup unsalted butter – this is the base of our caramel, do not skimp on it.
- 1/2 cup packed light or dark brown sugar – dark brown sugar gives a deeper molasses flavor, but light works perfectly fine.
- 1/4 teaspoon ground cinnamon – adds a nice warmth to the fruit.
- 5 large semi-ripe bananas – yellow only! Do not use brown, spotty bananas or they will turn into pure mush in the pan.
Pudding & Assembly
- 2 and 1/4 cups whole milk – skim milk will make a sad, watery pudding, so stick to whole.
- 1/2 cup heavy cream – gives the pudding that rich, buttery texture.
- 3/4 cup granulated sugar – sweetens the pudding base just enough.
- 1/4 teaspoon salt – crucial for balancing out all the sugar in this dish.
- 4 large egg yolks – save the whites for an omelet you will inevitably burn tomorrow morning.
- 1/4 cup cornstarch – this is what thickens the pudding, measure it carefully.
- 1 and 1/2 teaspoons pure vanilla extract – use the real stuff if you have it.
- 3 Tablespoons unsalted butter, softened – stirred in at the end for an extra glossy finish.
- about 50 vanilla wafer cookies – one standard 11-ounce box is plenty.
Cinnamon Whipped Cream
- 1 and 1/2 cups heavy cream – needs to be cold straight from the fridge to whip properly.
- 1/4 cup confectioners’ sugar – sweetens the cream without making it gritty.
- 1 teaspoon pure vanilla extract – for flavor.
- 1/4 teaspoon ground cinnamon – ties the whole dessert together.
Instructions
Whisking homemade pudding sounds intimidating, but I promise it is just stirring hot milk until it decides to behave.
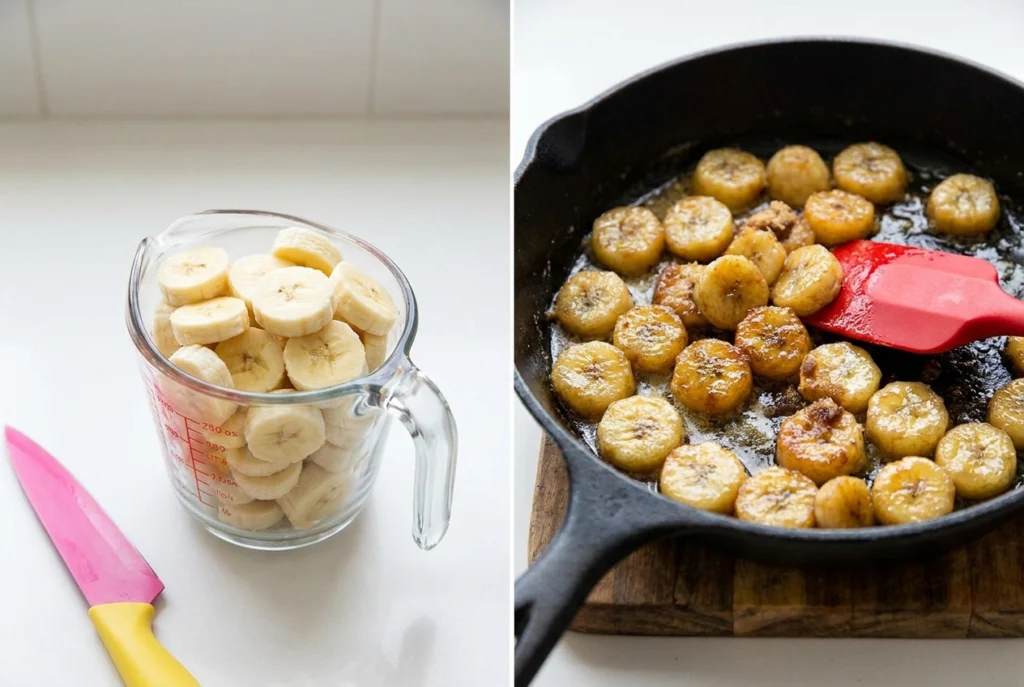
- Caramelize the bananas: Melt butter, brown sugar, and cinnamon in a skillet, add bananas, and cook for 3 minutes. If they get a little too mushy, just pretend you meant to make banana jam nobody will complain once it is buried in pudding.
- Start the pudding: Combine milk, cream, sugar, and salt in a saucepan and bring to a gentle simmer. Do not walk away to check your phone right now, because boiling over milk is a mess that will haunt your stovetop for weeks.
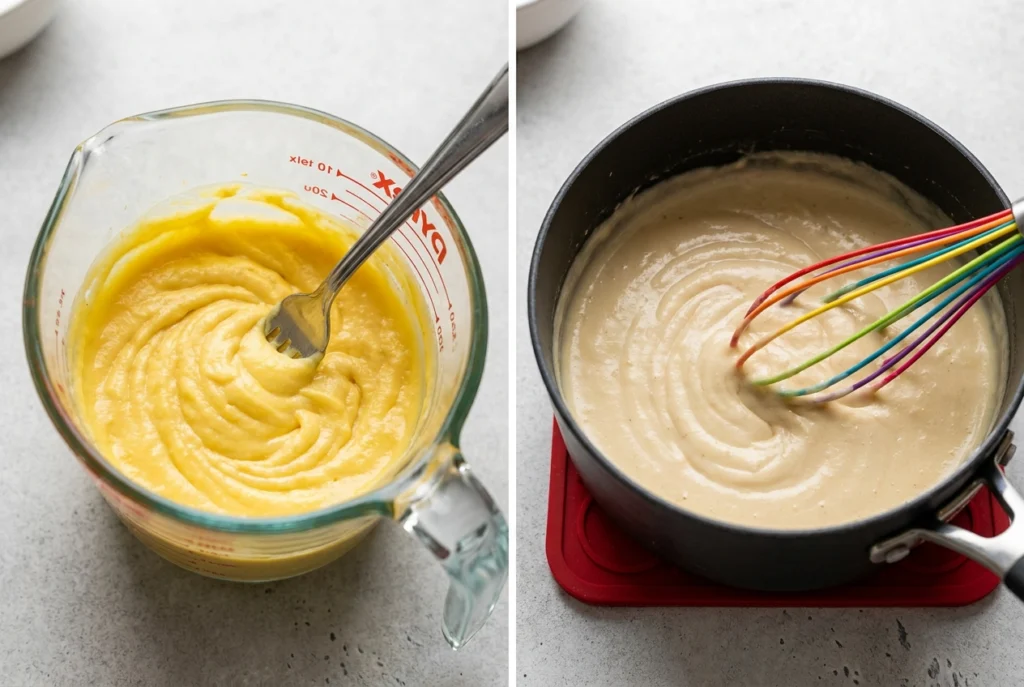
- Temper the eggs: Whisk egg yolks and cornstarch, then slowly stream in 3/4 cup of the hot milk mixture while whisking constantly. This is called tempering, which sounds fancy but really just means “please do not scramble the eggs.”
- Thicken the pudding: Pour the egg mixture back into the pan, whisking continuously until thick and bubbling, then remove from heat and stir in vanilla and butter. If you get a few lumps, push it through a fine-mesh strainer and take that secret to your grave.
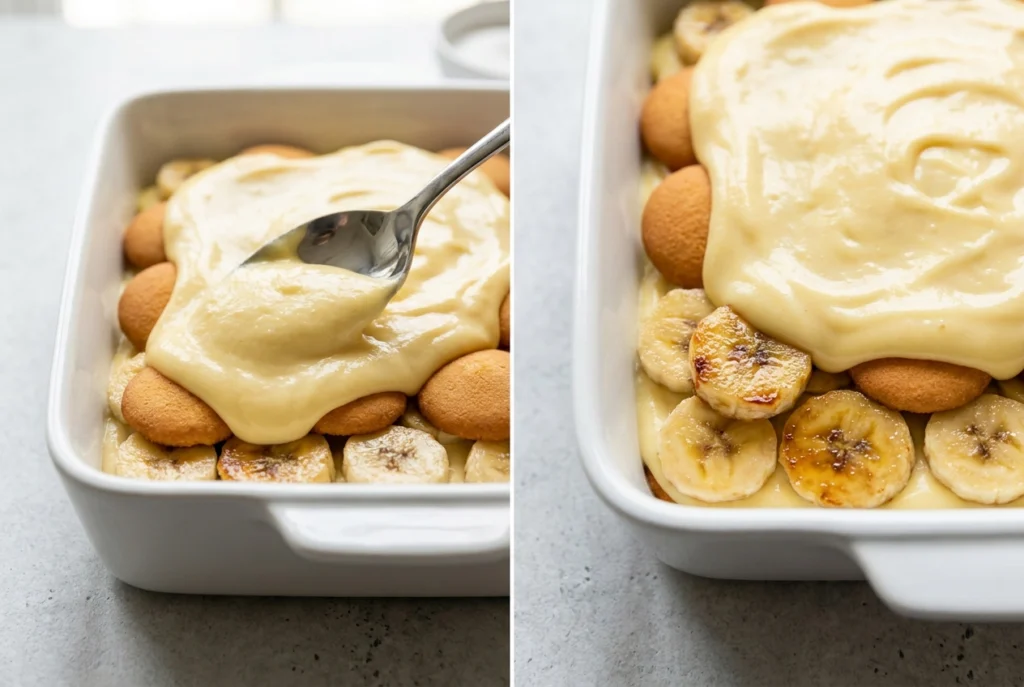
- Assemble the layers: Layer wafers, caramelized bananas, and half the warm pudding in a dish, then repeat. If your layers are messy and uneven, congratulations, you have successfully made a rustic dessert.
- Make the whipped cream: Whip the heavy cream, confectioners’ sugar, vanilla, and cinnamon until medium peaks form, then spread over the pudding. Stop whipping when it holds its shape; if you go too far, you will have cinnamon butter, which is delicious but not what we are doing here.
- Chill out: Cover and refrigerate for at least 4 hours. Do not skip this step, eating warm, soupy banana pudding is a mistake you only make once.
♥ The Misfit Tips!
- Give the pudding the full four hours minimum. A pudding pulled from the refrigerator after two hours runs soupy and structural. After four hours it holds its shape. Overnight it becomes something categorically different and better. Build the overnight step into the plan whenever the event allows it.
- Use yellow bananas with no spots for caramelizing. Overripe bananas dissolve in the brown sugar butter in under two minutes and turn into a fragrant paste. Yellow bananas hold their shape through the cooking and the layering and stay intact after overnight chilling.
- Press plastic wrap directly onto the pudding surface. Any gap between the wrap and the custard produces a rubbery skin across the top layer. Press the wrap flat against the surface before refrigerating, both on the finished assembled dish and on any leftover pudding stored separately.
Easy Variations to Try
You can fold sliced berries between the layers for a strawberry banana pudding, or swap the vanilla wafers for crushed cookies to make a Biscoff banana pudding.
Bakers who love a project turn this filling into a banana pudding cheesecake recipe, banana pudding cupcakes, or a banana pudding poke cake. Spoon it into jars for banana pudding cups at a party, stir in softened cream cheese for a banana pudding recipe with cream cheese, or simmer the base with condensed milk for an extra rich banana pudding with condensed milk.
Cooks watching sugar swap in a sugar free banana pudding pudding mix and ripe fruit, and a plant-based crowd can build a vegan banana pudding with coconut cream and dairy-free custard.
The recipe even inspired a banana pudding cookies recipe at last year’s banana pudding festival in Centerville, Tennessee, where I tasted bread and banana pudding so good I went back for thirds.
Perfect Pairings
This caramelized banana pudding needs no accompaniment, but two things help:
- A strong cup of black coffee that cuts through the richness of the custard and whipped cream
- A cold glass of whole milk eaten alongside a bowl at midnight, which is also a perfectly valid meal
How to Store Banana Pudding
❤
- Fridge. Up to 2 days covered tightly. The vanilla wafers continue softening each day, which many people prefer over the firmer first-day texture.
- Freezer. Never. The custard separates, the bananas release water, and the whipped cream collapses into a liquid layer. Eat it within two days.
- Serving temperature. Always cold. This dessert requires refrigeration from assembly through serving.
Caramelized Banana Pudding
Ingredients
Equipment
Method
- Caramelize the bananasMelt the butter and brown sugar together in a large skillet over medium heat, stirring until the sugar dissolves and the mixture bubbles. Add the cinnamon and sliced bananas. Cook for 3 minutes, turning the slices once. Remove from heat. The bananas should hold their shape with golden caramel coating each slice.
- Build the pudding baseCombine the whole milk, heavy cream, granulated sugar, and salt in a medium saucepan. Heat over medium, stirring occasionally, until the mixture reaches a gentle simmer with small bubbles appearing at the edges. Do not walk away during this step.
- Temper the egg yolksWhisk the egg yolks and cornstarch together in a medium bowl until the mixture turns pale yellow and smooth. Slowly pour ¾ cup of the hot milk mixture into the egg bowl in a thin, steady stream, whisking constantly the entire time. This process, called tempering, raises the egg temperature gradually so the yolks cook into a smooth custard rather than scrambled eggs.
- Thicken the custardPour the tempered egg mixture back into the saucepan and whisk continuously over medium heat until the pudding thickens and large bubbles burst at the surface, about 3 to 5 minutes. Remove from heat and stir in the vanilla extract and softened butter until fully incorporated. The pudding should coat the back of a spoon thickly.
- Assemble the layersArrange a single layer of vanilla wafers across the bottom of a 2.5-quart dish. Add a layer of caramelized banana slices, then pour half the warm pudding over the top. Repeat with a second layer of wafers, bananas, and the remaining pudding. This recipe for banana pudding with vanilla wafers works because the cookies absorb custard overnight and transform into something closer to a soft sponge cake.
- Make the whipped creamBeat the cold heavy cream, confectioners' sugar, vanilla extract, and cinnamon together with a hand mixer on medium-high speed until medium peaks form. Spread the whipped cream over the top layer of pudding.
- RefrigerateCover the dish with plastic wrap pressed directly onto the whipped cream surface and refrigerate for at least 4 hours. Overnight produces a noticeably better result, since the layers meld together and the cookies fully soften into the custard.