
Halloween baking is always more fun when the treats look as festive as they taste. These Halloween Skeleton Thumbprint Cookies are a playful addition to any spooky celebration, with sweet jam-filled centers and cute chocolate skeleton details. I love making them for Halloween parties because they bring a fun homemade touch to the dessert table without feeling too complicated.
They are perfect for sharing with family, serving at a Halloween gathering, or adding to a festive cookie platter. With their creepy-cute design and delicious combination of flavors, these cookies are sure to catch everyone’s attention.
Why You’ll Love This Recipe
- Easy Halloween treat: Simple cookie dough gets a spooky makeover with jam and chocolate.
- No chilling required: The dough moves straight from mixing to shaping.
- Simple decoration: Melted chocolate creates the skeleton faces.
- Jam-filled eyes: A little jam adds a bright pop of color.
- Great for Halloween parties: The skeleton design makes the cookies fun to serve and share.
- Flexible flavor: Strawberry, raspberry, blackberry, or apricot jam all work well.
Tools You’ll Need
You do not need much for these cookies.
- Baking sheet: A baking sheet gives the cookies room to spread.
- Parchment paper: Parchment prevents sticking.
- Mixing bowls: Separate bowls hold the wet and dry ingredients.
- Electric mixer or hand mixer: A mixer creams the butter and sugar smoothly.
- Piping bag: A piping bag creates the skeleton faces.
- Small zip-top bag: A snipped corner works as a quick piping tool.
- Small rounded tool: A fingertip or measuring spoon creates the thumbprint eyes.
Ingredients
For the Cookies
- 1/2 cup softened butter. Soft butter creams smoothly with the sugar.
- 1/2 cup sugar, plus extra for rolling. Sugar sweetens the dough and coats the cookies.
- 1 egg. The egg binds the dough.
- 1 teaspoon vanilla extract. Vanilla adds a simple, warm flavor.
- 1 1/2 cups all-purpose flour. Flour forms the cookie base.
- 1 teaspoon baking powder. Baking powder helps the cookies bake lightly.
- Pinch of salt. Salt balances the sweetness.
For the Decoration
- 1/4 cup jam. Jam fills the two thumbprint eyes in each cookie.
- Melted chocolate. Chocolate creates the skeleton nose and stitched smile.
- Coconut oil. A little coconut oil can thin the chocolate when needed.
How To Make Halloween Skeleton Thumbprint Cookies
- Prep the oven and tray: Preheat the oven to 350°F (175°C). Line a baking sheet with parchment paper and set it aside.
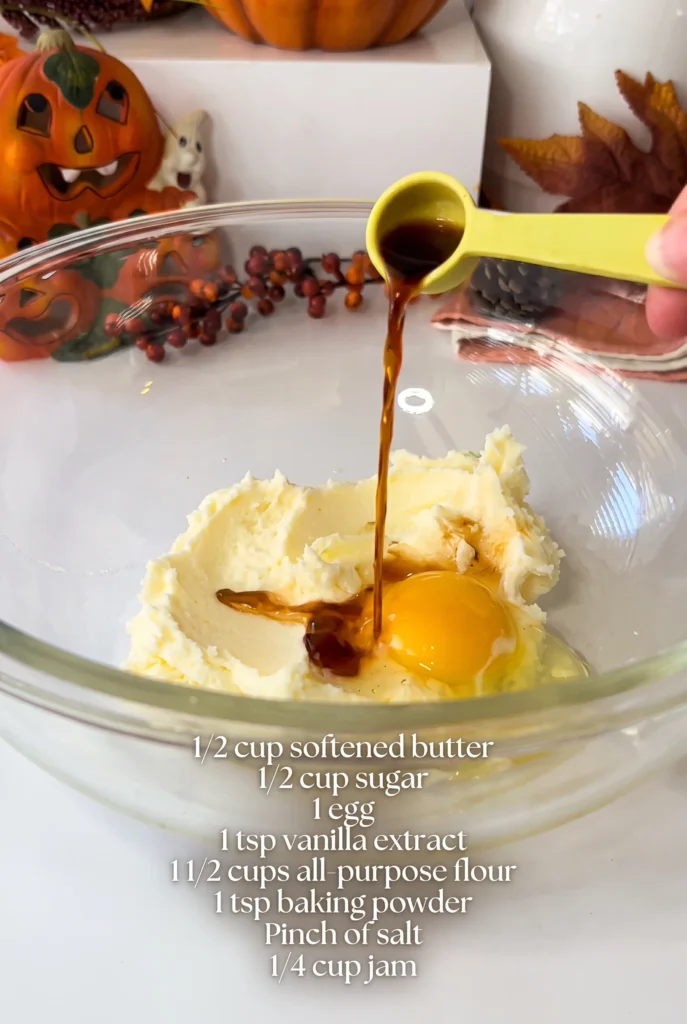
- Cream the butter and sugar: Add the softened butter and ½ cup sugar to a mixing bowl. Beat until the mixture is smooth and creamy.
- Add the wet ingredients: Mix in the egg and vanilla extract until everything is well combined.
- Mix in the dry ingredients: In a separate bowl, combine the flour, baking powder, and salt. Gradually add the dry ingredients to the butter mixture, mixing until a soft dough forms. There is no need to chill the dough.
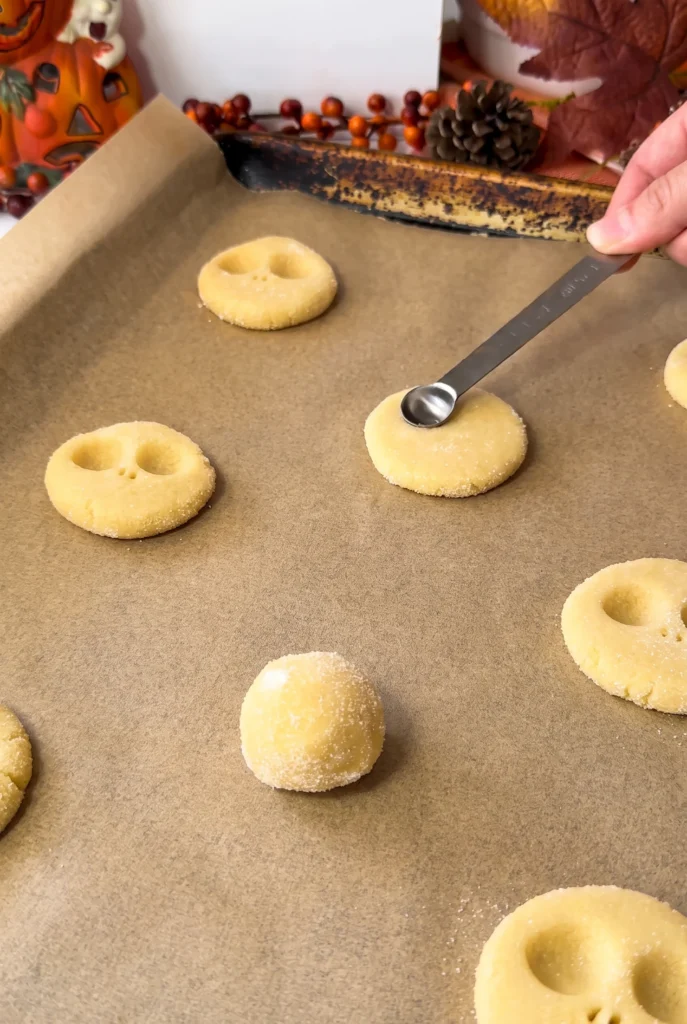
- Shape the cookies: Scoop the dough into small portions and roll each one into a ball. Roll the dough balls in extra sugar, then arrange them on the prepared baking sheet with space between each cookie. Flatten each ball slightly.
- Create the skeleton eyes: Use your finger or another small rounded tool to make two small indentations in each cookie. These will become the skeleton’s eyes. Add about ¼ teaspoon of jam per cookie, dividing it between the two indentations.
- Bake the cookies: Bake for 10–12 minutes, or until the cookies are set. Let them cool briefly on the baking sheet, then transfer them to a wire rack to cool completely.
- Prepare the chocolate: Melt the chocolate in the microwave in 15-second bursts, stirring well between each burst. If the chocolate feels too thick for piping, add a little coconut oil and stir until smooth.
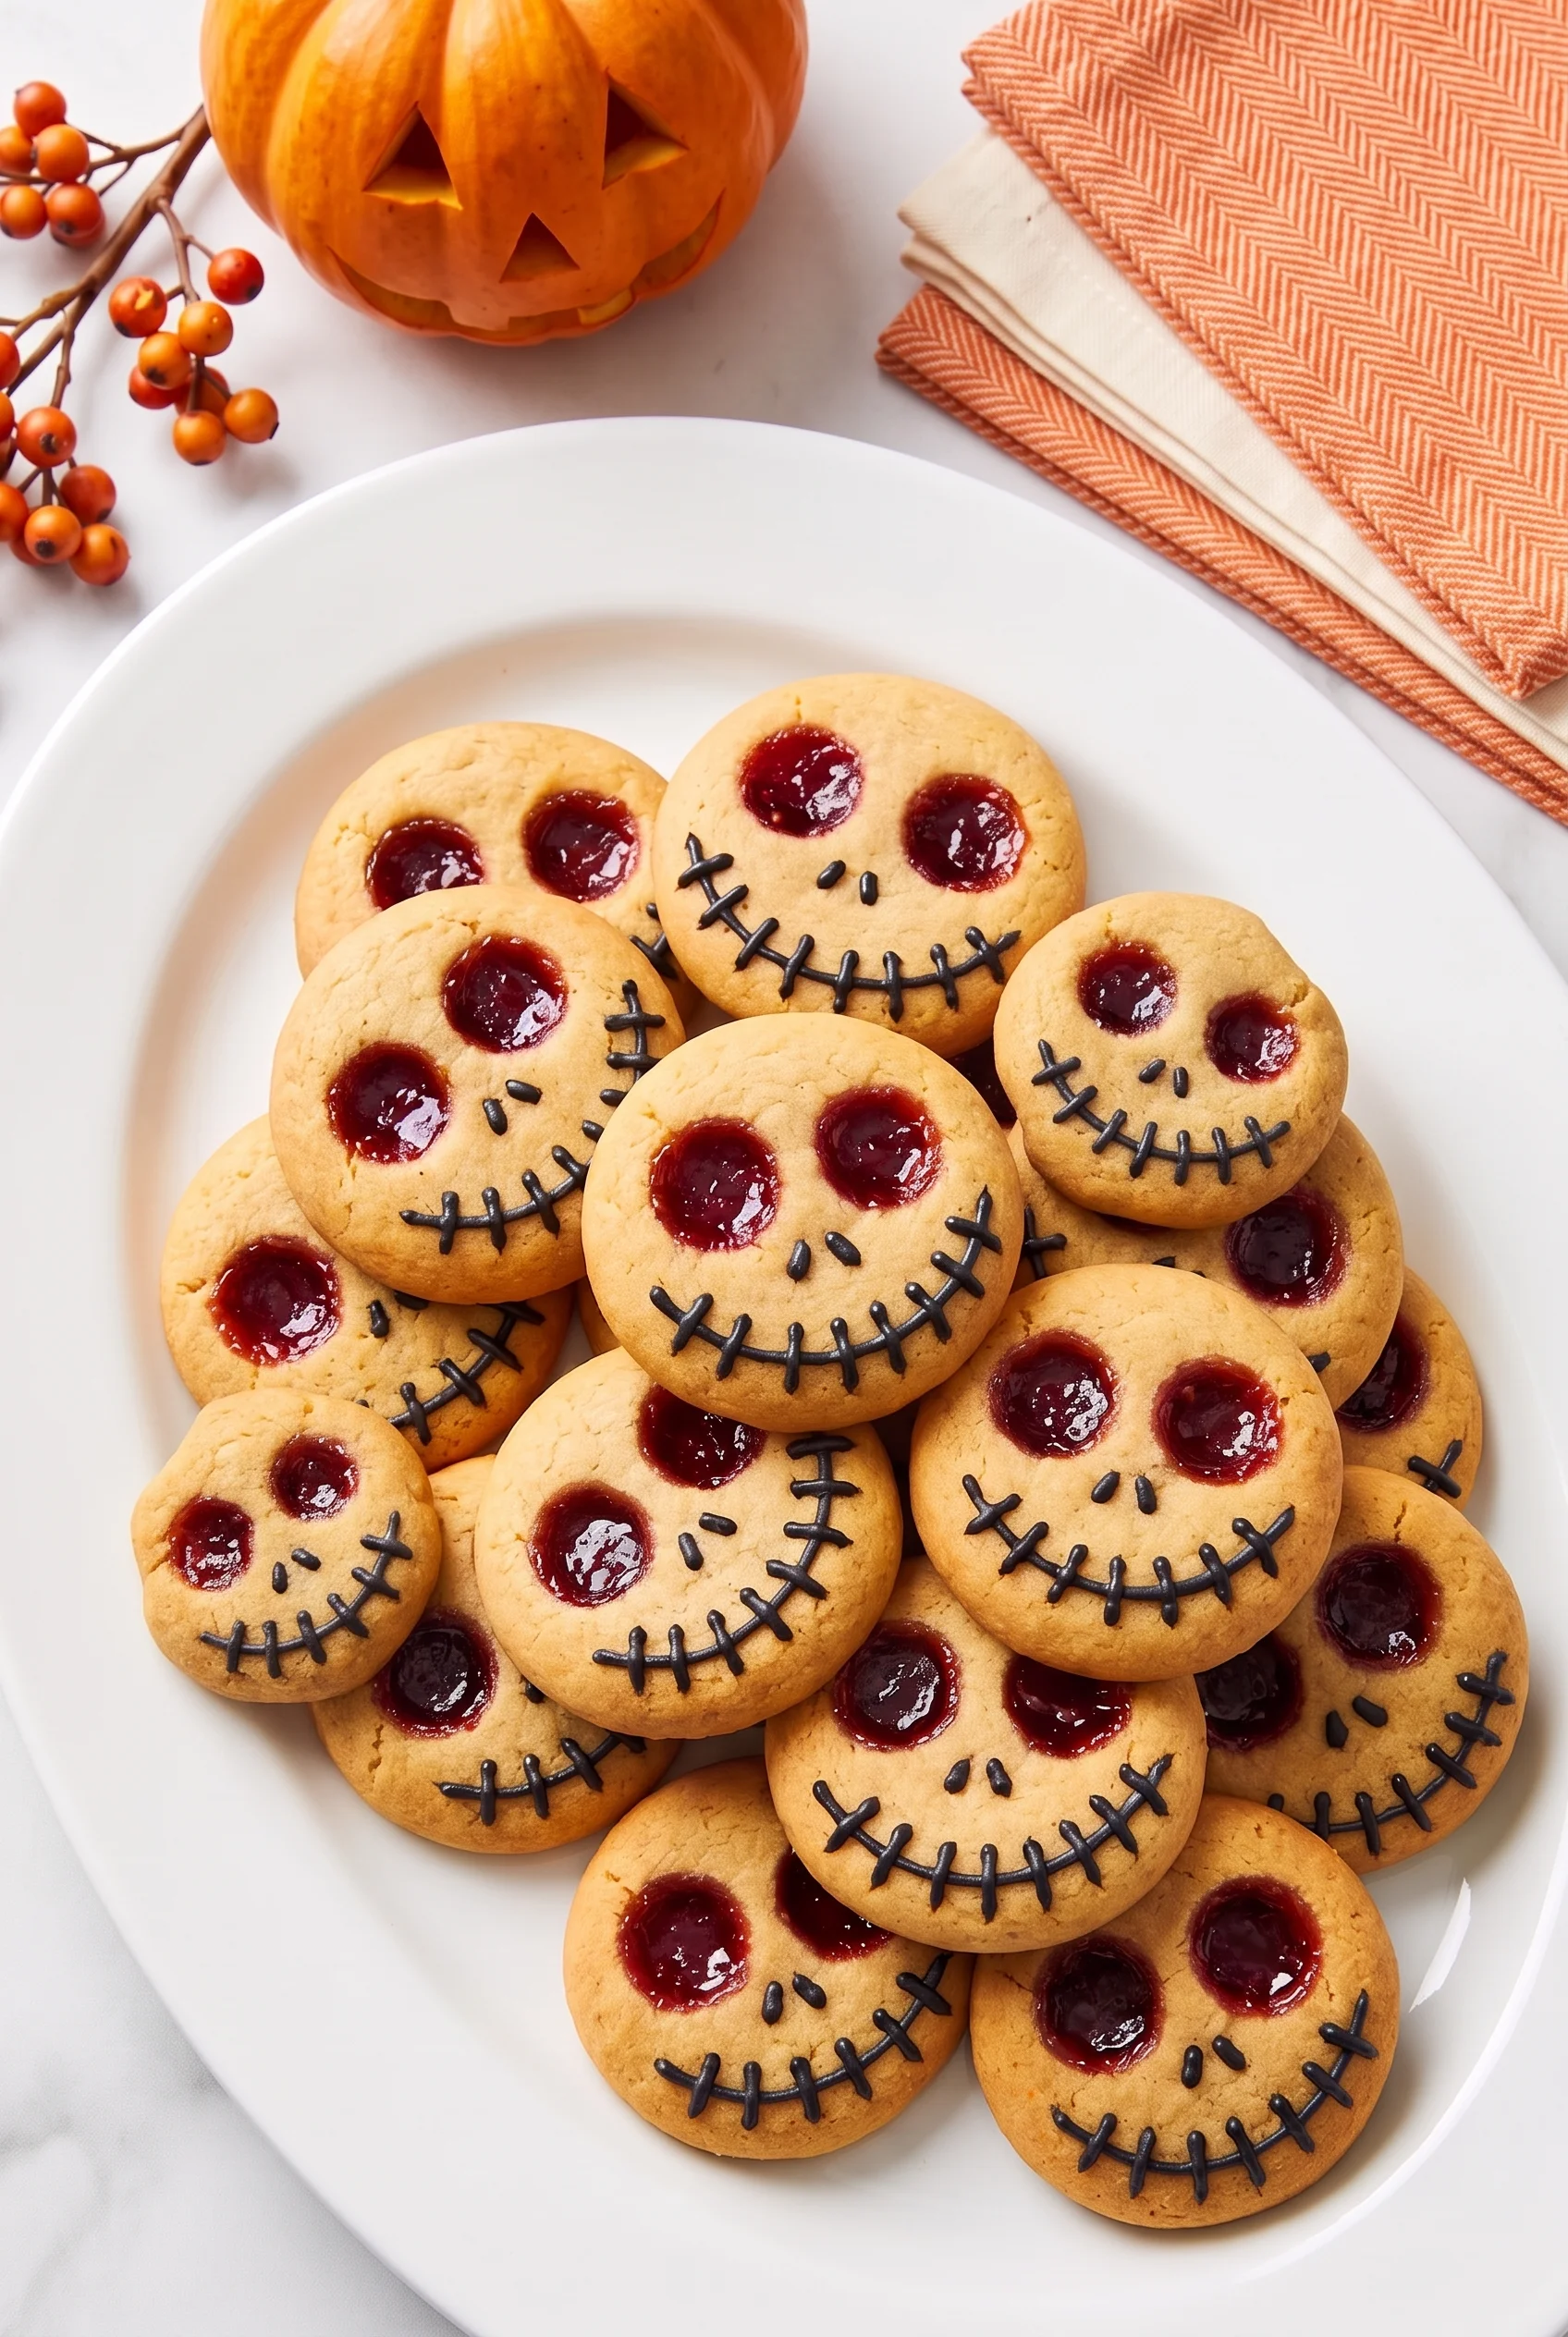
- Decorate the skeleton faces: Transfer the melted chocolate to a piping bag. You can also use a small zip-top bag with a tiny corner snipped off. Pipe a small nose and a stitched skeleton smile onto each cooled cookie.
- Let the chocolate set: Leave the cookies at room temperature until the chocolate has set before serving.

♥ The Misfit Tips!
- Use softened butter. Cold butter will not cream properly with the sugar.
- Do not overmix the dough. Mix only until the flour disappears and a soft dough forms.
- Keep the jam in the indentations. Avoid adding too much, or it can spread during baking.
- Cool the cookies completely before decorating. Warm cookies can make the chocolate run.
- Adjust the chocolate only if needed. The original recipe does not give a specific amount of coconut oil, so add just a little if the chocolate needs thinning.
Make It Yours
- Use strawberry, raspberry, or another favorite jam for the eyes.
- Try white chocolate for a different skeleton effect.
- Add a small amount of colored sugar when rolling the dough.
- Make smaller cookies for a Halloween dessert platter.
- Use different skeleton expressions by changing the shape of the chocolate smile.
Perfect for Halloween
These skeleton thumbprint cookies fit right into a Halloween dessert table.
- Hot chocolate adds a cozy pairing.
- Coffee balances the sweet jam and chocolate.
- Cold milk keeps the classic cookie combination alive.
- Other Halloween cookies create a colorful platter.
- Individual treat bags make the cookies easy to hand out.
How to Store
❤
- Room temperature: Store cooled cookies in an airtight container.
- Best texture: Keep the cookies in a single layer when possible.
- Stacking: Place parchment between layers if you need to stack them.
- Refrigeration: You can refrigerate the cookies, but let them return toward room temperature before serving.
- Serving: Serve the cookies after the chocolate has fully set.
- Storage note: Keep the cookies away from heat so the jam and chocolate remain neat.
Halloween Skeleton Thumbprint Cookies
These skeleton thumbprint cookies combine buttery cookie dough, sweet jam-filled eyes, and chocolate skeleton faces in one easy Halloween treat. The no-chill dough makes preparation simple, while the chocolate decoration creates a spooky finish without advanced piping skills. Serve these Halloween cookies on a dessert platter, pack them in treat bags, or pair them with hot chocolate, coffee, or milk for a creepy-cute homemade snack.
Ingredients
Equipment
Method
- Prepare the Oven: Preheat the oven to 350°F. Line a cookie sheet with parchment paper and set it aside.
- Make the Cookie Dough: In a large bowl, cream the butter and sugar together until light and smooth. Add the egg and vanilla, then mix until fully combined. Gradually add the flour, baking powder, and salt, mixing until everything is incorporated and a soft dough forms.
- Shape the Cookies: Scoop the dough into small, even portions and roll each portion into a ball. Roll the dough balls in sugar to lightly coat the outside. Place them on the prepared baking sheet, leaving space between each cookie, and gently flatten them.
- Create the Eyes: Use the end of a small utensil or your fingertip to make two small indentations in each cookie for the eyes. Fill each indentation with about 1/4 teaspoon of jam, being careful not to overfill.
- Bake the Cookies: Bake for 10–12 minutes, until the cookies are set and lightly golden around the edges. Let them cool on the baking sheet for a few minutes, then carefully transfer them to a wire rack to cool completely.
- Prepare the Chocolate: Place the chocolate and coconut oil in a microwave-safe bowl. Microwave in 15-second intervals, stirring well after each interval, until completely melted and smooth.
- Decorate: Transfer the melted chocolate to a piping bag. Once the cookies are completely cool, pipe a skeleton-style smile and other details onto each cookie. Allow the chocolate to set before serving.