
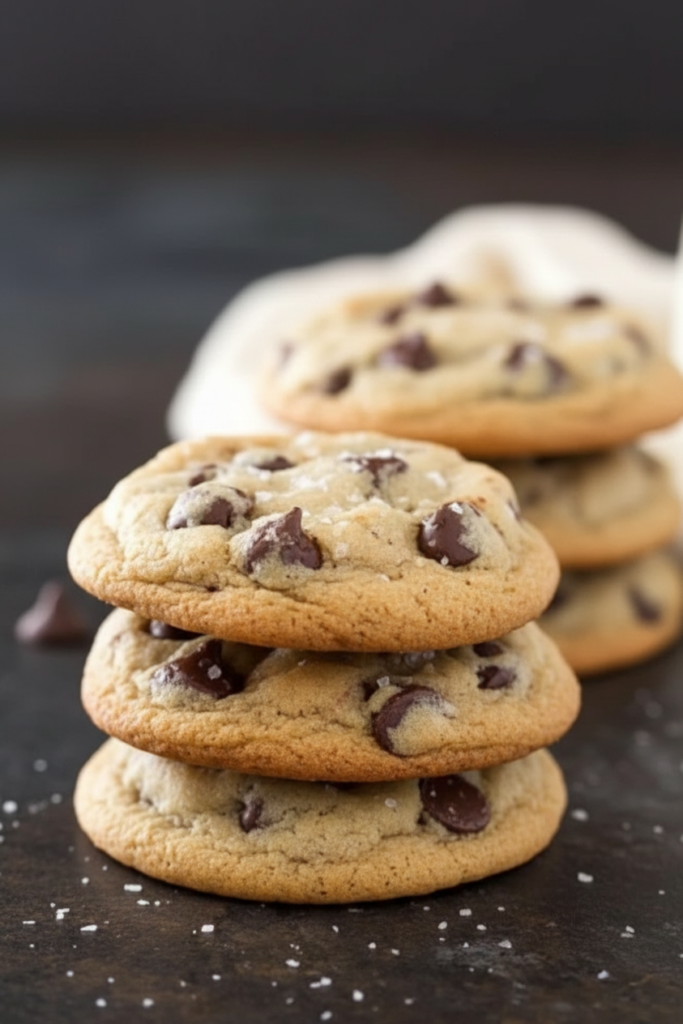
I baked these at 10 PM on a Tuesday because my emergency chocolate stash was completely depleted, and eating plain brown sugar out of the bag felt like a new low. Sometimes, a rough week just demands a batch of the perfect salted chocolate chip cookies.
These sweet, salty, and utterly chewy treats literally saved me from myself that night. I used to think adding flaky sea salt to a dessert was just a pretentious trick fancy bakeries used to justify charging six dollars a cookie but I was so, so wrong.
The salt cuts through the heavy sweetness and amplifies the rich chocolate, making them dangerously addictive. Looking for a plant-based version? My Vegan Chocolate Chip Cookies hit the same chewy, salty-sweet spot without any dairy or eggs.
If you regularly struggle with flat, sad bakes, this foolproof salted chocolate chip cookie recipe will restore your faith in late-night baking. Here is exactly how I do it.
Why You’ll Love This Recipe
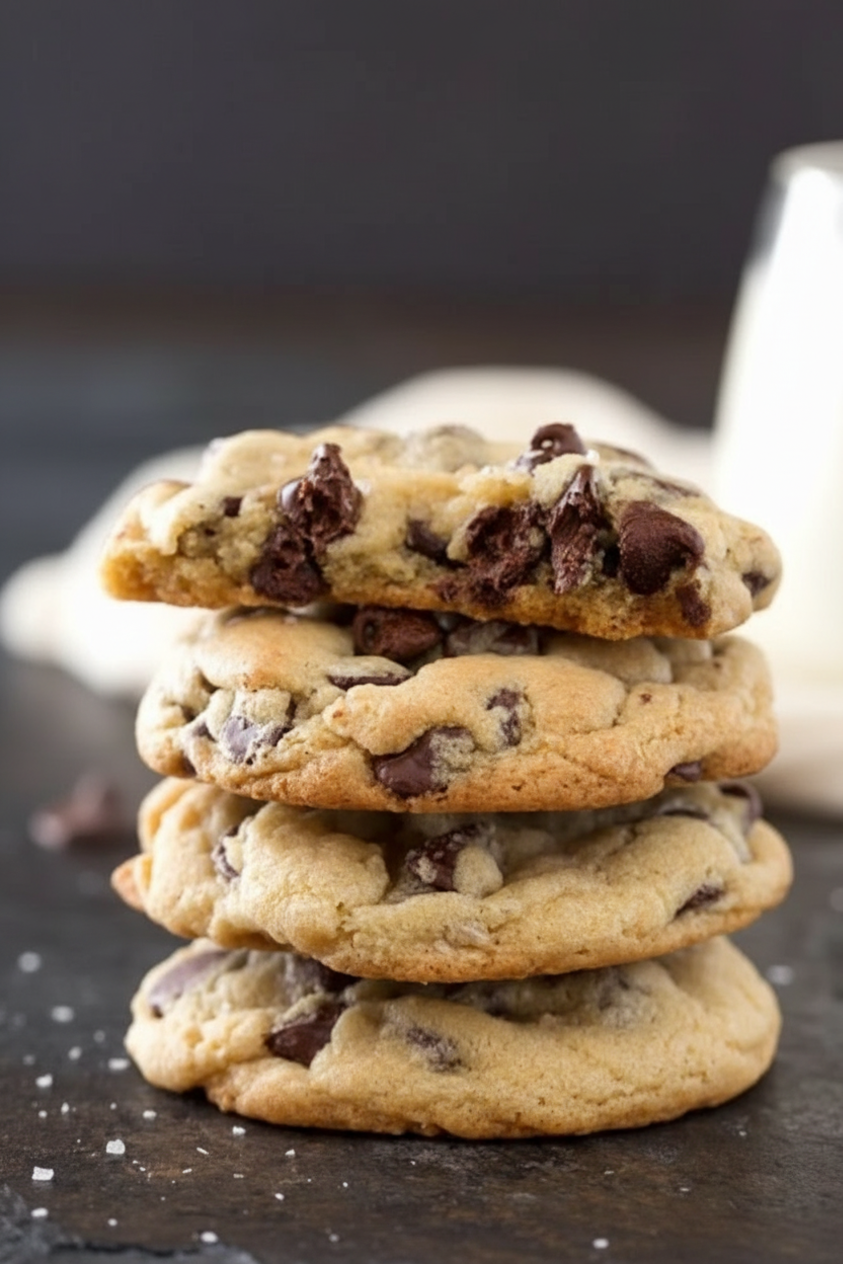
- Thick and chewy: They do not spread out into sad, greasy puddles on your baking sheet.
- Fast prep time: The mixer does almost all the heavy lifting while you just stand there and supervise.
- Pantry staples: You probably have everything you need right now, except maybe the flaky sea salt.
- Dangerously good: The sweet and salty combo means you will definitely eat more than you intended.
Tools You’ll Need
- Thick and chewy, never flat. Chilling the dough before baking controls the spread and keeps every cookie tall with a soft, dense center.
- Fast prep. The mixer handles the creaming and the mixing. The oven handles the rest. You handle the eating.
- Pantry staples throughout. Every ingredient in this recipe lives in a standard pantry except the flaky sea salt, which costs three dollars and lasts for months.
- Dangerously addictive sweet-salty balance. The chocolate chip and sea salt cookies combination makes it genuinely difficult to stop at two.
♥ Ingredient Notes
- 1 1/4 cups all-purpose flour
- 1 tsp baking soda
- 1/2 cup salted butter (at room temperature 1 stick)
- 1/2 cup packed light brown sugar
- 1/3 cup + 2 tsp granulated sugar
- 1 large egg (at room temperature)
- 1 tsp vanilla extract (or vanilla bean paste)
- 1 1/2 cups semisweet chocolate chips ((more or less to your tastes))
- sea salt flakes (for sprinkling)
Instructions
Make the dough, throw it in the fridge, and try your hardest not to eat it all before it hits the oven.
- Whisk the dry stuff: Add your flour and baking soda to a mixing bowl and give it a good whisk for about 15 seconds. Do not skip this, unless you genuinely enjoy biting into a bitter clump of pure baking soda.
- Cream the butter and sugars: Toss the softened butter and both sugars into your mixer bowl. Beat it with the paddle attachment for about 2 minutes until it looks smooth and fluffy. If you try doing this by hand with cold butter, you will question all your life choices.
- Add the wet ingredients: Drop in the egg and vanilla extract, then beat it on low speed just until it comes together. If your egg was cold right out of the fridge, the mixture might look a little curdled, but it will bake up perfectly fine.
- Mix in the flour: Add the flour mixture half at a time, keeping the mixer on low speed. Stop mixing the second it is combined—if you overmix this, your cookies will be tough instead of soft and tender.
- Fold in the chocolate: Dump in the chocolate chips and stir them in gently with a wooden spoon. A few extra chips might fall out of the bowl; eating those is the chef’s tax.
- Chill the dough: Cover the bowl tightly with plastic wrap and stick it in the fridge for at least 30 minutes. Chilling cookie dough is non-negotiable. I once tried to rush this step, and my cookies melted into one giant, flat, unbaked blob on the pan.
- Preheat the oven: About 15 minutes before you are ready to bake, set your oven to 350 degrees F. Line your baking sheet with parchment paper so you do not spend an hour scrubbing baked-on chocolate off your pans later.
- Scoop the balls: Use a large cookie scoop to portion out round balls of dough, placing them about 2 inches apart on the parchment. This stops you from making wildly different sized cookies that bake unevenly.
- Bake them: Press a couple of extra chocolate chips into the tops of the dough balls, then bake for 10-12 minutes. They will look totally raw in the middle when you take them out, but trust the process—they keep cooking on the hot pan.
- Add the salt: Immediately sprinkle the tops of the hot cookies with some flaky sea salt. Do not go crazy here, you just want a light dusting, not a mouthful of ocean water.
- Let them cool: Leave the cookies on the baking sheet for exactly 5 minutes before moving them to a wire rack. If you try to move them immediately, they will fall apart and you will be eating cookie crumbles off the floor.
♥ The Misfit Tips!
- 🧊 Give It the Full Overnight Chill. A six-hour cheesecake releases from the pan cleanly and holds its shape adequately. A twelve-hour cheesecake slices into clean, firm pieces that hold their structure on the plate without any slumping at the edge. Build the overnight step into the plan every time the schedule allows it.
- 🌡️ Room Temperature Means Two Hours on the Counter. Cold cream cheese produces lumps that the mixer cannot break down regardless of how long it runs. Leave all three blocks out for at least two hours before starting. Press a block with your finger before beating it. It should indent without any resistance.
- ❄️ Never Freeze to Set. Freezing ruins the texture by forming ice crystals in the moisture, which produces a grainy, icy filling on thawing rather than the smooth, creamy result the recipe promises. Freeze the finished, fully set cheesecake for storage only, never as a shortcut to speed up the initial setting process.
Troubleshooting Guide
Something went sideways? Been there. Here is how to fix it.
- Problem: Why did my cookies spread so much?
Why it happened: The butter was too warm or you skipped the chilling step.
Fix it: It is fixable, I promise. Just shove the whole bowl of dough in the freezer for 15 minutes before scooping the rest of them.
- Problem: Why are my cookies tough and dry?
Why it happened: You overmixed the dough after adding the flour, or you scooped too much flour by packing it into the cup.
Fix it: You cannot un-bake them, but you can dunk them in a lot of milk or microwave them for 10 seconds to soften them up before eating.
- Problem: The dough is too crumbly to scoop.
Why it happened: You might have added a bit too much flour or the butter was not soft enough.
Fix it: Just use your hands to firmly press and roll the dough into balls. The warmth of your hands will help it stick together.
Easy Variations to Try
Swap half the semi-sweet chips for dark chocolate chunks and add a drizzle of store-bought caramel sauce over the hot cookies alongside the flaky salt for salted caramel chocolate chip cookies that disappear faster than the standard version.
Press a caramel candy square into the center of each dough ball before baking for a gooey molten center that qualifies as chocolate chip salted caramel cookies in every meaningful way.
Cooks who want a double-chocolate result replace 3 tablespoons of flour with cocoa powder and keep the sea salt finish, which produces a richer, brownie-adjacent cookie that still carries the signature salty-sweet contrast.
The King Arthur Baking flavor guide covers additional mix-in combinations that work with this exact dough base.
Perfect Pairings
These salted chocolate chip cookies pair well with:
- A cold glass of whole milk that cuts through the richness of the chocolate chips
- A terrible reality TV show on a Friday night.
- Your morning coffee, because adults can eat cookies for breakfast.
- A giant scoop of vanilla ice cream smashed right in the middle for an impromptu sandwich. If that idea speaks to you, go all in with my Ice Cream Sandwiches
How to Store Salted Chocolate Chip Cookies
❤
- Fridge. Up to 5 days covered tightly. Press plastic wrap directly onto any cut surface to prevent the cream cheese from absorbing surrounding odors.
- Freezer. Up to 3 months. Wrap the fully set cheesecake in two layers of plastic wrap and one layer of foil. Thaw overnight in the refrigerator, never on the counter.
- Serving note. Keep the cheesecake away from strong-smelling foods in the refrigerator. Cream cheese absorbs surrounding odors fast, and a garlic-adjacent slice is a mistake worth making exactly once.
Salted Chocolate Chip Cookies
Ingredients
Method
- In a medium mixing bowl, combine the flour and baking soda. Whisk vigorously for about 15 seconds. Do not skip this step, unless you genuinely enjoy biting into a bitter, soapy clump of pure baking soda
- Place the softened butter, brown sugar, and granulated sugar into the bowl of your stand mixer. Beat with the paddle attachment on medium speed for about 2 minutes, until the mixture looks smooth, pale, and fluffy. If you try doing this by hand with cold butter, you will question all your life choices.
- Drop in the room-temperature egg and vanilla extract. Beat on low speed just until it comes together. Note: If your egg was cold right out of the fridge, the mixture might look a little curdled. Don't panic; it will bake up perfectly fine.
- Pour the dry flour mixture into the wet ingredients in two halves, keeping the mixer on its lowest speed. Stop mixing the exact second the flour disappears. If you overmix this, you will develop too much gluten and your cookies will be tough instead of soft and tender.
- Dump in the semisweet chocolate chips and fold them in gently by hand using a wooden spoon or sturdy spatula. A few extra chips might fall out of the bowl onto the counter; eating those is the chef's tax.
- Cover the bowl tightly with plastic wrap and stick it in the fridge for at least 30 minutes. Chilling cookie dough is non-negotiable. I once tried to rush this step, and my cookies melted into one giant, flat, unbaked blob on the pan
- About 15 minutes before you are ready to bake, set your oven to 350°F. Line a large baking sheet with parchment paper.
- Use a large cookie scoop to portion out round balls of dough. Place them about 2 inches apart on the parchment to prevent them from fusing into a mega-cookie.
- Press a couple of extra chocolate chips into the tops of the dough balls for that bakery-style look. Bake for 10 to 12 minutes. They will look totally raw and gooey in the middle when you take them out—trust the process, they keep cooking on the hot pan.
- Immediately upon removing them from the oven, sprinkle the tops of the hot cookies with a pinch of flaky sea salt. Do not go crazy here; you want a delicate, crunchy dusting, not a mouthful of ocean water.
- Leave the cookies on the hot baking sheet for exactly 5 minutes before transferring them to a wire cooling rack. If you try to move them immediately, they will fall apart, and you will be eating cookie crumbles off the kitchen floor.