
Staring at a sad, half-empty clamshell of berries in the fridge, then deciding that fruit goes bad but cake is forever, is exactly what led to this raspberry coffee cake at nine on a Tuesday morning. A weakness for those little store-bought danishes with the jam stripe down the middle usually ends in a sticky, misshapen disaster when attempted at home.
This cake gives all that sweet, tangy bakery energy without requiring anyone to laminate dough or pretend to know what laminating dough actually means. Accidentally dumping half the crumb topping on the floor once, scooping it back up, and still baking a golden miracle proved this recipe is basically foolproof. Here is exactly how I do it.
Why You’ll Love This Recipe
- Bakery energy, zero stress. This tastes like a fancy bakery danish without requiring any advanced pastry skills.
- Stays incredibly moist. The beauty of a cream cheese coffee cake is that the dairy layer keeps the crumb soft for days.
- Year-round appeal. Fresh or frozen berries make this a totally valid excuse to eat cake for breakfast in February.
- Looks wildly impressive. Slicing into it reveals a sneaky ribbon of fruit that makes anyone look like a baking genius.
Tools You’ll Need
Nothing fancy, I promise.
- 8-inch square baking pan You can also use a 9-inch round, but square corners mean corner pieces, and corner pieces are superior.
- Stand mixer or hand mixer. Beating cream cheese by hand counts as a great arm workout and a terrible idea for sanity.
- Parchment paper. This saves anyone from scrubbing baked-on berry jam out of a pan.
Ingredients
For the Crumb Topping
- 3/4 cup all-purpose flour – To get that classic raspberry crumb cake texture, do not pack your flour.
- 1/3 cup granulated sugar – For sweetness and crunch.
- 6 tablespoons cold butter – Keep it fridge-cold. Warm butter makes paste, not crumbs.
For the Filling
- 8 ounces block cream cheese – Make sure to use full-fat block cream cheese and let it soften, or you will have lumpy filling.
- 1/4 cup granulated sugar – Just enough to sweeten the cheese.
- 1 large egg – Helps the filling set up during baking.
- 1 cup fresh raspberries – Frozen works too, just do not thaw them.
For the Cake Batter
- 2 cups all-purpose flour – The base of our cake.
- 1 cup granulated sugar – For standard cake sweetness.
- 2 teaspoons baking powder – Check your expiration date so your cake actually rises.
- 1/2 teaspoon salt – Balances the sugar.
- 1/2 cup unsalted butter – Softened to room temperature.
- 2 large eggs – Room temperature eggs mix into the batter much easier.
- 1/2 cup milk – Whole milk is best, but whatever is in your fridge will survive.
- 1 teaspoon vanilla extract – Measure with your heart, but a teaspoon is a good start.
♥ The Misfit Tips!
- Never microwave the cream cheese. Rushing the softening step in the microwave once turned the block into a weird, oily soup.
- Try the swirl method. Dragging a butter knife through the batter before baking creates a true cream cheese swirl coffee cake vibe, though the layered method works just as well.
- Keep the butter cold. Warm butter turns the topping into a greasy paste instead of the crumbs this raspberry cheesecake coffee cake needs.
How To Make Raspberry Coffee Cake
Do not panic when you see the three different layers; this is mostly just dumping things in bowls and stirring.
- Prep the pan: Preheat your oven to 350°F and line your pan with parchment paper. Leaving a little overhang makes pulling the cake out later infinitely easier.
- Make the crumb topping: In a small bowl, whisk the flour and sugar, then cut in the cold butter until it looks like coarse peas. If a few chunks survive, that is between you and the pastry cutter, nobody else needs to know.
- Whip the cream cheese filling: Beat the softened cream cheese and sugar until smooth, then mix in the egg. If you forgot to soften your cream cheese and it looks lumpy, just keep beating it and pretend it is fine.
- Mix the cake batter: Cream the butter and sugar, add the eggs and vanilla, then alternate adding the flour mixture and milk. Do not overmix this, or your cake will have the texture of a kitchen sponge.
- Layer it up: Spread half the cake batter in the pan, pour the cream cheese mixture over it, scatter the raspberries, and drop the remaining batter on top in blobs. It will look messy, but the oven fixes everything.
- Top and bake: Sprinkle the crumb topping evenly over the top and bake for 35 to 40 minutes. The hardest part of this recipe is waiting for it to cool so you don’t burn your mouth on molten raspberries.
Make it yours
- Lemon zest version. You add a teaspoon of lemon zest to the cream cheese filling for a bright contrast against the raspberries.
- Blueberry version. You swap raspberries for blueberries for a different berry take on this cream cheese coffee cake.
How to Store Raspberry Coffee Cake
❤
- Fridge. Up to four days in an airtight container, though the crumb topping softens slightly.
- Freezer. Up to three months wrapped tightly in plastic wrap.
- Reheat. Fifteen seconds in the microwave takes the chill off nicely.
- Storage note. Fresh raspberries added as a garnish turn mushy fast, so adding them right before eating works best for presentation.
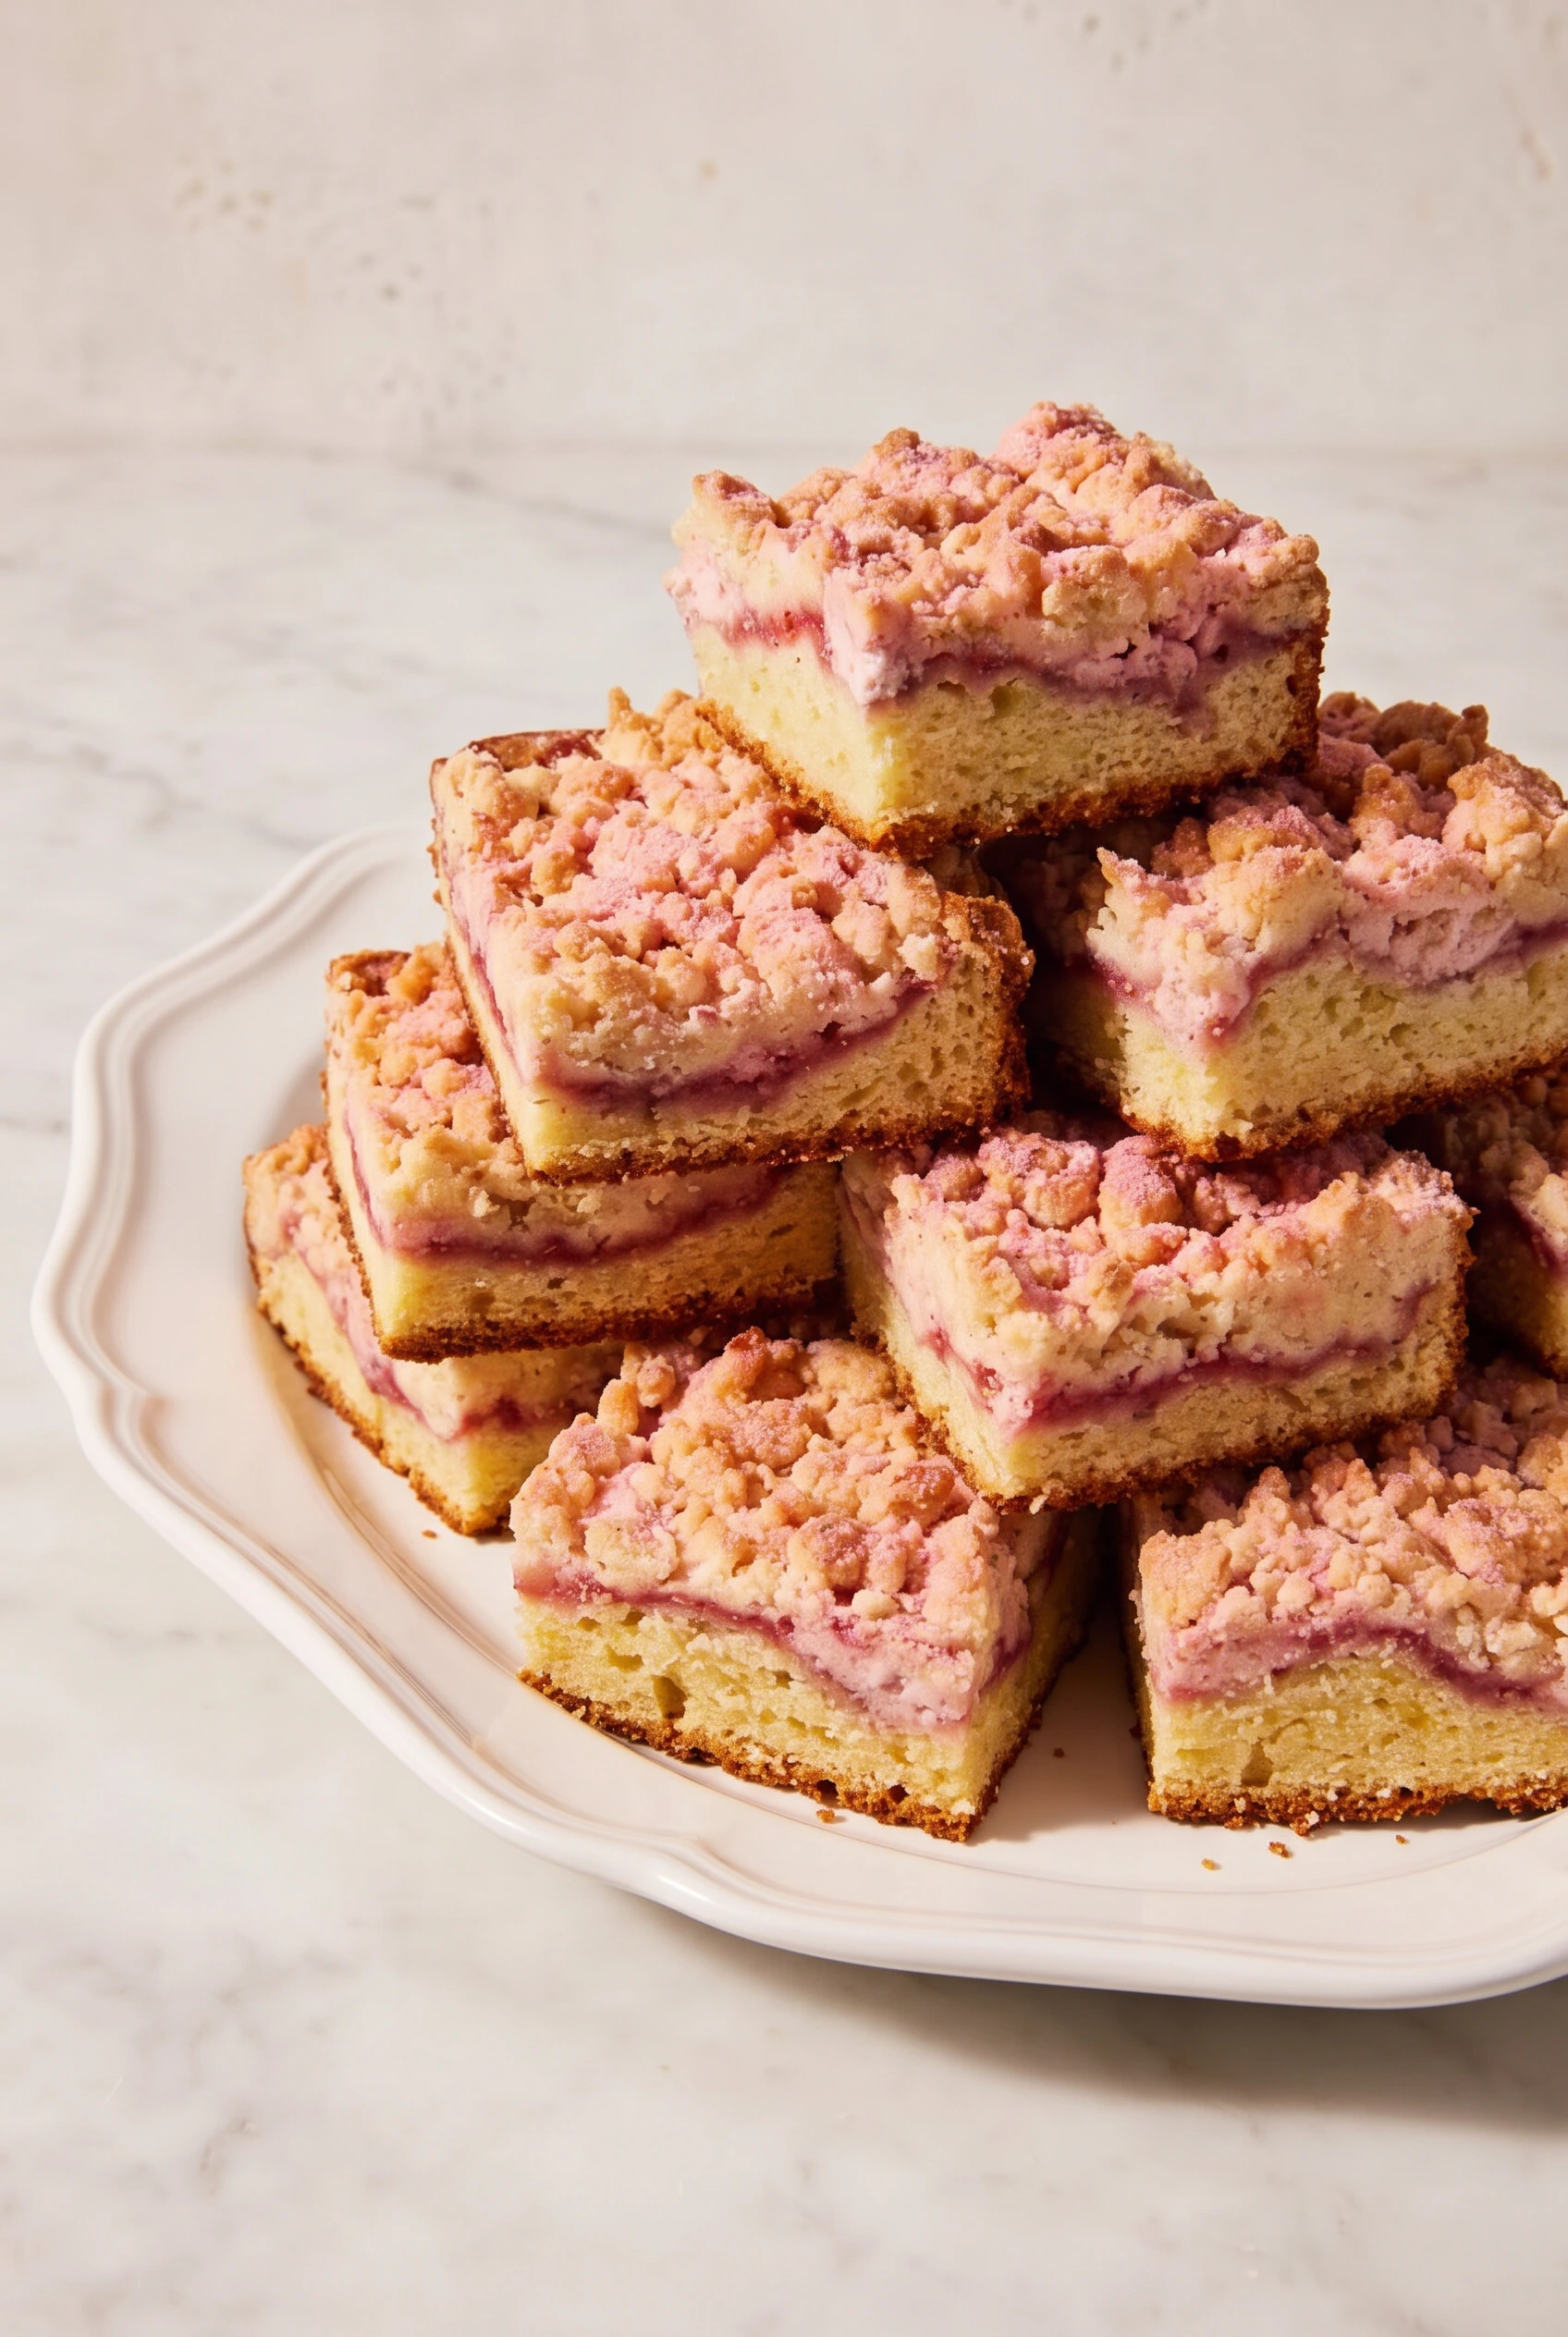
Raspberry Coffee Cake
Ingredients
Equipment
Method
- Preheat the oven to 350°F. Prepare an 8″ square pan with a parchment sling or reusable silicone liner, then lightly grease the sides of the pan. Alternatively, line a 9″ cake pan with a round piece of parchment or round reusable liner and lightly grease the sides.
- To make the raspberry layer: In a small saucepan or pot, combine the raspberries, sugar, and lemon juice. Cook over medium heat, stirring frequently, until the mixture comes to a rolling boil, and the raspberries break down and release their juice.
- Boil the raspberry mixture for 1 minute, then remove from the heat and stir in the flour; the mixture will thicken considerably. Set aside to cool to room temperature while you prepare the rest of the cake.
- To make the cream cheese layer: In a small bowl, use a flexible spatula to mix the cream cheese and sugar together until smooth.
- Add the raspberries and mix until incorporated. The berries will break down slightly; that’s OK. Set aside.
- To make the crumbs: In a medium bowl, whisk together the flour, sugars, and salt. Add the butter, cream cheese, and vanilla; toss to combine. Using a bowl scraper, fork, or your fingers, work in the butter and cream cheese until crumbs form and no dry spots remain. The crumbs should be irregular, ranging in size from a pea to walnut. Set aside.
- To make the cake: In a large bowl or bowl of a stand mixer, combine the flour, sugar, baking powder, salt, baking soda, and lemon zest. Add the butter and mix at low speed using an electric hand mixer or the flat beater on a stand mixer until the mixture looks sandy, about 1 to 2 minutes. (This mixing method is called reverse creaming and is also known as the paste method.)
- Beat in the vanilla and egg, then mix until no dry spots of flour remain. Stop the mixer and scrape the bowl and beater(s) as needed; the mixture will be thick.
- Add the yogurt or sour cream all at once before starting to mix. Stir until the batter is smooth. Stop to scrape the bowl and then mix again at low speed for 1 minute; this final mix is key to ensuring the best texture so don’t skip it.
- To assemble and bake the cake: Transfer the batter into the prepared pan, spreading it all the way to the edges. (A small offset spatula is a helpful tool here.)
- Dollop the raspberry layer across the batter and spread evenly.
- Dollop heaping teaspoons of the cream cheese layer on top of the raspberry layer; a teaspoon cookie scoop works well here. Do not spread.
- Sprinkle the crumbs evenly over the cream cheese layer and gently press to adhere.
- Bake the cream cheese coffee cake for about 35 to 40 minutes, until it’s set in the middle and the crumbs are lightly browned. (Check for doneness after 35 minutes and add additional time only as needed to avoid overbaking the cake.) It’s done when a toothpick or paring knife inserted into the center comes out with just a few moist crumbs clinging to it.
- Remove the coffee cake from the oven and allow it to cool in the pan for 30 minutes.
- Remove the coffee cake from the pan using the overhanging edges of parchment as handles to gently lift it out. Place the coffee cake (still on the parchment or pan liner) on a wire rack to cool slightly.
- To make the topping: Using a small food processor or blender, pulse the freeze-dried raspberries and confectioners’ sugar together until they’re a fine powder. Use a fine-mesh strainer to sprinkle the topping over the coffee cake before slicing and serving.
- Storage information: Store the cream cheese coffee cake, well wrapped, at room temperature for several days; freeze for longer storage.