
Halloween baking is always more fun when classic cookies get a spooky little twist. These Peanut Butter Spider Cookies combine rich peanut butter flavor with a playful spider design, making them a fun treat for the Halloween season. I love making them because they look festive on a cookie platter while still having that comforting homemade flavor everyone loves.
They are perfect for Halloween parties, family gatherings, or a fun afternoon of baking. Whether you are making treats for kids or simply want something cute for your dessert table, these cookies are sure to add a little spooky fun to your celebration.
Why You’ll Love This Recipe
- Zero chilling required: You can go from pantry search to baked cookies in about 30 minutes.
- Pantry staples save the day: You probably have everything except candy eyes and Reese’s cups.
- Kid-approved craft project: Children can place the eyes while you handle the warm chocolate.
- Crowd-pleasing flavor: The cookies taste like peanut butter blossoms in Halloween costumes.
- Easy decoration: Chocolate legs and candy eyes create the spider design.
- Make-ahead friendly: The finished cookies freeze well for up to three months.
Tools You’ll Need
Nothing fancy, I promise.
- Mixing bowls One for the dough, and a microwave-safe one for melting the chocolate.
- cookie scoop A small one helps keep the cookies uniform, but a regular spoon and your hands work just fine if you don’t mind messy fingers.
- Baking sheet Lined with parchment paper or a silicone mat so you aren’t scrubbing baked-on sugar later.
Ingredients
- 1/2 cup unsalted butter – Needs to be room temperature, but if you forgot to take it out, just microwave it on 10% power for a few seconds and pray it doesn’t melt.
- 1/2 cup brown sugar – Pack it into the measuring cup.
- 1/3 cup granulated sugar – Plus a little extra in a bowl for rolling the dough balls.
- 3/4 cup creamy peanut butter – Use the processed, commercial stuff here; natural peanut butter that separates will make your cookies spread into sad puddles.
- 1 large egg – Binds everything together.
- 1 tsp vanilla extract – Makes it taste like a real cookie.
- 1 1/2 cups all purpose flour – Spoon and level it so you don’t end up with dry dough.
- 1 tsp baking soda – Check the expiration date if it has been sitting in your fridge since last Halloween.
- 1/2 tsp baking powder – Helps them puff up nicely.
- 1/2 tsp salt – Balances all the sugar.
- 24 Mini Reese’s Peanut Butter Cups – Buy an extra bag because you will inevitably eat five of them while unwrapping.
- 1/2 cup semi-sweet chocolate chips – For melting and drawing the spider legs.
- 1/2 tsp neutral oil – Just a drop to help the chocolate melt smoothly.
- 48 Candy eye balls – Usually found in the baking aisle; grab tweezers to apply them if you have clumsy fingers like me.
How To Make Peanut Butter Spider Cookies
Do not let the decorating step intimidate you; if your spiders look a little wonky, just call them “mutant spiders” and move on.
- Freeze the candy: Unwrap about 24 mini Reese’s cups, place them in a bowl, and stick them in the freezer. If you skip this, the hot cookies will turn your peanut butter cups into a melted, structural disaster.
- Cream the butter and sugars: In a mixing bowl, beat the room-temperature butter, brown sugar, and granulated sugar for about 1 minute until smooth and fluffy. It should look like something you want to eat with a spoon, but resist the urge.
- Add the wet ingredients: Mix in the peanut butter, egg, and vanilla extract. Beat for less than a minute just until it comes together.
- Mix in the dry ingredients: Add the flour, baking soda, baking powder, and salt. Mix on low speed just until combined—if you overmix, your cookies will be tough, and nobody wants a chewy spider.
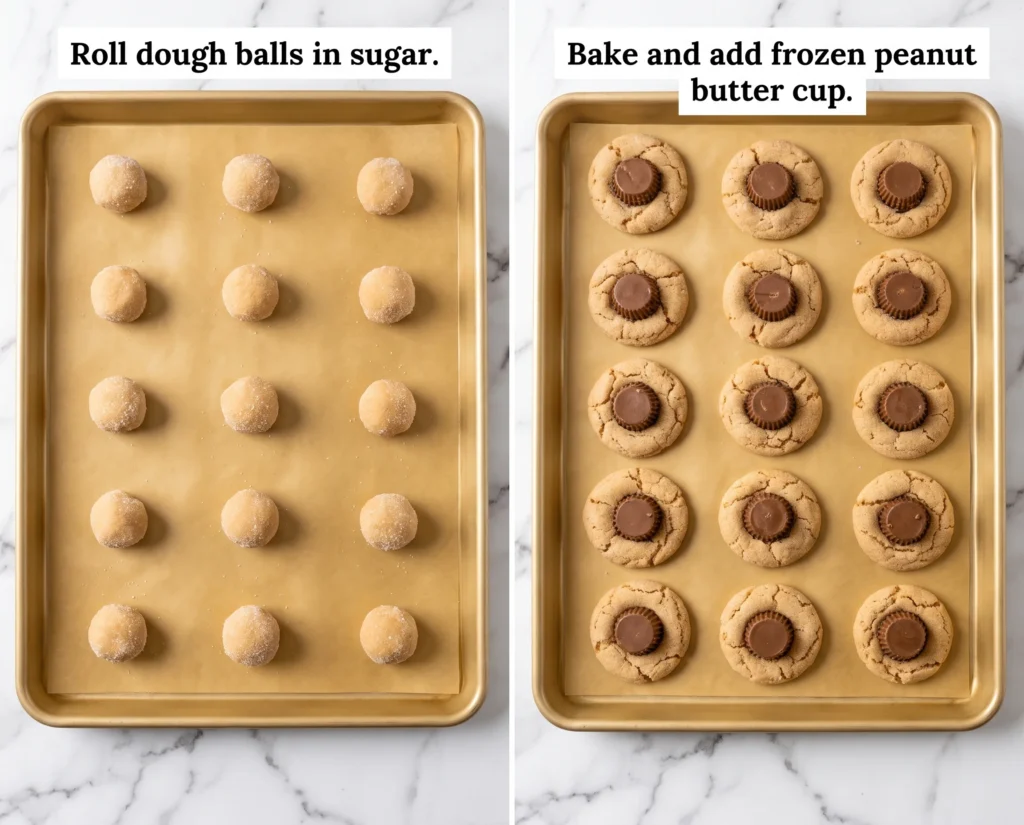
- Roll and bake: Form tablespoon-sized balls of dough, roll them in the extra granulated sugar, and place them on a lined baking sheet. Bake at 350F for 8-11 minutes until the edges just start to crack.
- Press the bodies: Immediately press a frozen Reese’s cup into the center of each hot cookie. Do not move them to a cooling rack yet, or the candy will sink straight through the bottom of the warm cookie. Let them sit on the pan for 15-20 minutes.
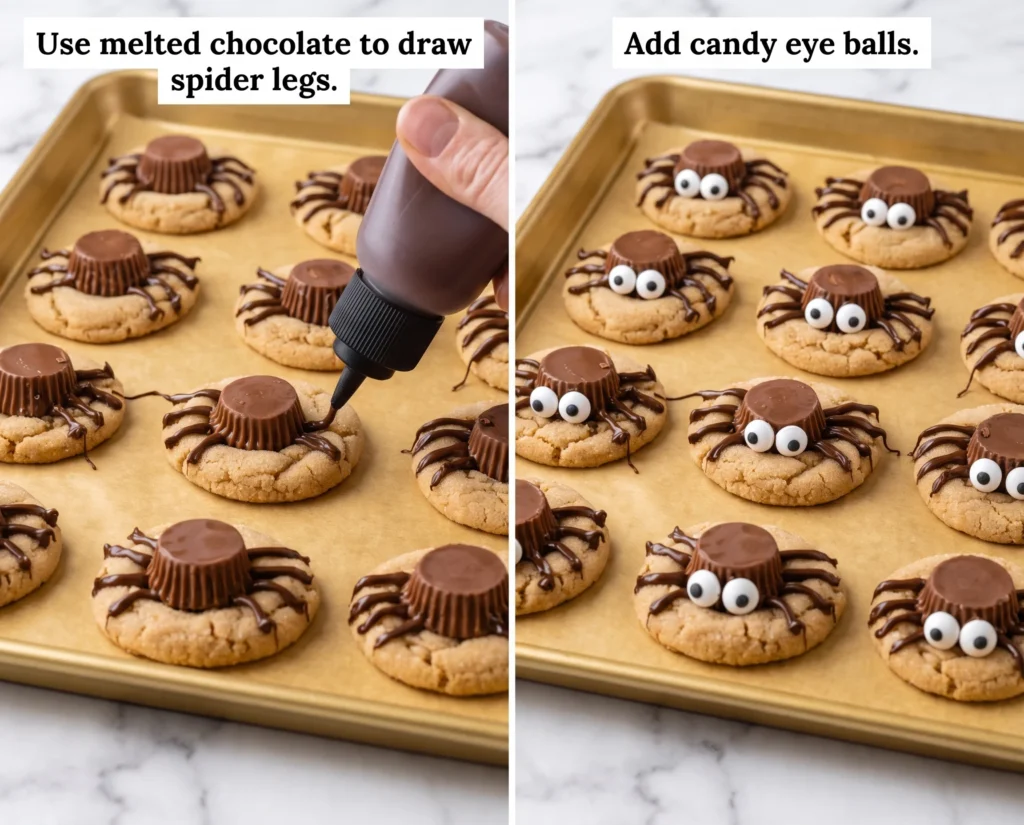
- Draw the legs: Melt the chocolate chips and oil in the microwave in 30-second bursts. Transfer to a squeeze bottle or a zip-top bag with a tiny corner snipped off, and draw four legs on each side. If a leg breaks, that spider just had a rough night.
- Attach the eyes: Use a tiny dab of melted chocolate on the back of the candy eyeballs to stick them onto the Reese’s cups. Let everything set completely before you try to stack them.
♥ The Misfit Tips!
- Freeze the candy: Room-temperature Reese’s cups melt under the heat of the cookie.
- Use a tiny piping opening: You can enlarge the opening, but you cannot make a large opening smaller.
- Use commercial peanut butter: Natural peanut butter separates and can make the cookies spread.
- Chill hot-kitchen dough: Refrigerate the dough for 15 minutes when your butter feels too soft.
- Keep the cookies on the tray: The hot pan helps the cookie support the candy body.
- Let chocolate harden: Soft legs glue the cookies together during storage.
- Use extra candy eyes: A few spare eyes help when one disappears during decorating.
Perfect Pairings
These pair perfectly with a little spooky ambiance and a lot of sugar.
- A cold glass of milk, obviously.
- Warm apple cider while you hand out candy.
- A neighborhood Halloween potluck where these disappear before store-bought cupcakes.
- A scary movie marathon on the couch.
- Hot chocolate for an extra cozy dessert spread.
How to Store
❤
- Fridge: Store the cookies in an airtight container for up to one week.
- Freezer: Freeze the cookies in a single layer, then transfer them to a container for up to three months.
- Thaw: Thaw the cookies at room temperature for about one hour.
- Reheat: Do not reheat the cookies because the chocolate and candy can melt.
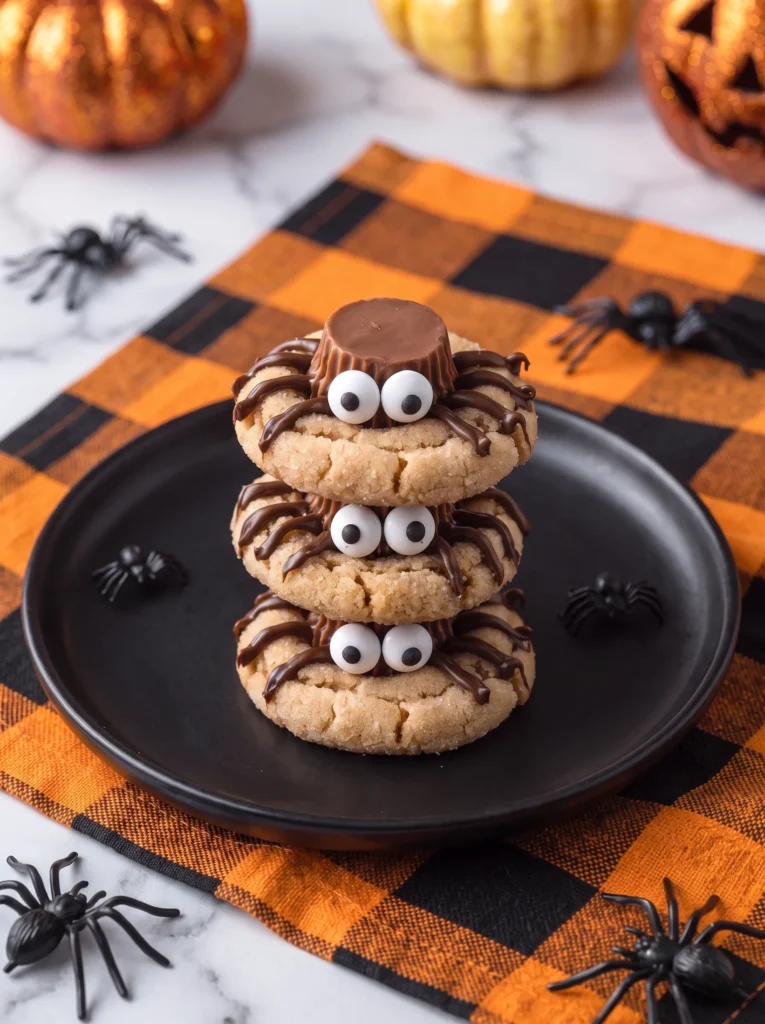
- Stacking: Place parchment between layers after the chocolate legs harden.
- Condensation note: Candy eyes may bleed slightly after freezing, creating a bloodshot Halloween effect.
Peanut Butter Spider Cookies
Ingredients
Equipment
Method
- Freeze the CandyUnwrap the 24 Mini Reese’s Cups and place them in a bowl or small container. Freeze them for at least 20 minutes while you prepare the cookie dough. Chilling the peanut butter cups helps them stay firm and hold their shape when they are pressed into the freshly baked cookies.
- Cream the Butter and SugarsPlace the room-temperature butter, brown sugar, and granulated sugar in a large mixing bowl. Beat for about 1 minute, or until the mixture looks smooth, creamy, and slightly fluffy. Scrape down the sides of the bowl if needed so the ingredients mix evenly.
- Add the Wet IngredientsAdd the peanut butter, egg, and vanilla extract to the butter mixture. Beat for less than 1 minute, just until everything is evenly combined and the mixture looks smooth. Avoid mixing longer than necessary.
- Add the Dry IngredientsAdd the flour, baking soda, baking powder, and salt to the bowl. Mix on low speed until the dry ingredients are almost fully incorporated and no visible streaks of flour remain. Stop mixing as soon as the dough comes together to prevent overmixing, which can make the finished cookies less tender.
- Shape the Cookie DoughScoop out tablespoon-sized portions of dough and roll each portion between your hands to form smooth balls. Roll each dough ball in extra granulated sugar, coating the outside lightly and evenly.Arrange the dough balls on a parchment-lined baking sheet, leaving enough space between them for the cookies to spread as they bake.
- Bake the CookiesPreheat the oven to 350°F (175°C). Bake the cookies for 8–11 minutes, or until the edges begin to crack and the cookies look set around the outside while remaining soft in the center.Do not wait for the cookies to become completely firm in the oven. They will continue to set as they cool.
- Add the Spider BodiesRemove the cookies from the oven and immediately press one frozen Mini Reese’s Cup into the center of each warm cookie. Press gently but firmly enough for the candy to sit securely in the cookie without pushing it too far down.Leave the cookies on the baking sheet for 15–20 minutes. The cookies will still be soft during this time, so avoid transferring them to a cooling rack too soon. Allowing them to cool on the baking sheet helps the centers firm up and keeps the Reese’s Cups from sinking through the cookies.
- Prepare the Chocolate for the LegsWhile the cookies cool, place the chocolate chips and neutral oil in a microwave-safe bowl. Microwave in 30-second intervals, stirring thoroughly after each interval, until the chocolate is completely melted and smooth.Be careful not to overheat the chocolate. Short heating intervals and stirring between each one help prevent it from becoming too hot or grainy.
- Pipe the Spider LegsTransfer the melted chocolate to a small squeeze bottle or a zip-top bag. If using a bag, snip off only a tiny corner so you can control the chocolate more easily.Pipe four legs on each side of every Reese’s Cup, creating eight legs per spider. The legs do not need to be perfectly straight or identical. Let the chocolate set for a few minutes if it becomes difficult to control.
- Add the Candy EyesPlace a very small dab of melted chocolate on the back of each candy eyeball. Carefully press two candy eyes onto each Reese’s Cup.Allow the chocolate to set completely before moving or stacking the cookies. Once the chocolate has hardened, your peanut butter spider cookies are ready to serve.