
Halloween baking is always more fun when the treats are as cute and spooky as they are delicious. These Halloween Skeleton Oreo Pops are an easy no-bake Halloween dessert made with Oreo cookies, creamy white chocolate coating, and simple dark chocolate skeleton faces. They are fun to make, easy to decorate, and perfect for adding a festive touch to any Halloween celebration.
I love making these Halloween Oreo pops because they require only a few ingredients and no complicated baking. The cookies are placed on lollipop sticks, dipped in smooth white coating, and decorated with classic skeleton faces for a creepy-cute Halloween look.
They are perfect for Halloween parties, school treats, kids’ parties, Halloween dessert tables, or homemade party favors. You can even wrap them individually with small bags and ribbons for an adorable Halloween treat.
Why You’ll Love This Recipe
- Easy Halloween treat: These Oreo pops require no baking and only a few simple ingredients.
- No-bake recipe: There is no need to turn on the oven.
- Kid-friendly Halloween dessert: Kids can help dip and decorate the Oreo pops.
- Simple ingredients: Oreo cookies, white coating, and dark chocolate are all you need for the basic recipe.
- Festive skeleton design: Chocolate eyes, noses, and stitched smiles turn ordinary cookies into spooky Halloween treats.
- Perfect for parties: Serve them on a dessert table or wrap them individually as Halloween party favors.
- Easy to customize: Use different Oreo flavors, colorful ribbons, or additional Halloween decorations.
Tools You’ll Need
You only need a few basic tools to make these spooky Oreo cookie pops.
- Baking sheet: Provides a flat surface for assembling and decorating the pops.
- Parchment paper: Prevents the coated Oreo pops from sticking.
- Microwave-safe bowl: Makes melting the white coating and chocolate simple.
- Lollipop sticks: Turn the cookies into easy-to-hold Halloween treats.
- Piping bag: Makes it easier to create the skeleton faces.
- Small zip-top bag: A convenient alternative to a piping bag.
- Scissors: Use scissors to make a very small opening in the corner of the bag.
Ingredients
For the Oreo Pops
- 12 Oreo cookies: Double-stuffed or mega-stuffed Oreos work especially well because the thicker cream filling helps hold the lollipop sticks securely.
- 12 long lollipop sticks: These make the cookies easy to hold and serve.
- About 2 cups (340 g) white confectionery coating or white chocolate: This creates the smooth white skeleton background.
- 2 teaspoons coconut oil, optional: Use coconut oil if you are working with white chocolate chips and need to thin the melted chocolate.
For the Skeleton Faces
- About 50 g (1¾ oz) dark chocolate: Dark chocolate creates the skeleton eyes, nose, and stitched smile.
- 12 small black ribbons, optional: Ribbons add an extra festive touch to the finished Oreo pops.
How To Make Halloween Skeleton Oreo Pops
- Prepare the baking sheet: Line a baking sheet with parchment paper and set it aside. This will give you a clean surface for assembling and decorating the Oreo pops.
- Separate the Oreos: Carefully twist each Oreo apart, trying to keep the cream filling attached to one cookie half. Work gently so the cookies do not crack.
- Attach the lollipop sticks: Melt a small amount of the white coating. Dip the tip of each lollipop stick into the melted coating, then gently press it into the Oreo cream filling. Place the other cookie half back on top and press very lightly to secure it. Repeat with the remaining Oreos.
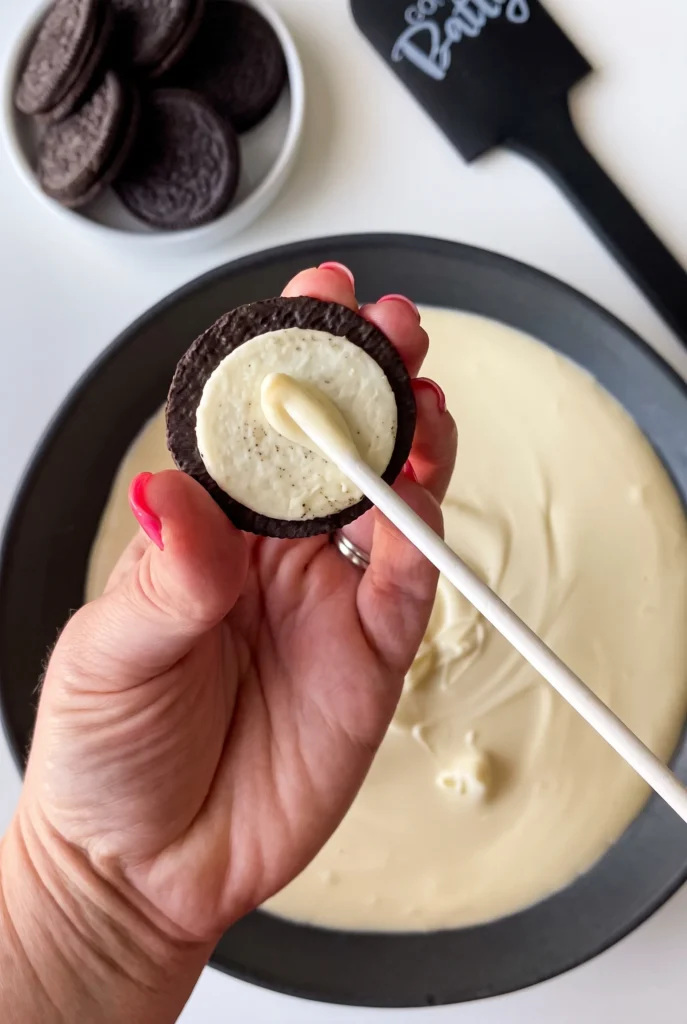
- Let the sticks set: Place the assembled Oreo pops on the prepared baking sheet. If the cookies feel loose, chill them for about 5–10 minutes, or until the coating around the sticks has firmed up.
- Melt the white coating: Place the white confectionery coating or white chocolate in a microwave-safe bowl. Microwave in short bursts, stirring well between each burst, until completely smooth. If using white chocolate chips, stir in the coconut oil to create a thinner, smoother coating. Avoid overheating the chocolate.
- Dip the Oreo pops: Hold each Oreo pop over the bowl and carefully dip it into the melted white coating. Spoon the coating over the cookie if necessary to cover both sides completely. Allow any excess coating to drip back into the bowl.
- Place the pops on the tray: Transfer each coated Oreo pop to the parchment-lined baking sheet. Try to keep the cookies flat while the coating begins to set.
- Let the white coating harden: Chill the Oreo pops for about 5–10 minutes, or until the white coating is completely firm.
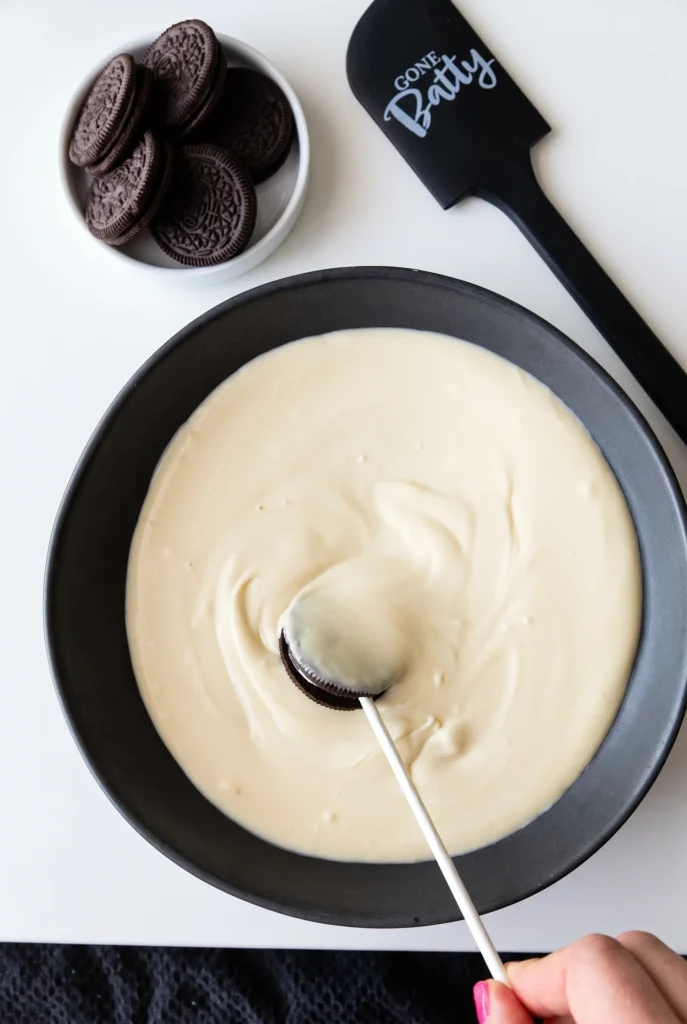
- Melt the dark chocolate: Place the dark chocolate in a clean microwave-safe bowl. Microwave in 15-second bursts, stirring thoroughly after each burst, until smooth and easy to pipe.
- Prepare the piping bag: Transfer the melted dark chocolate to a piping bag. You can also use a small zip-top bag with a tiny corner snipped off.
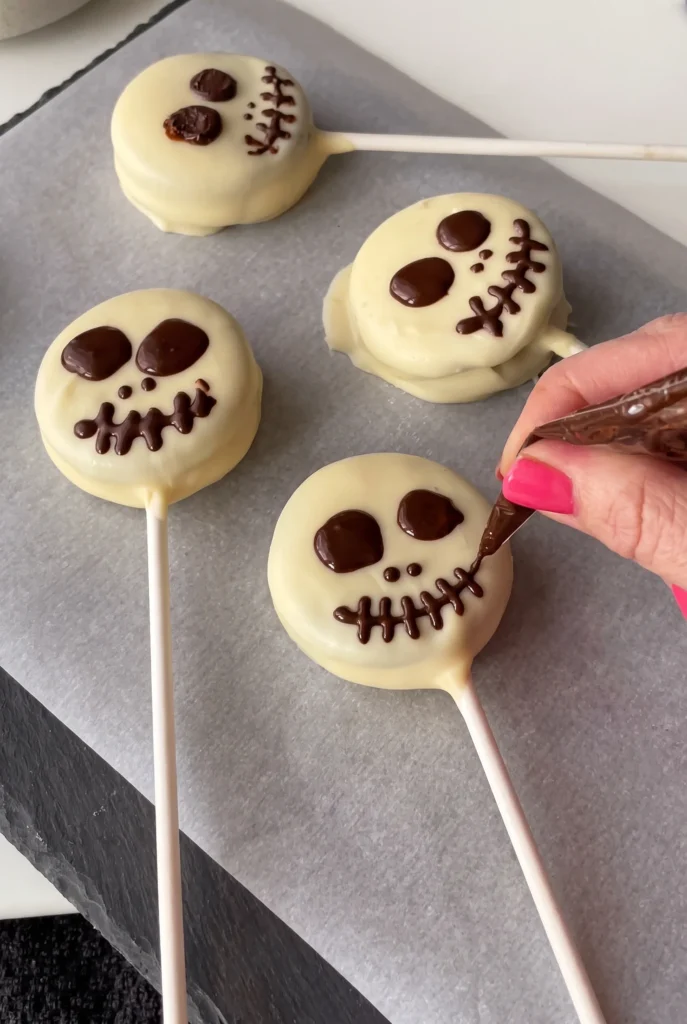
- Decorate the skeleton faces: Pipe two round eyes, a small nose, and a stitched skeleton smile onto each Oreo pop. Keep the decorations simple for a classic Jack-o’-lantern-style skeleton look, or experiment with different expressions.
- Let the chocolate set: Allow the decorated Oreo pops to sit at room temperature until the dark chocolate has completely hardened.
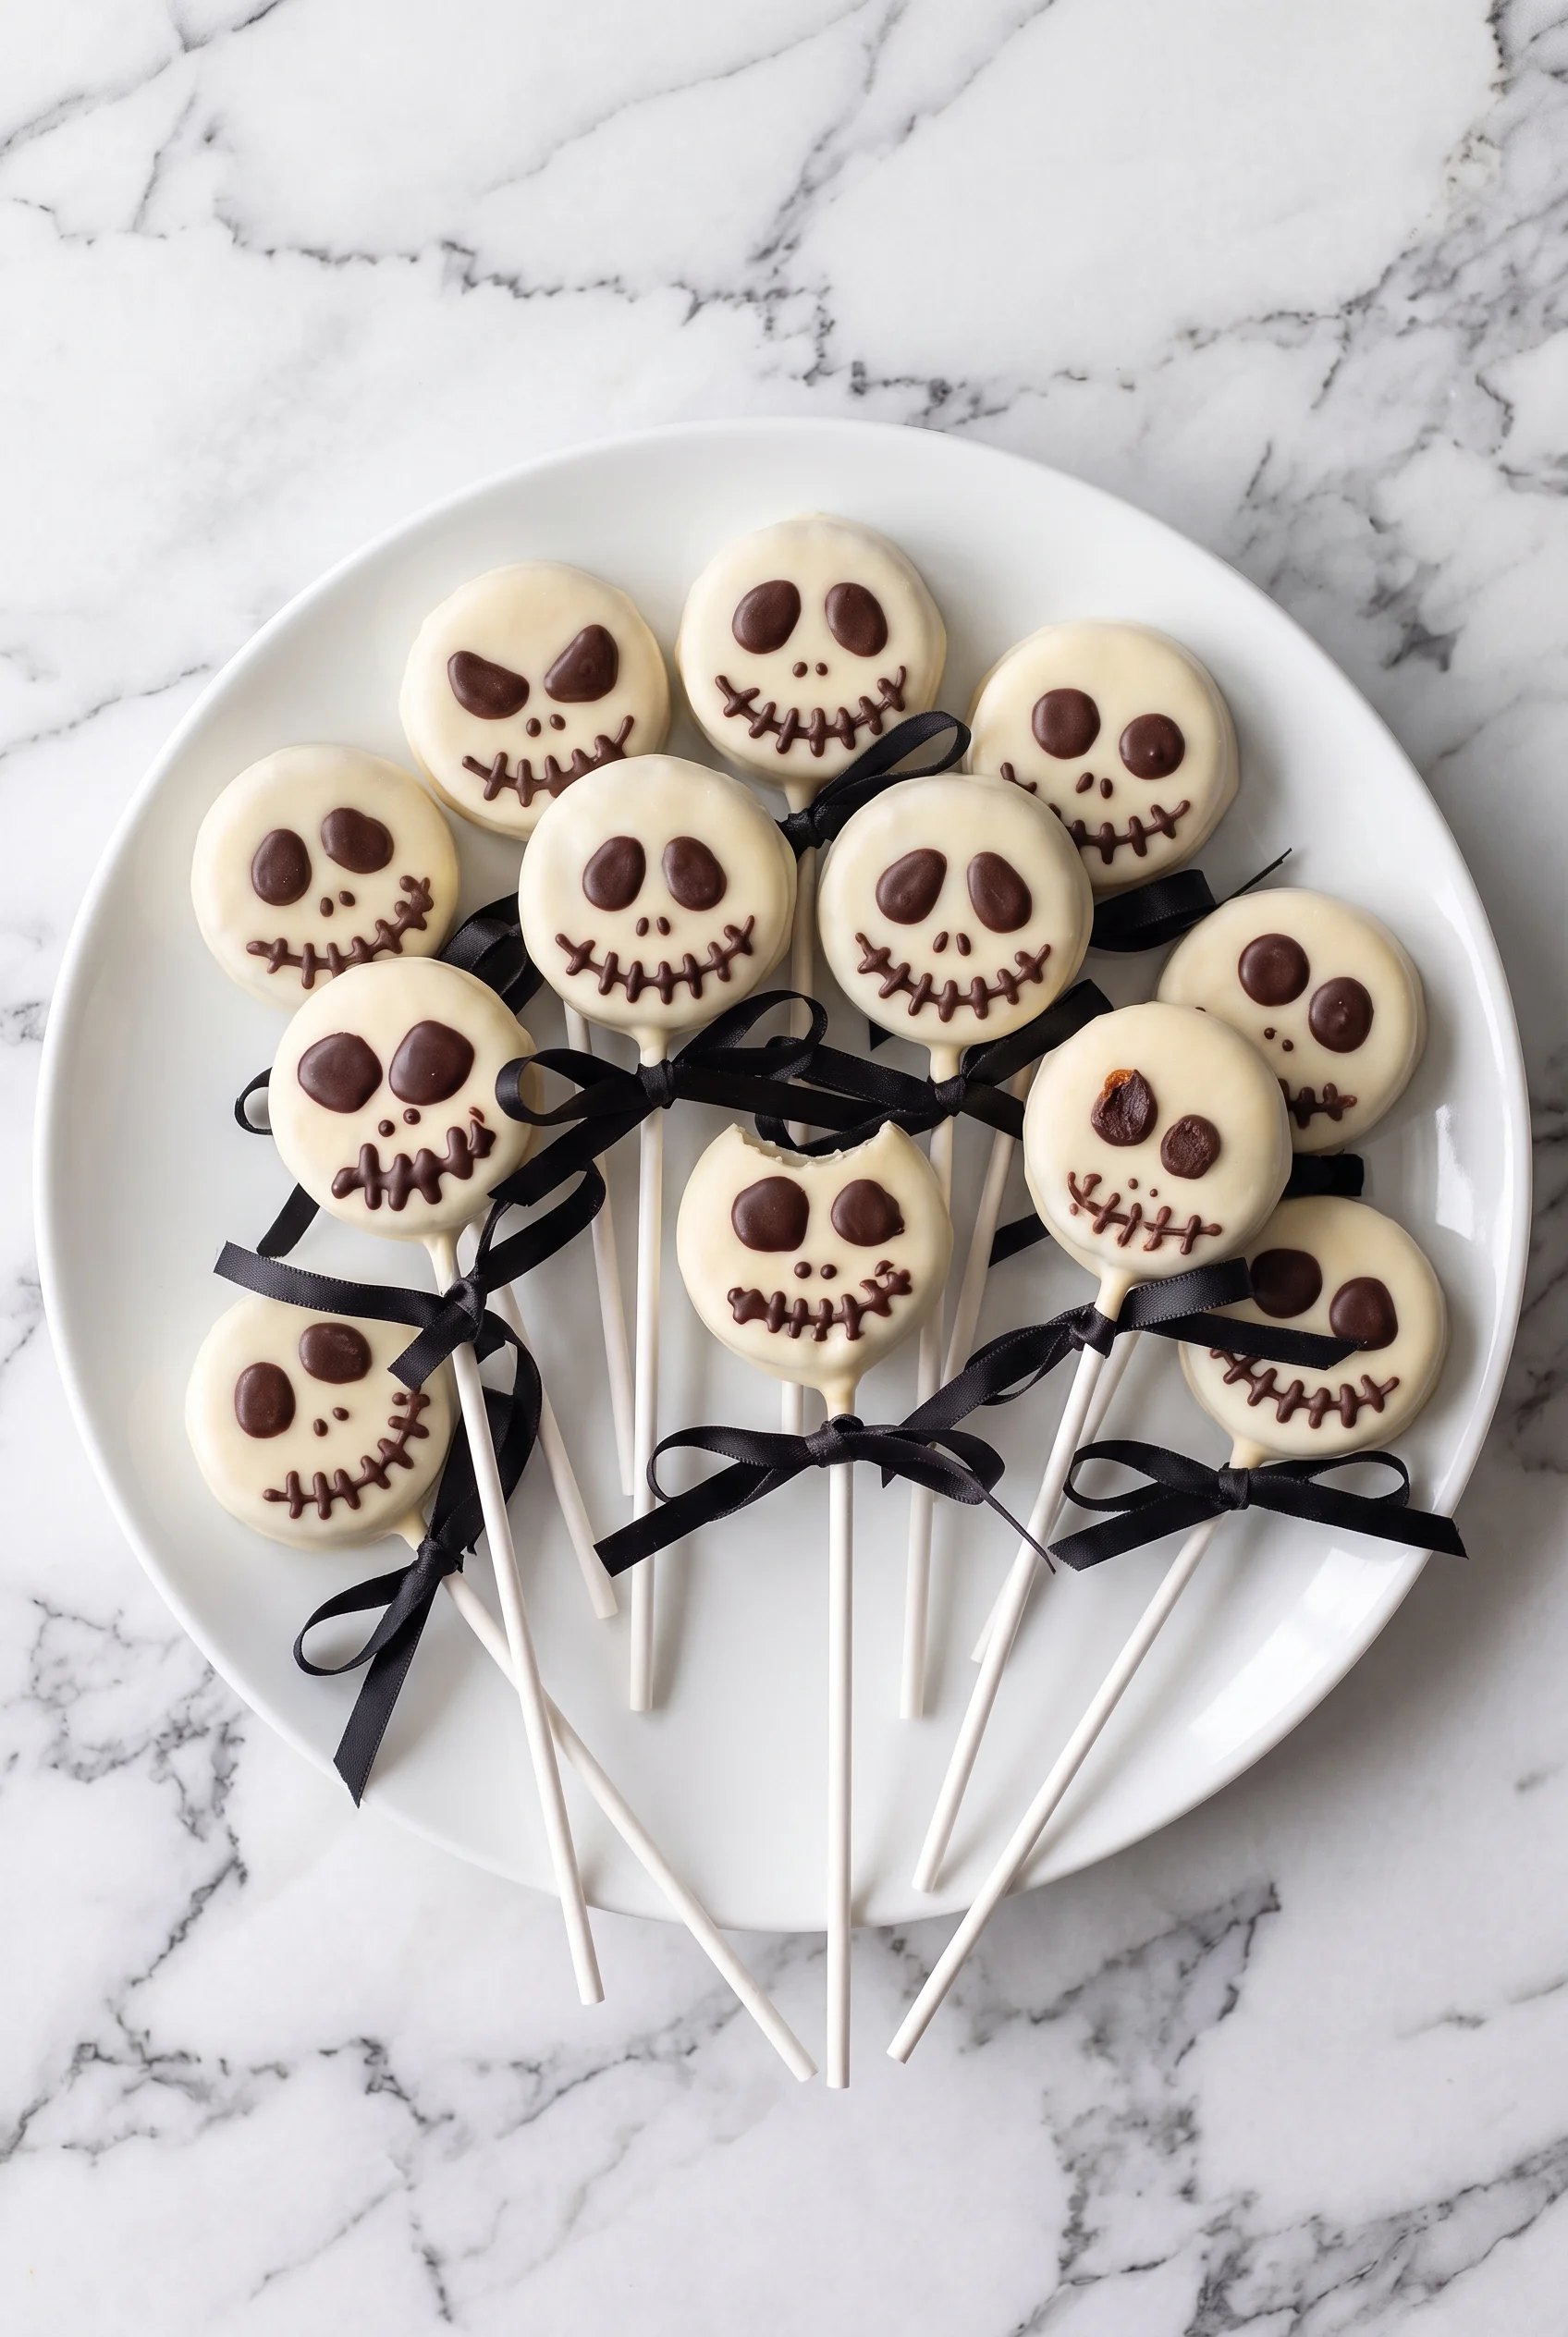
- Add the ribbons: For an extra Halloween touch, tie a small black ribbon around each lollipop stick before serving.
♥ The Misfit Tips!
- Use Double-Stuffed or Mega-Stuffed Oreos. The thicker cream filling gives the lollipop sticks more support and makes the pops easier to assemble.
- Handle the cookies gently. Oreo cookies can break when separated, so twist them slowly rather than pulling them apart.
- Do not overheat the chocolate. Short microwave bursts help prevent the coating from becoming thick or grainy.
- Thin the white chocolate if needed. A small amount of coconut oil can make white chocolate easier to dip and coat.
- Let the white coating set completely. Decorating too early can cause the skeleton faces to smear.
- Use a very small piping opening. This gives you better control when creating the eyes and stitched smile.
- Work on parchment paper. It makes cleanup easier and prevents the coated cookies from sticking.
- Chill briefly if necessary. A few minutes in the refrigerator can help the coating set faster.
Make It Yours
There are plenty of ways to customize these Halloween Oreo Pops for your celebration.
- Use Golden Oreos, chocolate Oreos, or your favorite Oreo flavor.
- Try milk chocolate or semi-sweet chocolate for the skeleton faces.
- Add Halloween sprinkles before the white coating sets.
- Tie orange, purple, or black ribbons around the sticks.
- Make different skeleton expressions with different eye and mouth shapes.
- Add tiny chocolate details such as eyebrows or cheek marks.
- Use colorful candy melts for a fun twist on the traditional white skeleton design.
- Wrap each Oreo pop individually in a clear treat bag for easy Halloween party favors.
Perfect for Halloween
These Halloween Skeleton Oreo Pops are an easy addition to any spooky dessert table.
- Halloween parties: Arrange them in a glass or decorative container for an eye-catching centerpiece.
- Kids’ Halloween parties: Let children decorate their own skeleton faces.
- School Halloween treats: Individually wrapped Oreo pops are easy to hand out.
- Halloween dessert platters: Pair them with Halloween cookies, brownies, cupcakes, and other spooky sweets.
- Party favors: Wrap each pop in a small clear bag and finish with a Halloween ribbon.
- Trick-or-treat alternatives: They make a fun homemade Halloween treat for family and friends.
How to Store
❤
- Room temperature: Store completely set Oreo pops in an airtight container in a cool, dry place.
- Keep them cool: Avoid warm areas because the white coating and chocolate decorations can soften.
- Separate the layers: If you need to stack the pops, place parchment paper between the layers.
- Refrigeration: You can refrigerate the pops to help the chocolate remain firm, especially in a warm kitchen.
- Before serving: If refrigerated, allow the Oreo pops to sit briefly at room temperature before serving.
- Best presentation: Store the pops carefully so the skeleton faces remain intact and the white coating stays clean.
Halloween Skeleton Oreo Pops
Ingredients
Equipment
Method
- Prepare the baking sheet: Line a baking sheet with parchment paper and set it aside. This will give you a clean surface for assembling and decorating the Oreo pops.
- Separate the Oreos: Carefully twist each Oreo apart, trying to keep the cream filling attached to one cookie half. Work gently so the cookies do not crack.
- Attach the lollipop sticks: Melt a small amount of the white coating. Dip the tip of each lollipop stick into the melted coating, then gently press it into the Oreo cream filling. Place the other cookie half back on top and press very lightly to secure it. Repeat with the remaining Oreos.
- Let the sticks set: Place the assembled Oreo pops on the prepared baking sheet. If the cookies feel loose, chill them for about 5–10 minutes, or until the coating around the sticks has firmed up.
- Melt the white coating: Place the white confectionery coating or white chocolate in a microwave-safe bowl. Microwave in short bursts, stirring well between each burst, until completely smooth. If using white chocolate chips, stir in the coconut oil to create a thinner, smoother coating. Avoid overheating the chocolate.
- Dip the Oreo pops: Hold each Oreo pop over the bowl and carefully dip it into the melted white coating. Spoon the coating over the cookie if necessary to cover both sides completely. Allow any excess coating to drip back into the bowl.
- Place the pops on the tray: Transfer each coated Oreo pop to the parchment-lined baking sheet. Try to keep the cookies flat while the coating begins to set.
- Let the white coating harden: Chill the Oreo pops for about 5–10 minutes, or until the white coating is completely firm.
- Melt the dark chocolate: Place the dark chocolate in a clean microwave-safe bowl. Microwave in 15-second bursts, stirring thoroughly after each burst, until smooth and easy to pipe.
- Prepare the piping bag: Transfer the melted dark chocolate to a piping bag. You can also use a small zip-top bag with a tiny corner snipped off.
- Decorate the skeleton faces: Pipe two round eyes, a small nose, and a stitched skeleton smile onto each Oreo pop. Keep the decorations simple for a classic Jack-o'-lantern-style skeleton look, or experiment with different expressions.
- Let the chocolate set: Allow the decorated Oreo pops to sit at room temperature until the dark chocolate has completely hardened.
- Add the ribbons: For an extra Halloween touch, tie a small black ribbon around each lollipop stick before serving.