
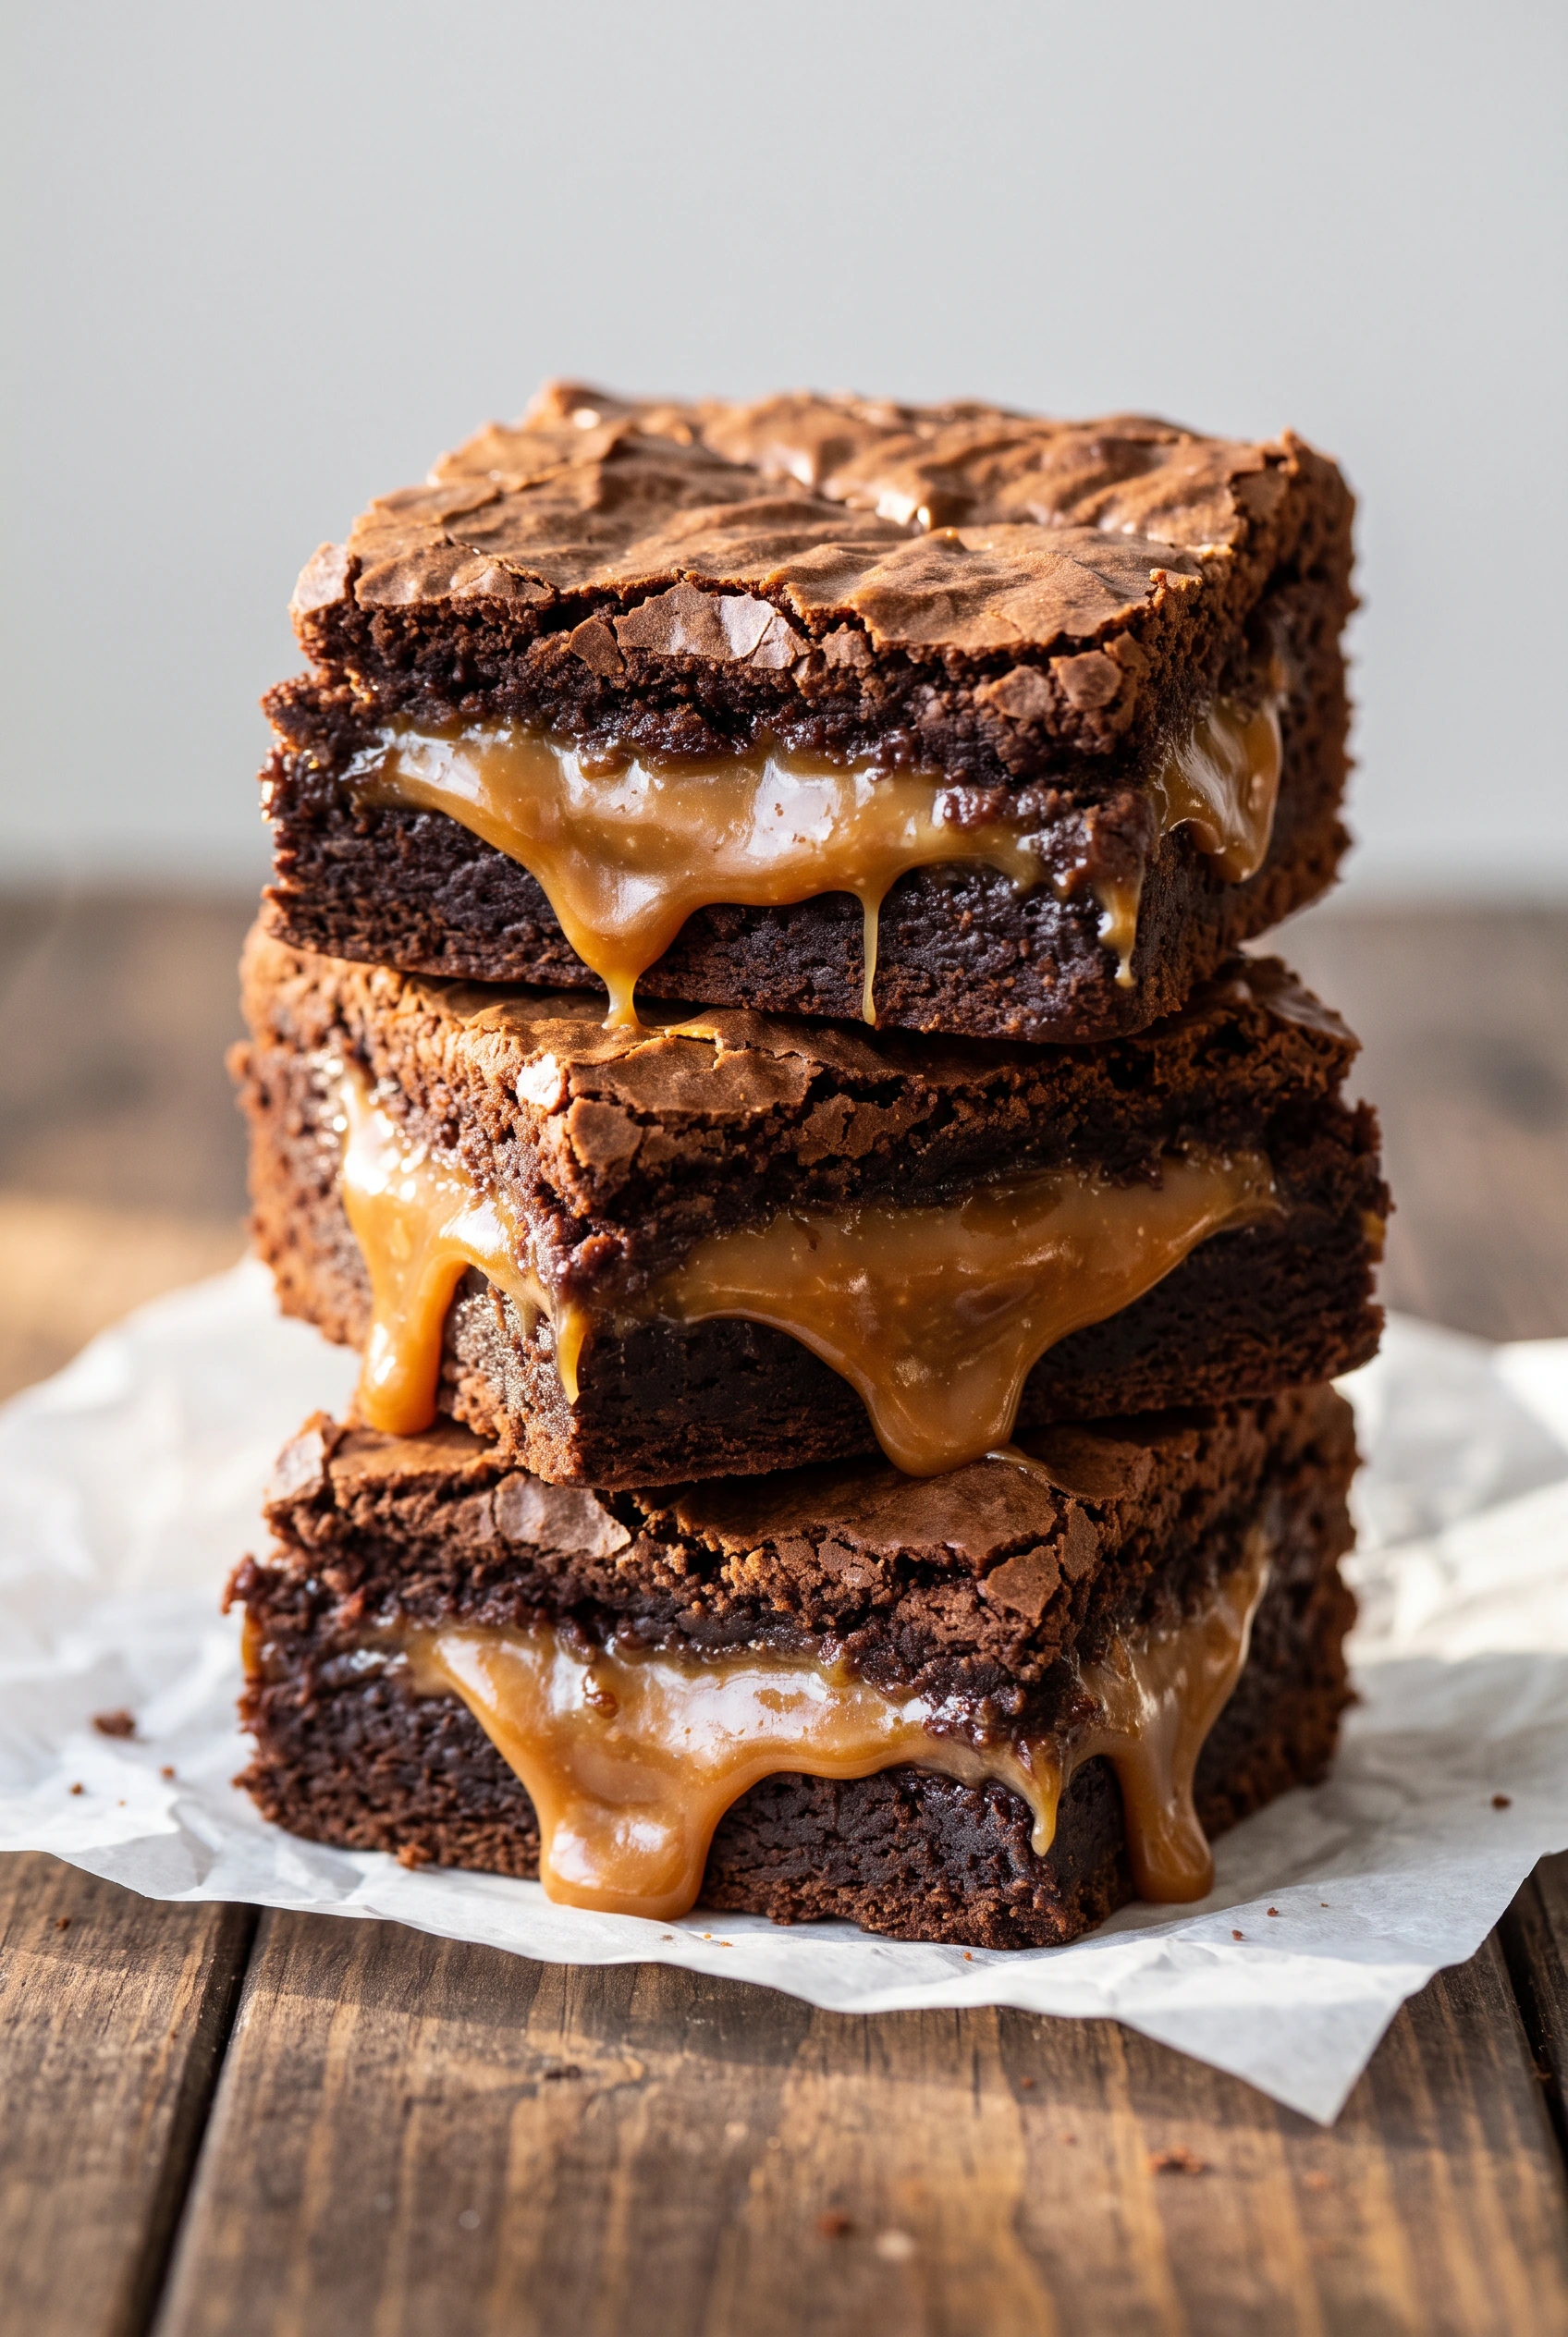
Standing over the stove in yesterday’s sweatpants at nine on a random night, aggressively whisking a can of condensed milk, is exactly how these caramel brownies came to life. Regular chocolate suddenly stopped feeling like enough, and a previous attempt at a complicated caramel brownie recipe once seized into a hard rock and got tossed straight into the sink.
This time, a condensed milk shortcut turned putting caramel in brownies into something completely foolproof. No candy thermometer, no sugar-boiling anxiety, just a rich, gooey layer swirled straight into fudgy chocolate. Anyone craving a dessert that basically apologizes for the rest of the day belongs right here. Here is exactly how I do it.
reader review
“Gooey Gooey and Gooey. I skipped the candy thermometer completely and used the condensed milk trick exactly like the recipe says, and my caramel swirl turned out perfect on the first try. My sister demanded the recipe before she even finished her second square.” – Marguerite T.
Loved this too? Add your reviewWhy You’ll Love This Recipe
- No candy thermometer required We use a condensed milk shortcut that saves you from sugar-boiling anxiety.
- One bowl batter The brownie portion comes together in the microwave so you have fewer dishes to aggressively scrub later.
- Stays soft inside The salted caramel brownies actually keep their gooey center without turning into hard toffee.
- Crowd-pleasing Bring these to a potluck and watch people fight over the middle pieces.
Tools You’ll Need
Nothing fancy, I promise.
- 8-inch square pan – A standard 8-inch square baking pan is perfect here.
- Small saucepan. This handles the caramel layer without much fuss.
- Whisk. Stirring the caramel gently with this keeps it from burning to the bottom of the pot.
Ingredients
For the Brownie
- 200g (7oz) unsalted butter – Cut it into chunks so it melts faster in the microwave.
- 200g (7oz) dark chocolate chips – Use proper baking chocolate or chips, not a regular eating bar. Baking chocolate has a different ratio of cocoa solids and fat, which helps it melt smoothly.
- 1 cup brown sugar – Pack it in there to give the brownies extra moisture.
- 3 eggs – Lightly whisked. If you forget to whisk them first, just beat them a little extra in the bowl, I won’t tell.
- 1 tsp vanilla extract – The good stuff if you have it.
- 1/2 cup all-purpose flour – Just regular flour here.
- 1/4 cup cocoa powder – To double down on the chocolate flavor.
- 1/8 tsp salt – To balance the sugar.
For the Salted Caramel
- 1 can (14oz) sweetened condensed milk – The magic ingredient that makes this foolproof.
- 2 tbsp golden syrup or maple syrup – I use maple syrup because I never have golden syrup, and it works great.
- 2 oz (60g) unsalted butter – Yes, more butter. We are not counting today.
- 1 tsp salt – Crucial for that salted caramel vibe.
Instructions
Do not overthink the swirling step; it is going to look like a delicious mess no matter what you do.
- Prep the pan: Preheat your oven to 350°F (180°C) and line an 8-inch square tin with parchment paper. Leave some overhang so you can actually lift the brownies out later instead of eating them directly from the pan like an animal.
- Make the caramel: In a small saucepan over medium-high heat, combine the condensed milk, syrup, butter, and salt. Once you see wisps of steam, whisk constantly but casually for 7 minutes until it turns pale golden. If you stop whisking to check your phone and it catches slightly on the bottom, do not panic—those tiny brown bits will vanish into the baked brownie and nobody will know.
- Cool the caramel: Remove from the stove, whisk for 30 seconds, pop a lid on, and set it aside to keep warm. Do not stick your finger in it to taste it right now unless you want a burnt tongue.
- Melt the chocolate: In a microwave-safe bowl, melt the chocolate and butter in 30-second bursts, stirring in between. Do not get impatient and do a full minute at once unless you want seized, grainy chocolate.
- Mix the wet ingredients: Stir the brown sugar, eggs, and vanilla extract into the melted chocolate mixture until well combined.
- Add the dry ingredients: Sift in the flour, cocoa powder, and salt, mixing until smooth. If you skip sifting the cocoa powder and get lumps, that is between you and the batter.
- Layer the base: Measure out a heaped 1/2 cup of the brownie batter and set it aside. Pour the rest into your prepared pan.
- Add the caramel: Pour your warm salted caramel evenly over the brownie base. If it cooled down and got too thick, just pop it back on the stove for a minute until it is pourable again.
- Swirl it up: Dollop that reserved 1/2 cup of brownie batter randomly over the caramel. Use a knife to swirl it around—it does not need to look like modern art, you just want to spread the batter out a bit.
- Bake: Bake for 30 minutes for a very gooey center, or up to 35 minutes if you prefer them slightly more set. They will look wobbly, and that is exactly what you want.
- Cool completely: Let them cool in the pan for 10 minutes, then lift them out onto a wire rack. Wait another 20 minutes before slicing. I know waiting is torture, but cutting them hot will result in a caramel lava flow on your counter.
♥ The Misfit Tips!
- Never skip the parchment paper overhang. Greasing the pan alone once let the caramel bubble up the sides and glue itself to the metal, turning this caramel brownies recipe into scooped crumbles instead of clean squares.
- Trust the maple syrup substitution. Golden syrup works as the traditional choice, though maple syrup delivers the same result without any special shopping trip.
- Keep whisking the caramel gently. Condensed milk burns easily on the bottom of the pot, so a slow, steady whisk prevents scorching.
Make it yours
- Espresso version. You stir a teaspoon of instant espresso powder into the brownie batter for a deeper chocolate flavor against the sweet caramel.
- Nutty version. You scatter chopped pecans over the caramel layer before adding the swirled batter on top.
Perfect Pairings
Because brownies and caramel already deliver so much richness, a couple of pairings help balance the plate.
- A very strong cup of black coffee cuts through the intense sweetness with every sip.
- A scoop of vanilla bean ice cream turns an already indulgent square into something completely unhinged.
How to Store Caramel Brownies
❤
- Fridge. You store these in an airtight container for up to five days, and the caramel firms up into a wonderfully chewy texture.
- Freezer. You wrap individual squares tightly in plastic wrap and freeze them for up to three months.
- Reheat. Ten to fifteen seconds in the microwave brings back that fresh-from-the-oven gooey caramel experience.
- Storage note. You avoid the counter in a warm kitchen, since the caramel layer softens too much and the brownies slide apart.
Caramel Brownies
Ingredients
Equipment
Method
- Preheat oven to 180°C/350°F (all oven types).
- Butter and line a 20cm / 8" square tin with parchment / baking paper.
- Place the ingredients in a small saucepan over medium high heat. Stir occasionally for the first 1 minute. When it is heated (ie. when you see wisps of steam), whisk constantly (leisurely, not vigorously!) for 7 minutes, ensuring the base doesn't catch (Note 3). It should be a pale golden colour.
- Remove from stove and whisk for 30 seconds. Place lid on, set aside and keep warm.
- Melt chocolate & butter: Place chocolate and butter in a bowl. Microwave in three 30 second bursts on high, stirring in between bursts, until melted and smooth.
- Add sugar, eggs, vanilla: Add the sugar, eggs and vanilla extract to the chocolate mixture and mix well to combine.
- Add dry ingredients: Sift in the flour, cocoa powder and salt. Mix until smooth and combined.
- Reserve some batter: Measure out 1/2 cup of brownie batter and set aside. Pour the remaining batter into the prepared tin.
- Pour over caramel: Pour the Salted Caramel over the brownie batter, getting as much coverage as you can (as you can't easily spread the caramel once poured). If caramel has cooled and is no longer pourable, reheat it on stove for 1 minute until runny again.
- Cover with reserved brownie batter: Dollop the reserved 1/2 cup of brownie batter randomly over the Salted Caramel. Use a knife or skewer to make “swirls” – they won't be so visible once baked, it's more about spreading brownie batter over the caramel.
- Bake: Place in the oven and bake for 30 minutes (for very gooey brownie, as pictured) to 35 minutes (for very moist but not super-gooey).
- Cool: Leave to cool in pan for 10 minutes. Use surplus paper overhang to lift out onto a cooling rack. Cool for a further 20 minutes before slicing. Note: Caramel is a bit gooey when still warm but sets firmer once fully cooled, ie. it will cut through neatly.