
Standing in front of an open freezer at 2 AM eating ice cream with a fork is a low point most of us quietly share. These homemade ice cream sandwiches came together the next afternoon from a batch of soft chocolate chip cookies sitting on the counter and a stubborn craving that refused to wait.
Learning how to make ice cream sandwiches at home requires no pastry training, no special equipment, and no planning beyond buying ice cream. Soft cookies stay tender straight from the freezer, the ice cream holds its shape after three hours of setting, and the whole thing comes together in one sticky, deeply satisfying assembly session.
Why You’ll Love This Recipe
- Tooth-friendly texture. The cornstarch in the dough keeps the cookies pliable after freezing so the first bite doesn’t feel like a dental emergency.
- Total flavor freedom. Any ice cream flavor you have in the back of the freezer works here. Vanilla, mint chip, strawberry, or whatever is closest to expiring.
- Kid-approved chaos. Children will eat these without complaint and request them by name within forty-eight hours.
- No chill time for the dough. The cookies go straight from mixing bowl to oven with no waiting around.
Tools You’ll Need
Nothing fancy, I promise.
- Medium cookie scoop. Uniform cookies produce sandwiches that stack evenly and hold the ice cream without one side sliding off.
- Baking sheets. Line three large ones with parchment paper. Skipping the parchment means spending twenty minutes scraping cookies off bare metal.
- Ice cream scoop. A proper scoop gives you enough leverage to wrestle with deeply frozen ice cream without bending your good spoons.
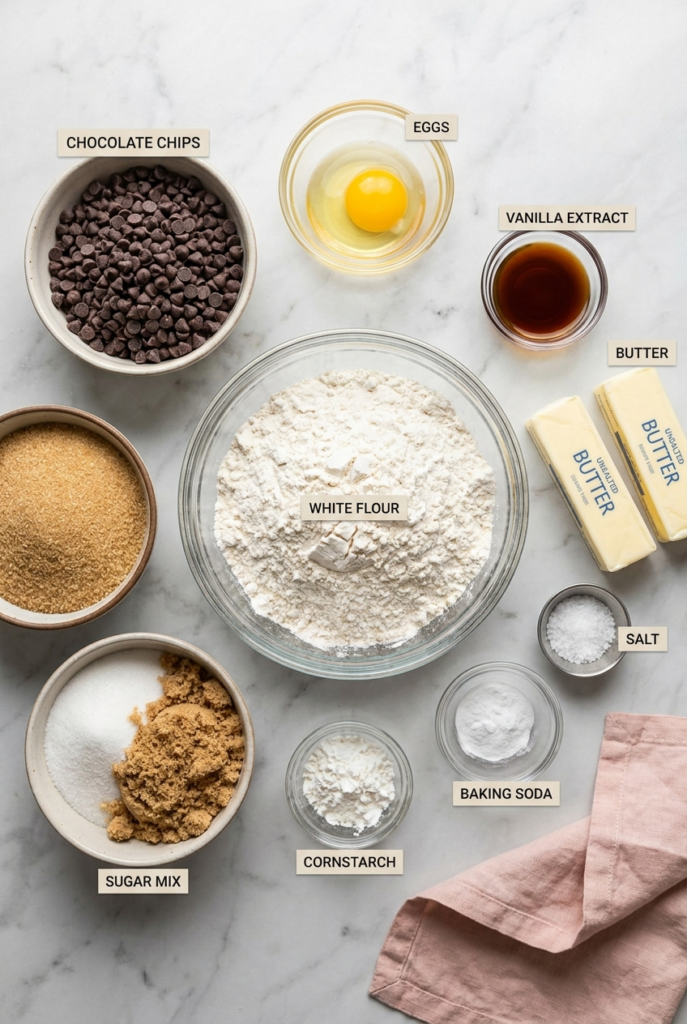
Ingredients
For the Cookies
- 2 1/4 cups all-purpose flour – Measure this correctly by spooning and leveling or your cookies will taste like sand.
- 1 1/2 teaspoons cornstarch – This is the secret ingredient that keeps the cookies from turning into bricks in the freezer.
- 1 teaspoon baking soda – Check the expiration date on your box, seriously.
- 1/2 teaspoon salt – Do not skip this unless you like aggressively bland sweets.
- 3/4 cup unsalted butter – Softened to room temperature, not melted into a sad puddle in the microwave.
- 3/4 cup packed brown sugar – Light or dark, whichever you have hardened into a block in your pantry.
- 1/2 cup granulated sugar – Just the regular white stuff.
- 1 large egg + 1 egg yolk – The extra yolk makes it tender; the leftover white can go down the drain, I will not tell anyone.
- 2 teaspoons pure vanilla extract – Measure with your heart.
- 1 1/4 cups mini semi-sweet chocolate chips – Mini is crucial here so you do not bite into frozen rocks.
For the Sandwiching
- 3 cups vanilla ice cream – Or whatever flavor you aggressively crave right now.
- 1 cup mini chocolate chips, sprinkles, or chopped nuts – For rolling the edges and hiding any messy ice cream overspill.
Instructions
Set your expectations low for keeping your kitchen clean, and embrace the sticky chaos.
- Prep the oven and pans: Preheat oven to 350°F (177°C). Line 3 large baking sheets with parchment paper – if you skip the parchment, you will be chiseling cookies off the pan until Tuesday.
- Mix the dry ingredients: Whisk the flour, cornstarch, baking soda, and salt together in a medium bowl.
- Cream the butter and sugars: Using a mixer, beat the butter, brown sugar, and granulated sugar together on medium-high speed until creamy, about 3 minutes. Do not rush this, just stare blankly at the wall while the mixer runs.
- Add the wet ingredients: Add the egg, egg yolk, and vanilla extract, beat until combined, then slowly mix in the dry ingredients and chocolate chips. The dough will be sticky, and yes, you will be tempted to just eat it now.
- Scoop and bake: Scoop 1.5 Tablespoon balls of dough onto the sheets and bake for 12-13 minutes until lightly browned on the sides. The centers will look alarmingly soft, but trust the process.
- Cool completely: Let them cool on the pan for 5 minutes before transferring to a wire rack. Do not attempt to put ice cream on a warm cookie unless you want homemade cookie soup.
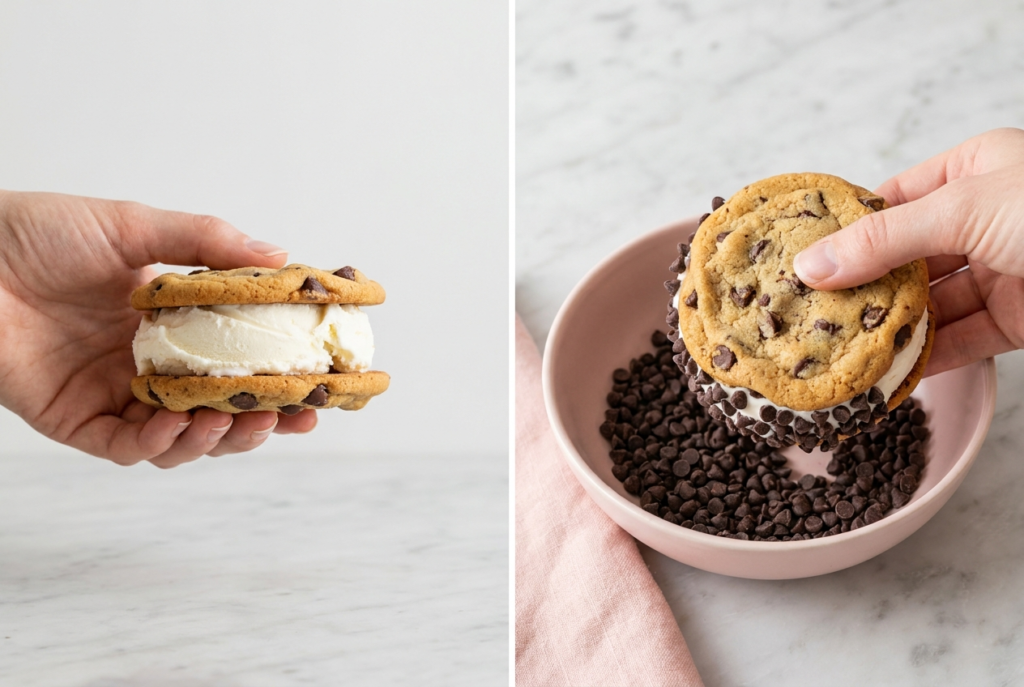
- Assemble the sandwiches: Flip a cooled cookie over, add a scoop of ice cream, top with another cookie, and gently press. Emphasis on gently – I once Hulked-smashed a cookie and had to eat the messy evidence.
- Roll and freeze: Roll the edges in mini chips or sprinkles, wrap tightly in plastic wrap, and freeze for at least 3 hours before eating.
♥ The Misfit Tips!
- Give the pudding the full four hours minimum. A pudding pulled from the refrigerator after two hours runs soupy and structural. After four hours it holds its shape. Overnight it becomes something categorically different and better. Build the overnight step into the plan whenever the event allows it.
- Use yellow bananas with no spots for caramelizing. Overripe bananas dissolve in the brown sugar butter in under two minutes and turn into a fragrant paste. Yellow bananas hold their shape through the cooking and the layering and stay intact after overnight chilling.
- Press plastic wrap directly onto the pudding surface. Any gap between the wrap and the custard produces a rubbery skin across the top layer. Press the wrap flat against the surface before refrigerating, both on the finished assembled dish and on any leftover pudding stored separately.
Troubleshooting Guide
Something went sideways? Been there. Here is how to fix it.
- Problem: The cookies cracked when pressed together
- Why: The cookies weren’t fully cool, or you pressed with too much force
- Fix: Eat the cracked one over the sink and press the next pair with two hands and steady, even pressure rather than a single push from the center.
- Problem: The ice cream melted during assembly
- Why: A warm kitchen or a slow assembly process softened the ice cream past the scoopable stage
- Fix: Return the ice cream tub to the freezer for 10 minutes to firm up, then work faster through the next assembly.
- Problem: The cookies came out rock hard from the freezer
- Why: The cornstarch was skipped, or the cookies baked two to three minutes past the point where the centers looked underdone
- Fix: Let the sandwich sit on the counter for 5 to 10 minutes before eating. Next batch, pull the cookies when the centers still look slightly underbaked.
Perfect Pairings
These homemade ice cream sandwiches need nothing but a warm afternoon and zero plans, but a few extras help:
- A hot cup of black coffee balances the sugar and makes the whole experience feel more sophisticated than it is
- A backyard barbecue where nobody minds chocolate on their chin and the kids can clean up outside with the hose
How to Store
❤
- Fridge. Up to 2 days covered tightly. The vanilla wafers continue softening each day, which many people prefer over the firmer first-day texture.
- Freezer. Never. The custard separates, the bananas release water, and the whipped cream collapses into a liquid layer. Eat it within two days.
- Serving temperature. Always cold. This dessert requires refrigeration from assembly through serving.
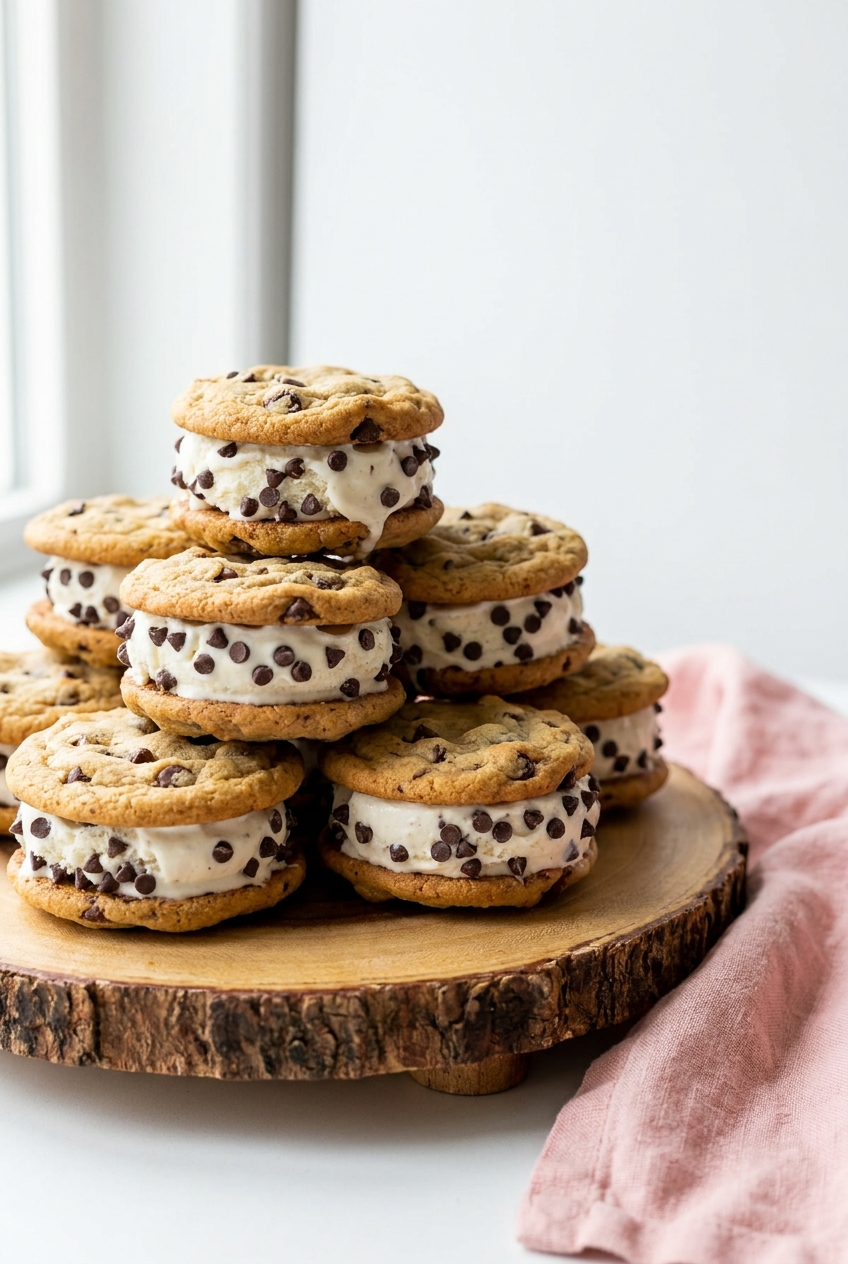
Cookie Ice Cream Sandwiches (Like a Chipwich!)
Ingredients
Equipment
Method
- Prep the oven and pansPreheat the oven to 350°F (177°C). Line three large baking sheets with parchment paper. Parchment also makes cleanup take thirty seconds rather than twenty minutes.
- Mix the dry ingredientsWhisk the flour, cornstarch, baking soda, and salt together in a medium bowl and set aside.
- Cream the butter and sugarsBeat the softened butter, brown sugar, and granulated sugar together with a hand mixer or stand mixer on medium-high speed for about 3 minutes until the mixture looks pale and fluffy. The sugar should dissolve into the butter rather than sitting in visible granules.
- Add the wet ingredientsAdd the egg, egg yolk, and vanilla extract and beat until the mixture looks uniform. Reduce the mixer speed to low and add the flour mixture in two additions, mixing just until the flour disappears. Fold in the mini chocolate chips by hand with a spatula.
- Scoop and bakeUse a medium cookie scoop to portion 1.5-tablespoon balls of dough onto the prepared baking sheets, spacing them about two inches apart. Bake for 12 to 13 minutes until the edges look set and lightly golden. The centers will look underdone when you pull the pan. They finish cooking on the hot pan.
- Cool completelyLeave the cookies on the pan for 5 minutes, then transfer to a wire cooling rack. The cookies need to reach full room temperature before assembly. A warm cookie melts the ice cream immediately and turns the whole thing into a puddle.
- Assemble the sandwichesFlip one cooled cookie upside down on a clean surface. Add a generous scoop of ice cream to the flat side and press a second cookie on top with steady, even pressure. Pressing too hard cracks the cookie. Too light and the ice cream squeezes out unevenly on one side.
- Roll and freezeRoll the exposed ice cream edge through mini chips, sprinkles, or chopped nuts. Wrap each homemade ice cream sandwich tightly in plastic wrap immediately after rolling and place it in the freezer. Freeze for at least 3 hours before eating.