
I made these at 11pm in my pajamas because I found a forgotten bag of cookies in the pantry and the idea of turning on the oven was genuinely offensive to me. We have all been there, staring into the fridge hoping a fully formed dessert will magically appear to fix a bad day.
When it inevitably does not, this easy Oreo Balls recipe is the perfect backup plan. These creamy, chocolate-coated Oreo truffles require just a few ingredients and absolutely no baking. If you love simple no-bake desserts, this recipe belongs on your regular rotation. According to the official Oreo website, Oreo cookies have been a dessert favorite for generations, which probably explains why these homemade Oreo Balls disappear so quickly.
reader review
“Made these for a party and they were GONE in like 10 minutes. Three ingredients!! Three!! No oven, no fuss, and everyone thought I bought them from a fancy bakery. So easy So easy So easy. My new go to whenever I need a dessert in a hurry. Thank you!!!!” – Megan T.
Loved this too? Add your reviewWhy You’ll Love This Recipe
- Zero baking required. This no bake Oreo Balls recipe keeps the oven completely out of the equation.
- Only three ingredients: You can memorize this grocery list while walking from your car to the store entrance.
- Crowd-pleasing magic. These Oreo cream cheese balls are always one of the first desserts to disappear.
- Totally customizable: Roll them in sprinkles, drizzle them with extra chocolate, or just eat them plain over the sink.
Tools You’ll Need
Nothing fancy, I promise.
- Food processor : This makes crushing the cookies a breeze, but a zip-top bag and a heavy rolling pin work just as well if you need to get some aggression out.
- Cookie scoop : Highly recommended so your truffles are actually the same size, instead of ranging from marbles to golf balls.
- Fork or skewer: For dipping the truffles into the chocolate without covering your entire hand in the process.
Instructions
No baking required, just a little bit of patience while things chill in the fridge.
- Crush the cookies: Pulse the Oreos in a food processor until they are fine crumbs. If a few stubborn chunks survive, that is between you and the food processor, nobody else needs to know.
- Mix the dough: Beat the cream cheese and cookie crumbs together until a sticky dough forms. Make sure your cream cheese is actually soft, or you will be fighting a very lumpy dough that refuses to cooperate.
- Roll and chill: Scoop the mixture into 1-inch balls, place them on a lined baking sheet, and chill for at least an hour. Do not skip the chilling step unless you want your Oreo balls to disintegrate into the hot chocolate like a sad, muddy swamp.
- Melt the chocolate: Melt your chocolate in the microwave in short bursts, stirring in between. Chocolate burns faster than you think, and burnt chocolate smells like defeat, so keep a close eye on it.
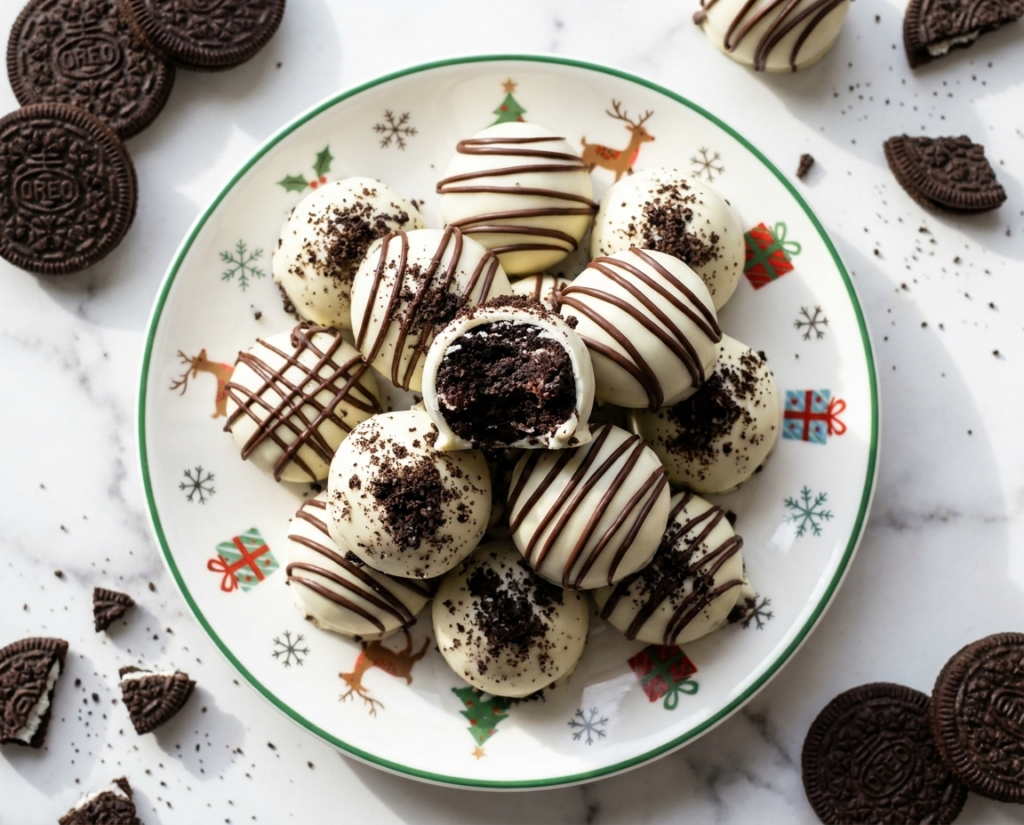
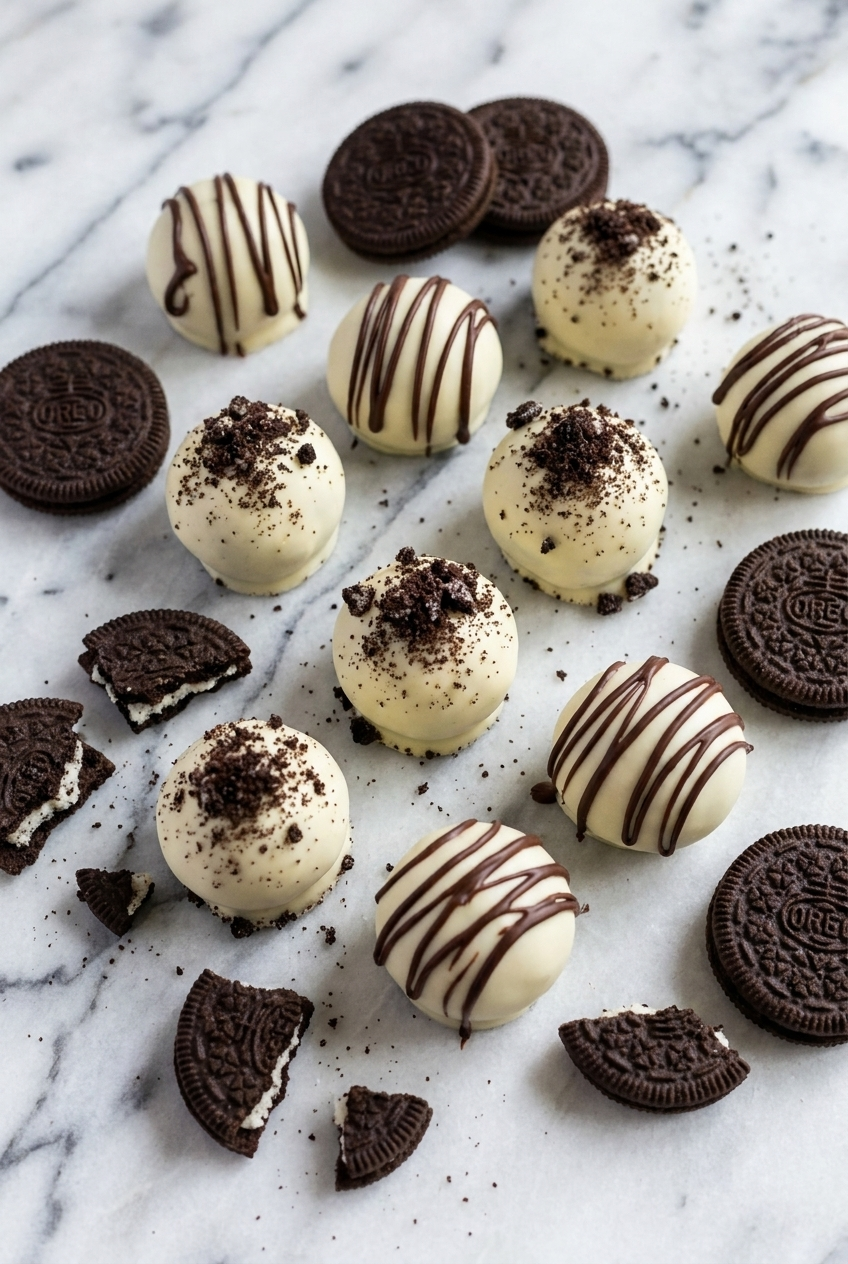
- Dip the truffles: Drop each chilled ball into the chocolate, lift it out with a fork, and tap off the excess before placing it back on the tray. They might not all be perfectly round, but a bumpy truffle tastes exactly the same as a smooth one.
- Decorate and set: Add your sprinkles or extra crumbs immediately before the chocolate hardens. The chocolate sets fast, so do not take a phone call in the middle of this step.
♥ The Misfit Tips!
- Chill the balls for the full hour before dipping. A warm truffle softens the moment it hits hot chocolate and loses its shape before it even makes it back to the tray. Cold balls hold firm through the whole dipping process.
- Soft cream cheese means left out for at least two hours, not microwaved for 20 seconds. Microwaved cream cheese turns greasy and uneven, and the dough never comes together the same way.
- Melt the chocolate in 20-second bursts, not one long blast. Chocolate goes from melted to scorched faster than you expect, and burnt chocolate cannot be fixed. Stir between every interval and pull it out while a few small lumps remain residual heat finishes the job.
Perfect Pairings
These go perfectly with whatever low-effort vibe you are currently channeling.
- A cold glass of milk – obviously.
- A dangerously strong cup of black coffee to balance out the intense sweetness.
- The dessert table at a holiday party where you want to look like you tried way harder than you actually did.
- A late-night Netflix binge when you need a tiny hit of chocolate.
Troubleshooting Guide
Something went sideways? Been there. Here is how to fix it.
- Problem: Why are my Oreo balls falling apart in the chocolate?
Why it happened: The dough was not cold enough, or your melted chocolate was way too thick and heavy.
Fix it: Pop the balls back in the freezer for 15 minutes, and stir a tiny bit of coconut oil into your chocolate to thin it out. It is fixable, I promise.
- Problem: Why did my chocolate coating crack in the fridge?
Why it happened: The temperature change was too extreme between the ice-cold truffle and the hot chocolate.
Fix it: Let the dipped balls sit at room temperature for a few minutes before moving them to the fridge. The cracked ones are still perfectly edible, just call them rustic.
- Problem: My dough is too dry and won’t roll into balls.
Why it happened: You might have accidentally bought the family size Oreos and used too many, throwing off the ratio.
Fix it: Splash in a tiny bit of milk, one teaspoon at a time, until the dough is sticky enough to hold together.
How to Store my Oreo balls
❤
- Counter. Up to 3 days in an airtight container. The chocolate shell stays firm at room temperature as long as your kitchen isn’t warm enough to melt it.
- Fridge. Up to 7 days covered tightly. This is actually the best way to store them cold Oreo balls have a firmer bite and the filling stays dense and creamy.
- Freezer. Up to 2 months in a zip-lock bag. Thaw overnight in the fridge. Counter thawing causes condensation on the chocolate shell, which makes the coating look streaky and dull.
- Storage note. Keep them away from strong-smelling foods in the fridge. Cream cheese absorbs surrounding odors fast, and a garlic-adjacent truffle is a mistake worth avoiding entirely.
Oreo Balls Recipe
Ingredients
Method
- Crush the cookiesPlace the Oreo cookies in a food processor and pulse until they become fine crumbs. A few larger pieces are completely fine. They add a little texture and nobody is bringing a microscope to dessert.
- Mix the fillingAdd the softened cream cheese to the cookie crumbs and mix until a thick, smooth dough forms. Make sure the cream cheese is fully softened so everything combines evenly without stubborn little lumps.
- Shape the Oreo ballsUse a small cookie scoop or spoon to portion the mixture into 1-inch balls. Roll them between your hands until smooth and place them on a parchment-lined baking sheet or tray.
- Chill until firmTransfer the tray to the refrigerator and chill for at least 1 hour. This step helps the balls hold their shape and makes dipping much easier later.
- Melt the chocolatePlace the chocolate in a microwave-safe bowl and heat in short intervals, stirring between each one until smooth. Chocolate has a remarkable ability to go from melted to ruined when nobody is paying attention.
- Dip the trufflesDrop each chilled Oreo ball into the melted chocolate. Use a fork to lift it out and gently tap away any excess coating before placing it back on the lined tray.
- Decorate while wetImmediately sprinkle with extra cookie crumbs, sprinkles, or a drizzle of chocolate before the coating sets. Once the chocolate hardens, decorations become significantly less cooperative.
- Let them setAllow the chocolate coating to fully harden at room temperature or place the tray in the refrigerator for a few minutes to speed things up.
- Serve and enjoyServe chilled or slightly cool. Rich chocolate, creamy cookie filling, and exactly the kind of dessert that mysteriously disappears faster than expected.