
Last December, I stood in my kitchen at 9 PM on a Tuesday, staring at a bag of candy canes and a package of Oreos as though they were a riddle I had to solve before bed. I had already burned a batch of sugar cookies that afternoon, the kind that looked like they belonged in a museum rather than my oven, and I refused to turn the oven on again. I made a candy cane lush instead.
This no bake peppermint layered dessert requires no oven time, no candy thermometer, and no upper-body strength. You crush Oreos for the crust, beat cream cheese with powdered sugar and milk, fold in whipped topping and crushed candy canes, then add white chocolate pudding. Chill the candy cane lush for at least 4 hours, then add the final candy cane topping just before serving. One 9×13 pan serves 12 people.
Why You’ll Love This Recipe
- No oven required: Make the dessert while the oven stays off.
- Fifteen minutes of actual work: The refrigerator handles the rest while you wrap presents or watch a movie.
- Feeds a crowd for cheap: One 9×13 pan serves 12 people.
- Kids can help: Children can crush candy canes in a zip-top bag.
- Make-ahead friendly: The dessert sets firmer after a night in the refrigerator.
Tools You’ll Need
Nothing fancy, I promise.
- Food processor: Crush the Oreos into crumbs. A zip-top bag and rolling pin work too.
- 9×13 baking dish: Use the standard size for this recipe. A glass dish shows the layers.
- Electric mixer: Beat the cream cheese until smooth. A hand mixer works well.
Ingredients
For the crust:
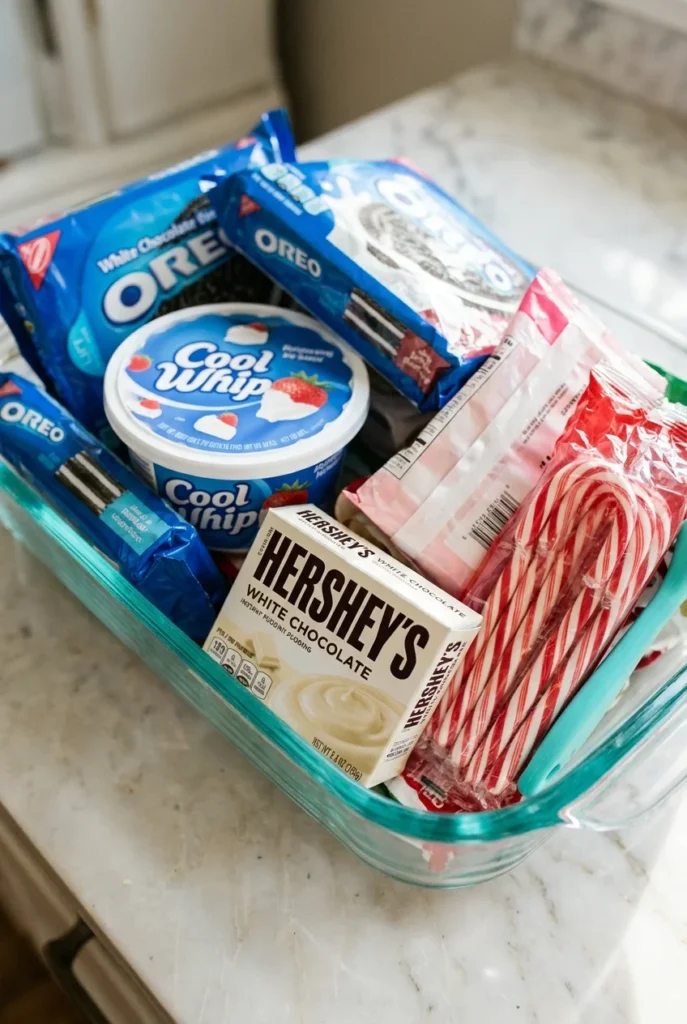
- 36 Oreo cookies, one 14-ounce package. Keep the filling in the cookies.
- 1/4 cup unsalted butter, melted, 1/2 stick. Let it cool slightly before mixing.
- 1/4 teaspoon salt. Skip it if you use salted butter.
For the layers:
- 1 (8-ounce) package cream cheese, softened. Room-temperature cream cheese creates smooth layers.
- 1/2 cup powdered sugar. Use confectioners’ sugar, not granulated sugar.
- 2 tablespoons milk. Any kind works.
- 1 (12-ounce) carton whipped topping, thawed, such as Cool Whip, divided. Thaw it in the refrigerator overnight.
- 3/4 cup crushed candy canes, divided. Crush them in a bag with a rolling pin.
- 2 (3.3-ounce each) packages white chocolate pudding mix. Vanilla pudding works as a substitute, though it changes the flavor slightly.
- 2 3/4 cups cold milk. Cold milk helps the pudding set properly.
How To Make Candy Cane Lush
Set aside about fifteen minutes of hands-on time, then let the fridge handle the rest. This is the kind of dessert that makes you look like you tried harder than you did.
- Make the crust: In a food processor, pulse cookies into fine crumbs. Add salt and melted butter and pulse just until combined. Press mixture into the bottom of a 9×13-inch baking dish. Chill while you prepare the filling. Tip: If you do not have a food processor, crush the cookies in a sealed bag with a rolling pin. A few bigger chunks are fine — they add texture.
- Beat the cream cheese: In a medium bowl, beat cream cheese with an electric mixer until smooth. Add powdered sugar and milk and beat until smooth, about 2 minutes. If it looks slightly lumpy, keep beating. It will smooth out. If it does not, no one will notice under the pudding layer.
- Add the peppermint layer: Fold in 1 cup of the whipped topping along with 1/2 cup of the crushed candy canes. Spread mixture over chilled crust. Do not stir too hard or you will deflate the whipped topping. Gentle folds are your friend.
- Add the pudding layer: In a clean bowl, whisk together the pudding mix and milk for 2 minutes until thickened. Spread over cream cheese layer. Let it sit for a minute before spreading so it thickens up and does not run into the cream cheese layer.
- Top and chill: Spread remaining whipped topping over the top. Cover dish with plastic wrap or foil and chill at least 4 hours. I know four hours feels like forever. It is not. Go wrap some presents. The wait is worth it.
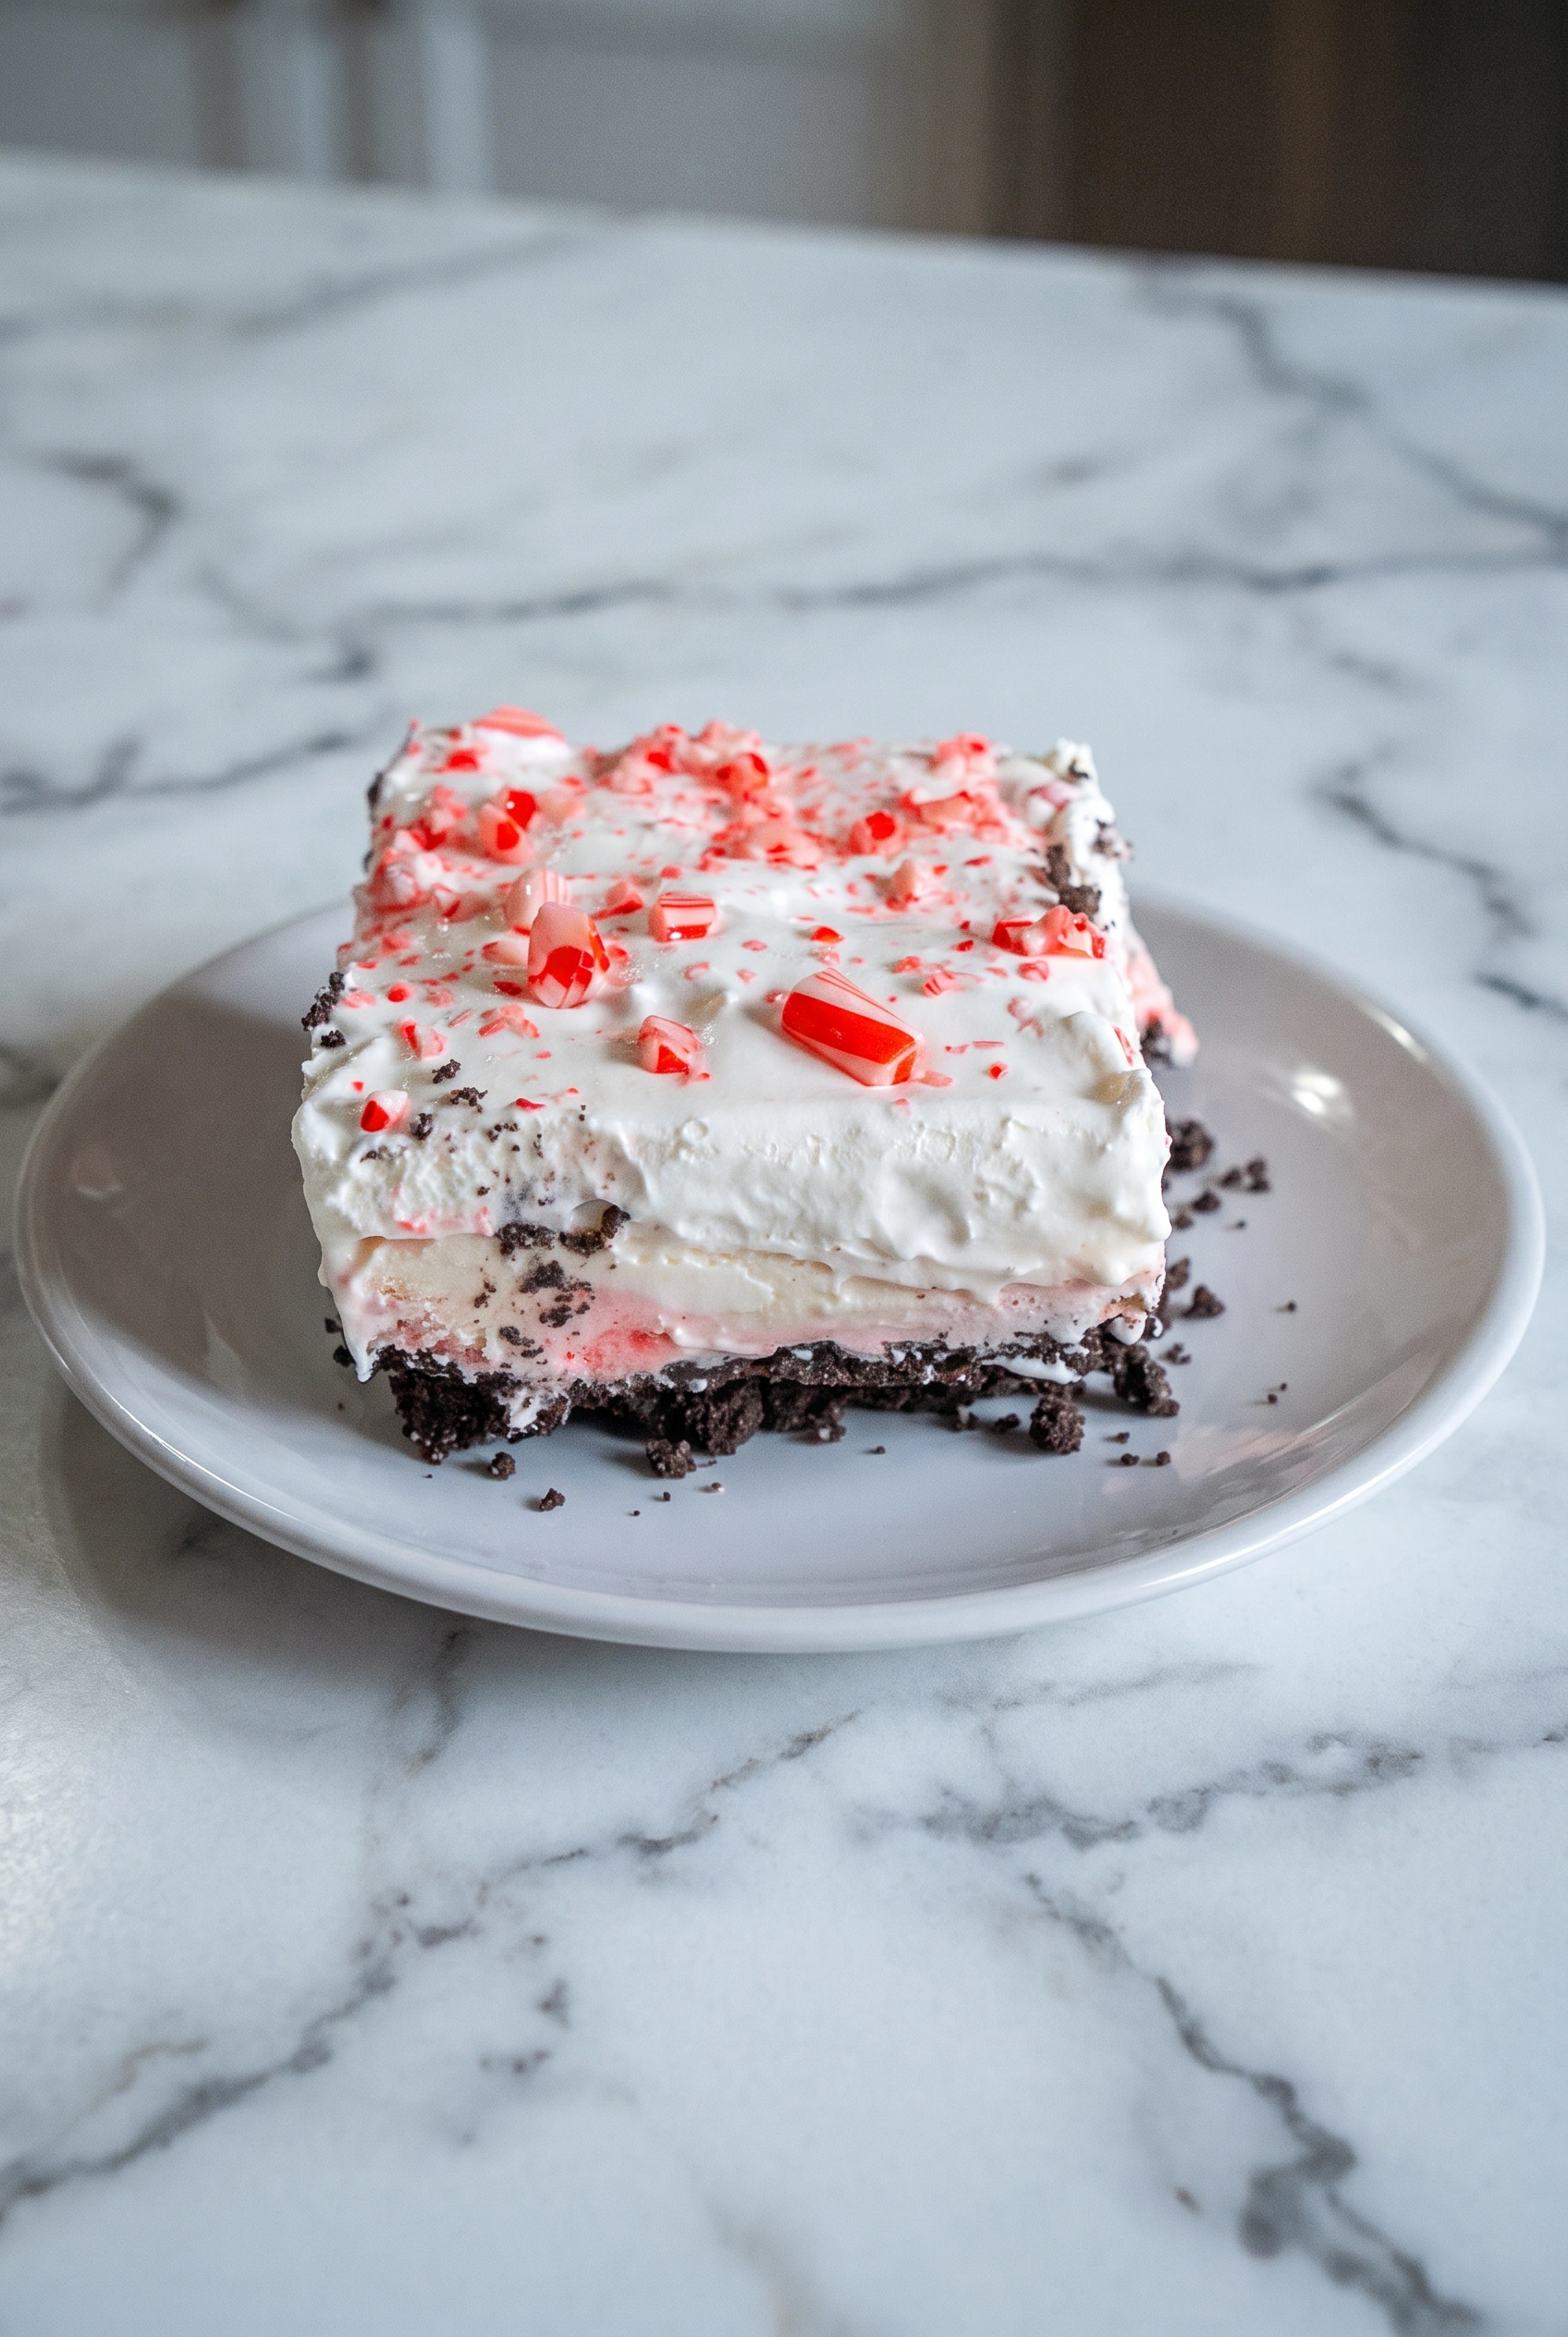
- Serve: When ready to serve, sprinkle with remaining crushed candy canes. Enjoy! Add the candy canes right before serving so they stay crunchy. If you add them early, they will soften and turn pink.
♥ The Misfit Tips!
- Chill the crust properly: I once tried to rush this step and spread the cream cheese layer on a barely-chilled crust. It slid around like a bumper car. Give it at least 15 minutes in the fridge while you make the filling. It makes a difference.
- Crush candy canes in a bag: I tried crushing them directly on a cutting board once. Candy cane shards flew across my kitchen like confetti. Use a zip-top bag and a rolling pin. Much safer and less sticky.
- Make it a day ahead: This dessert actually gets better after a night in the fridge. The layers set up firmer and the flavors meld. Just wait to add the final candy cane topping until right before serving. It is the ultimate make-ahead holiday lush dessert recipe.
Perfect Pairings
This holiday lush dessert recipe goes perfectly with anything that cuts through the creamy sweetness.
- A cold glass of milk cuts through the creamy sweetness.
- Hot cocoa with an extra candy cane stirred in doubles the peppermint flavor.
- A game day or potluck table gains a layered dessert that disappears before the chips do.
- Christmas Eve dinner becomes easier when you make the dessert the day before.
How to Store
❤
- Fridge: Cover the dessert tightly with plastic wrap or foil and store it for up to 3 days. The layers stay set, though the candy cane topping softens after the first day.
- Freezer: Wrap the dessert tightly and freeze it for up to 1 month. Thaw it in the refrigerator overnight. The texture becomes slightly firmer and slices more cleanly.
- Reheat: Do not reheat the dessert. Let it sit at room temperature for 5 minutes if it feels too firm from the refrigerator.
- Note: Store crushed candy canes separately and add them right before serving because they become sticky and dissolve.
Candy Cane Lush
Ingredients
Equipment
Method
- Make the CrustPlace the cookies in a food processor and pulse until they form fine crumbs. Add the salt and melted butter, then pulse just until the mixture is evenly combined. Press the mixture firmly into the bottom of a 9 × 13-inch baking dish, creating an even crust. Place the dish in the refrigerator to chill while you prepare the filling.Tip: If you do not have a food processor, place the cookies in a sealed bag and crush them with a rolling pin. A few larger pieces are fine and will add a little texture to the crust.
- Beat the Cream CheeseIn a large bowl, beat the cream cheese with an electric mixer until smooth and creamy. Add the powdered sugar and milk. Beat for about 2 minutes, scraping down the sides of the bowl as needed, until the mixture is smooth and well combined.
- Add the Peppermint LayerGently fold in 1 cup of the whipped topping and ½ cup of the crushed candy canes until evenly distributed. Spread the peppermint cream cheese mixture over the chilled crust, smoothing it into an even layer. Fold gently to keep the whipped topping light and airy.
- Add the Pudding LayerIn a clean bowl, whisk the pudding mix with the cold milk for 2 minutes, or until the mixture begins to thicken. Let the pudding stand for another minute to help it set slightly. Carefully spread the pudding over the cream cheese layer, taking care not to disturb the layer underneath.
- Top and ChillSpread the remaining whipped topping evenly over the pudding layer. Cover the dish with plastic wrap or aluminum foil and refrigerate for at least 4 hours, allowing the layers to set before serving.
- ServeSprinkle the remaining crushed candy canes over the dessert just before serving. Adding them at the last minute helps preserve their crunchy texture. If added too early, the candy canes may soften and bleed color into the whipped topping.