
Staring at a 9-inch pie dish on Thanksgiving eve while realizing I had entirely forgotten to buy pie weights and the thought of blind baking a crust made me want to cry into my mashed potatoes is exactly what led to these mini pumpkin pies.
They saved my sanity, and honestly, they are so much better because nobody has to awkwardly slice them while Uncle Bob breathes down their neck. If you have ever mangled the first slice of a pie and tried to patch it with whipped cream, this individual pumpkin pie recipe is your redemption. Here is exactly how I do it.
Why You’ll Love This Recipe
- No blind baking. You get all the flaky crust goodness without the absolute nightmare of pre-baking with beans or pie weights.
- Crowd-friendly. They are the ultimate bite size pumpkin pies for thanksgiving, meaning people can eat them while holding a drink.
- Crust ratio. The crust-to-filling ratio stays heavily skewed in favor of the crust, which we all know is the best part anyway.
- Speed. They bake and cool in a fraction of the time a massive pie takes, so you are not trapped in the kitchen all day.
Tools You’ll Need
Nothing fancy, I promise.
- 24-count mini muffin pan The absolute MVP of this easy mini pumpkin pie recipe. If you do not grease it well, you will be eating pumpkin pie crumbles.
- 2.5-inch cookie cutter. This stamps out the crusts, though a 1/3 measuring cup works if you cannot find your cutter.
- Hand mixer or whisk. A whisk works fine if you want an arm workout to justify the three pies you are about to eat.
Ingredients
- 2 unbaked discs of Pie Crust – Store-bought is fine, I will not tell a soul, just thaw it first.
- 1 and 1/4 cups (285g) pumpkin puree – Make sure it is pure pumpkin, not pumpkin pie filling, or things will get weirdly sweet.
- 3/4 cup (150g) packed light or dark brown sugar – Dark brown sugar gives it a deeper, molasses flavor.
- 1/2 cup (120ml) heavy cream – Do not try to swap this for skim milk unless you want pumpkin soup.
- 1/4 cup (60ml) whole milk – Adds just enough liquid without watering it down.
- 1 large egg – The binder that keeps this whole operation from falling apart.
- 1/4 teaspoon salt – To balance the sweetness.
- 1 teaspoon ground cinnamon – Because it is pumpkin pie, it is legally required.
- 1 teaspoon store-bought or homemade pumpkin pie spice – The heavy lifter of the flavor profile.
- small pinch black pepper – Trust me on this. It adds a background warmth that makes people go “wow, what is that?” (I learned this trick from King Arthur Baking and it is life-changing).
How To Make Mini Pumpkin Pies
Set your timer, grab your mini muffin pan, and prepare to feel like a domestic genius with minimal effort.
- Chill the dough: Make pie dough the night before because it needs to chill in the refrigerator for at least 2 hours before using. Do not skip the chill time, or your dough will stick to the counter and you will be scraping it off with a spatula while cursing my name.
- Mix the filling: In a large bowl with a handheld or stand mixer fitted with a whisk attachment or simply using a whisk and mixing bowl beat/whisk the pumpkin, brown sugar, heavy cream, milk, egg, salt, cinnamon, pumpkin pie spice, and black pepper together until completely combined, about 2 minutes. If a few lumps of brown sugar survive, that is just a little caramel surprise for later.
- Prep the pans: Preheat oven to 375°F (191°C). Grease two 24-count mini muffin pans. Nonstick spray is your best friend here; spray it like you are trying to waterproof a tent.
- Cut the crusts: Working with 1 chilled pie dough at a time, place the dough onto a floured work surface. Roll into a large 12-inch circle. From the circle, cut rounds using a 2.5 inch cookie cutter. You will have to re-roll the scraps, which means the last few will look a little rustic, and that is perfectly fine.
- Press into pans: Place the dough rounds into greased 24-count mini muffin pan(s). Press the dough flat into the bottom of the crevice and up the sides. If your fingernails poke holes in the dough, just smush it back together with your thumb.
- Add the filling: Evenly spoon cold filling into each unbaked crust, filling to the top. Spoon it, do not pour it, unless you want to spend twenty minutes scrubbing baked-on egg off your pan.
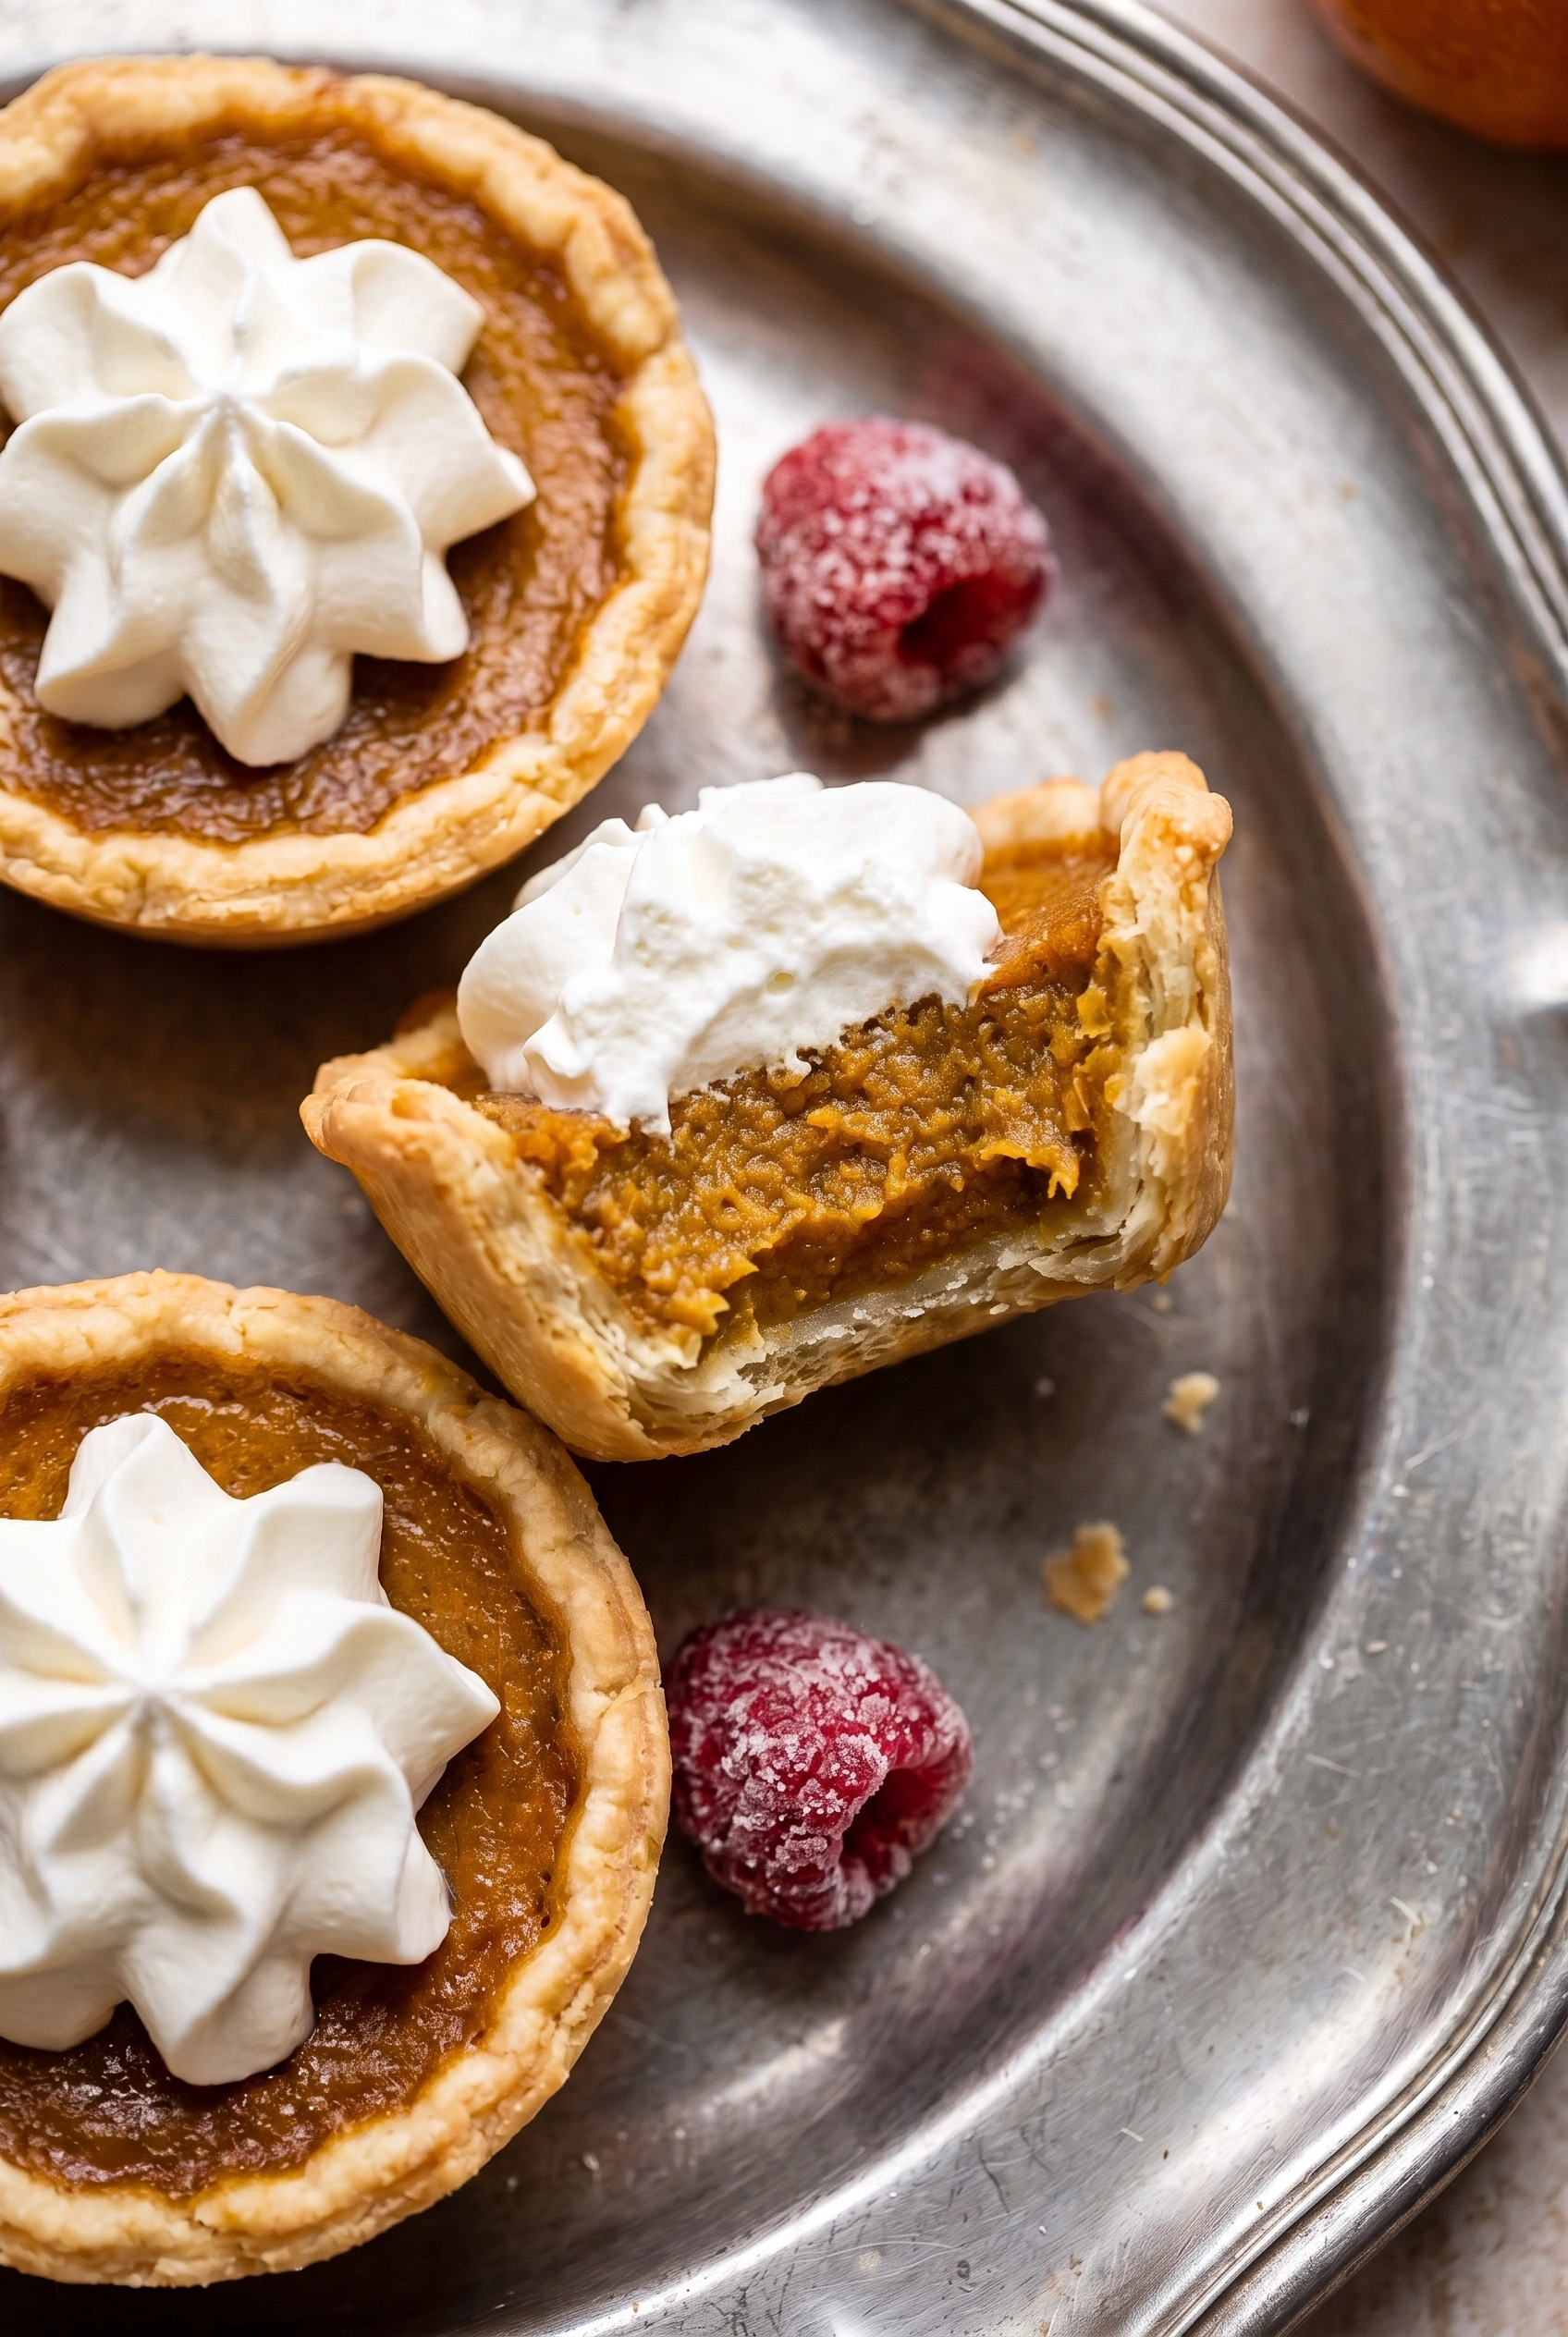
- Bake: Bake mini pies until the center is just about set and edges are lightly browned, about 21–25 minutes. They will puff up and then deflate a bit as they cool do not panic, this leaves the perfect crater for whipped cream.
- Cool and serve: Allow to cool for 5 minutes before removing from the pan. If you try to pop them out immediately, you will have a hot pumpkin lava mess on your hands.
♥ The Misfit Tips!
- Do not overfill the crusts I once got greedy and filled these past the crust line. The filling bubbled over, baked onto the pan, and effectively glued the pies into their little metal prisons. Leave a tiny gap at the top.
- Use cold dough If your kitchen is hot and the dough gets sticky, throw it back in the fridge for 10 minutes. Warm dough shrinks in the oven, leaving you with pumpkin puddles.
- The black pepper matters I thought it was a typo the first time I saw it. I skipped it. The next time, I added it. The tiny pinch of pepper cuts the sweetness and makes these the best thanksgiving mini desserts you will ever make.
Make it yours
- Maple version. You swap brown sugar for maple sugar for a different sweetness profile in this individual pumpkin pie recipe.
- Bourbon version. You add a tablespoon of bourbon to the filling for a richer, adult twist on these thanksgiving mini desserts.
Perfect Pairings
These go perfectly with basically anything that involves whipped cream and avoiding family drama.
- A strong cup of black coffee offsets all that rich brown sugar.
- A quiet moment in the pantry where you eat three of them before anyone else realizes they are ready rounds out the whole experience.
How to Store Mini Pumpkin Pies
❤
- Fridge. Up to 5 days in an airtight container, though the crust softens slightly over time.
- Freezer. Up to 3 months layered between parchment paper in a freezer-safe container, thawed at room temperature.
- Reheat. Serving them cold or at room temperature works best, and a toaster oven on low for a few minutes warms them without turning the crust soggy.
- Storage note. Adding whipped cream right before serving prevents it from melting into a sad milky puddle in the fridge.
Mini Pumpkin Pies
Ingredients
Equipment
Method
- I like to make sure my pie dough is prepared before I begin the mini pies. Make pie dough the night before because it needs to chill in the refrigerator for at least 2 hours before using.
- In a large bowl with a handheld or stand mixer fitted with a whisk attachment or simply using a whisk and mixing bowl beat/whisk the pumpkin, brown sugar, heavy cream, milk, egg, salt, cinnamon, pumpkin pie spice, and black pepper together (on medium high speed if using a mixer) until completely combined, about 2 minutes. You’ll have about 3 cups of filling. Cover and refrigerate filling until step 6.
- Preheat oven to 375°F (191°C). Grease two 24-count mini muffin pans. Nonstick spray is best. (If you only have 1 mini muffin pan, bake these in batches. Roll out first pie dough, shape, fill, and bake then roll out the second pie dough, shape, fill, and bake.)
- Working with 1 chilled pie dough at a time, place the dough onto a floured work surface. Roll into a large 12-inch circle. Use your warm hands to mold any cracking edges back together if needed. From the circle, cut rounds using a 2.5 inch cookie cutter. (Sometimes I use my 1/3 cup measuring cup, which is 2.5 inches in diameter.) You’ll have to re-roll the dough scraps a few times. Work quickly, as the dough becomes much more delicate the longer it’s at room temperature. You’ll get about 24 rounds per pie crust. Repeat with 2nd chilled pie dough for a total of about 48.
- Place the dough rounds into greased 24-count mini muffin pan(s). Press the dough flat into the bottom of the crevice and up the sides.
- Evenly spoon cold filling into each unbaked crust, filling to the top.
- Bake mini pies until the center is just about set and edges are lightly browned, about 21–25 minutes. Allow to cool for 5 minutes before removing from the pan. If greased well, the mini pies pop right out using a spoon to scoop them up. Cool, then serve at room temperature or refrigerate until chilled and serve cold. Filling deflates a bit as they cool. Top with whipped cream if desired. (Also pictured are sugared cranberries.)
- Cover leftover pies tightly and store in the refrigerator for up to 5 days.