
I made these Nutella brownies at 11pm on a Tuesday because I found a half-empty jar hiding behind the peanut butter, and the idea of eating it with a spoon felt slightly too sad even for me.
These easy Nutella brownies have become my favorite last-minute dessert. They are rich, fudgy, packed with chocolate hazelnut flavor, and require just one bowl. If you are searching for a Nutella brownies recipe that delivers bakery-style results without complicated steps, this one checks every box.
I usually manage to overbake brownies into chocolate bricks, but these homemade Nutella brownies are almost impossible to mess up. The Nutella does all the heavy lifting, creating an incredibly soft, chewy texture with very little effort. If you love fudgy Nutella brownies, grab that jar and let’s get started.
reader review
“Made these on a whim because I had half a jar of Nutella sitting around, and wow. One bowl, no cocoa powder, and the fudgiest brownies I’ve ever pulled out of my oven. The swirl on top made them look like I actually tried. My kids inhaled the whole pan in one evening. This is my forever brownie recipe now!” Danielle R.
Loved this too? Add your reviewWhy You’ll Love This Recipe
- One-bowl wonder – You only need a single mixing bowl, which means you will not spend the rest of your evening aggressively scrubbing dishes.
- Zero cocoa powder needed – All the intense chocolate flavor comes straight from the jar, saving you a trip to the grocery store.
- Dangerously fast – You can go from craving chocolate to pulling a warm pan out of the oven in under 45 minutes.
- Extremely fudgy – There is barely any flour in this batter, resulting in an incredibly dense, chewy texture that puts boxed mixes to shame.
Tools You’ll Need
Nothing fancy, I promise.
- 8×8 or 9×9 Baking Pan – I prefer the 8×8 for thicker slices, but use whatever you have hiding in your cabinet.
- Parchment Paper – Do not skip this unless you enjoy chiseling baked goods out of corners with a butter knife.
- Hand Mixer – You could technically whisk this by hand, but your arm will hate you for it.
Instructions
Throw out your boxed mix, because this is about to become your new personality.
- Prep your station: Preheat your oven to 350°F and line your pan with parchment paper, leaving a little overhang. That overhang is your handle to pull the brownies out later—if you skip it, you will be eating these straight out of the pan like an animal.
- Cream the butter and sugar: Beat the softened butter for about a minute until smooth, then add the brown sugar and beat until creamed. Scrape the bowl down, because butter loves to hide at the bottom just to mock you later.
- Add the wet ingredients: Mix in the eggs and vanilla on medium-high until combined, then beat in exactly 1 cup of the Nutella and the salt. It will look unbelievably thick and glossy, which is exactly what you want.
- Fold in the dry: Turn your mixer to low and add the flour, mixing just until you cannot see white streaks anymore. Do not overmix this, or you will bake a tough chocolate sponge instead of a fudgy brownie. Fold in the chocolate chips if you are using them.
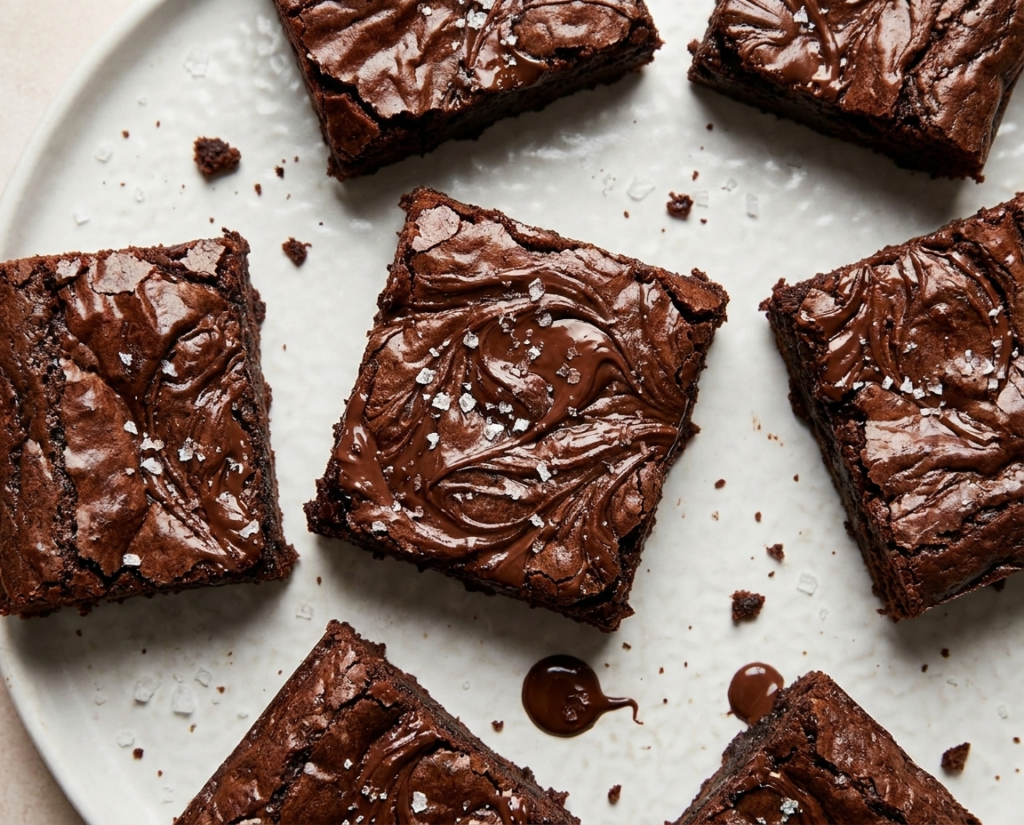
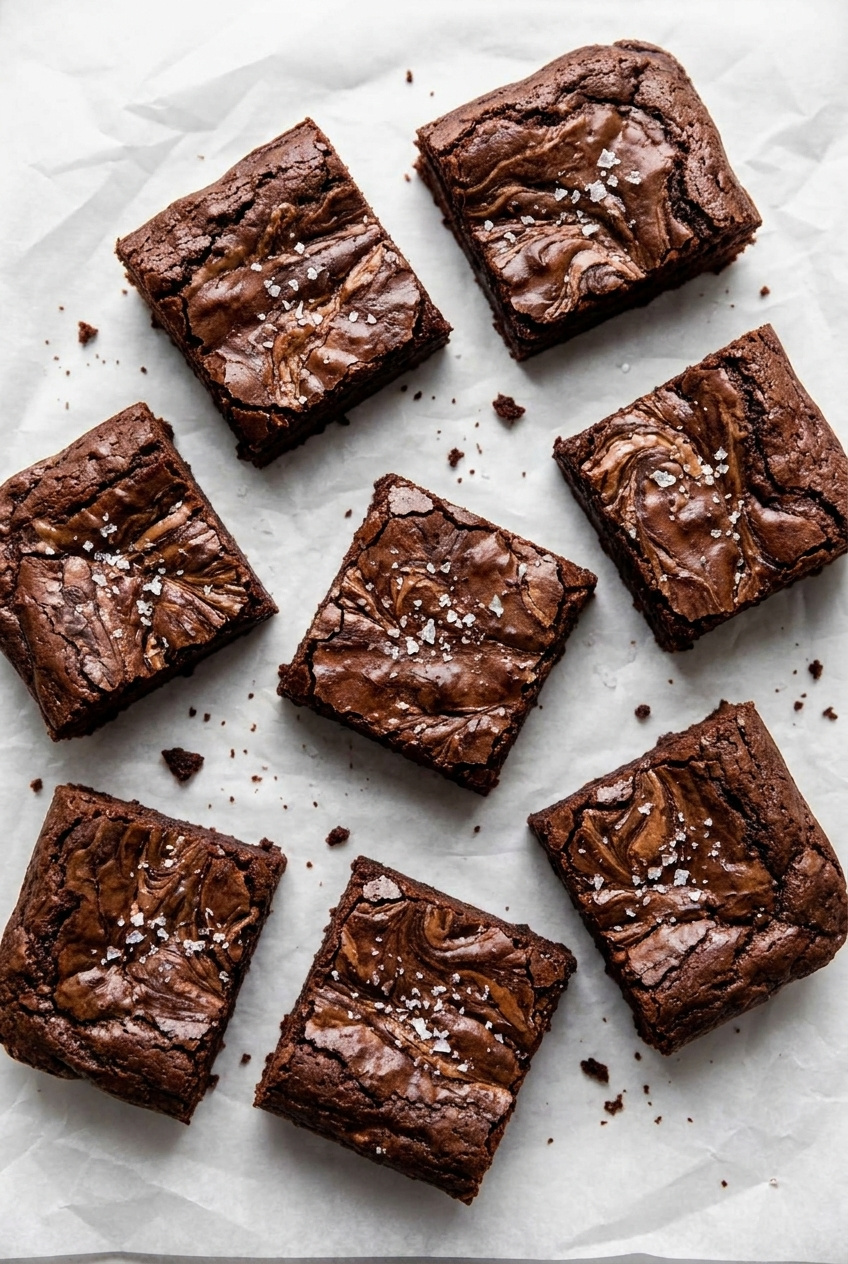
- The swirl: Pour the batter into your lined pan. Drop little spoonfuls of the remaining 1/4 cup of Nutella all over the top, then drag a butter knife through them to make pretty swirls. It does not have to be perfect—mine usually looks like a toddler’s finger painting.
- Bake and wait: Bake for 32-36 minutes. A toothpick should come out with a few moist crumbs, not wet batter. Let them cool completely in the pan before lifting them out. I know waiting is torture, but hot brownies will fall apart if you try to cut them.
♥ The Misfit Tips!
- Let them cool completely before cutting. Warm brownies look done but they’re still setting in the center. Cut them too early and you get a fudgy collapse instead of a clean slice.
- Softened butter means soft enough to dent with your finger, not melted. Melted butter changes the fat structure and produces a greasier, denser result. Leave the butter out for an hour before starting.
- Pull them from the oven when the toothpick shows moist crumbs, not clean. A clean toothpick means you already overbaked them. Moist crumbs mean fudgy. That’s the whole goal.
Troubleshooting Guide
Something went sideways? Been there. Here is how to fix it.
- Problem: Why are my brownies hard on the edges?
Why it happened: Your oven runs hot, or you left them in a few minutes too long.
Fix it: Cut the edges off and save them to crumble over ice cream. The middle pieces will still be totally fine.
- Problem: The center is completely raw and sinking.
Why it happened: They are underbaked. The edges cooked, but the middle needed more time.
Fix it: If you already cut into them, it is too late to bake. Scoop out the gooey center, microwave it in a mug for 30 seconds, and call it a molten lava cake.
- Problem: The Nutella swirl on top just looks like a messy blob.
Why it happened: You swirled too aggressively or the Nutella was too cold.
Fix it: Literally nobody cares what it looks like once it is in their mouth. Next time, microwave the 1/4 cup of Nutella for 10 seconds before swirling so it glides easier.
Perfect Pairings
These go perfectly with…
- A freezing cold glass of whole milk – obviously.
- A massive scoop of vanilla bean ice cream while the brownies are still warm enough to melt it.
- Your next desperate weeknight sugar craving when you refuse to leave the house.
- A strong cup of black coffee to cut through the intense sweetness.
How to Store Nutella Brownies
❤
- Counter. Up to 4 days in an airtight container at room temperature. Stack them with a sheet of parchment between layers so they don’t fuse into one sad chocolate block.
- Fridge. Up to 7 days covered tightly. Cold brownies firm up considerably, so pull them out 20 minutes before eating or microwave one for 10 seconds.
- Freezer. Up to 3 months, wrapped individually in plastic wrap then stored in a zip-lock bag. Thaw overnight in the fridge or 30 minutes on the counter. They come out tasting freshly baked.
- Storage note. Keep them away from strong-smelling foods. Brownies absorb surrounding odors fast, and onion-adjacent chocolate is a mistake you only make once.
Nutella Brownies
Ingredients
Method
Prepare the pan
Preheat your oven to 350°F (175°C). Line your baking pan with parchment paper, leaving a little overhang on the sides. Future-you will appreciate not having to excavate brownies from the corners.Cream butter and sugar
Beat the softened butter until smooth. Add the brown sugar and continue mixing until light and creamy. Scrape down the bowl because butter has a habit of hiding where it is least helpful.Add the wet ingredients
Mix in the eggs and vanilla extract. Add 1 cup of Nutella and the salt, then beat until smooth and glossy.For more information about chocolate hazelnut spread ingredients, visit Nutella Official Website.Add the flour
Mix in the flour on low speed just until combined. Avoid overmixing if you want perfectly fudgy Nutella brownies instead of cake-like brownies.Fold in the chocolate chips if using.Create the Nutella swirl
Spread the brownie batter into the prepared pan. Spoon the remaining Nutella over the surface and use a butter knife to create swirls throughout the top.Messy swirls still count as swirls.Bake
Bake for 32 to 36 minutes, or until a toothpick inserted near the center comes out with a few moist crumbs attached.Cool completely
Allow the brownies to cool completely before slicing. This helps the brownies set properly and creates that dense, chewy texture everyone loves.