
I made these grinch cake pops at 11 PM on a Tuesday because I found a bag of green candy melts in the back of my pantry and the idea of turning on the oven felt genuinely offensive. My first batch looked less like the Grinch and more like a swamp creature having a rough day. My husband walked into the kitchen, stared at the tray, and asked whether I made “Shrek on a stick.”
After a few tweaks, these little green cake pops turned out well enough that I brought them to my kid’s class party and three parents asked for the recipe. This holiday cake pop recipe uses vanilla cake mix, vanilla frosting, green candy melts, coconut oil, and candy melt face details. You bake the cake, crumble it with frosting, roll it into 1-inch balls, chill them, dip them in green candy coating, and decorate them as the Grinch. No oven required after the cake bakes.
Why You’ll Love This Recipe
- No oven required after baking: The refrigerator and microwave handle the rest.
- Kids lose their minds: A green ball on a stick makes children excited.
- Budget-friendly: A box of cake mix and candy melts cost less than one bakery cake pop.
- Make-ahead friendly: Roll the pops days ahead and dip them the morning of the party.
- Festive Grinch design: Green coating, candy face details, and optional heart sprinkles create the theme.
Tools You’ll Need
Nothing fancy, I promise.
- Cookie scoop: Portion uniform balls so they chill and dip evenly. A tablespoon works too.
- Lollipop sticks: Use paper or plastic sticks. Plastic holds up better in thick candy coating.
- Styrofoam block or tall glass: Stand the pops upright while they set.
Ingredients
- 1 box vanilla cake mix, 15.25 ounces, plus the eggs, oil, and water the package calls for.
- 1/2 cup vanilla frosting. Store-bought frosting works.
- 12 ounces green candy melts. Tint white candy melts with gel food coloring if you cannot find green.
- 2 tablespoons coconut oil or shortening. This thins the melted candy coating.
- Black and red candy melts or icing, for the face details.
- Heart sprinkles, optional, for the small heart detail
How To Make Grinch Cake Pops
Bake the cake, crumble it, mix with frosting, roll, chill, dip, and decorate. If you can make a mess and wait patiently, you can do this.
- Bake the cake: Prepare the cake mix according to the package directions in a 9×13 pan. Let it cool completely. If you try to crumble it warm, you will get a sticky paste. Trust me, I have been there.
- Crumble and mix: Once cool, crumble the cake into fine crumbs in a large bowl. Add the frosting and mix with your hands until it holds together when squeezed. If it is too dry, add a tablespoon more frosting.
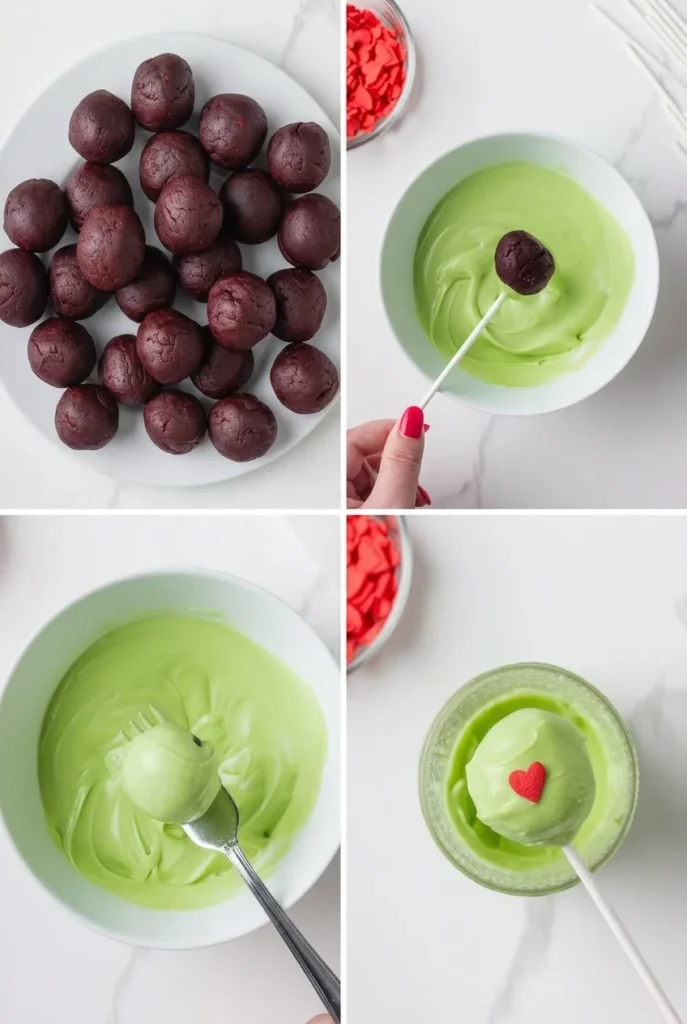
- Roll the balls: Use a small cookie scoop to portion out the mixture, then roll into 1-inch balls. Place them on a parchment-lined baking sheet. If they look lumpy, that is fine. The coating hides a multitude of sins.
- Chill: Refrigerate the balls for at least 30 minutes, or freeze for 15. Cold balls hold their shape when you dip them. Warm ones slide off the stick and ruin your life.
- Melt the candy: Melt the green candy melts with the coconut oil in a microwave-safe bowl in 30-second bursts, stirring between each, until smooth. Do not overheat or it seizes up. If it does, a teaspoon of coconut oil can sometimes save it.
- Dip and decorate: Dip the tip of a lollipop stick into the melted candy, then insert it halfway into a chilled cake ball. Dip the ball into the green candy, gently tap off excess, and stand it upright in a styrofoam block. Before the coating sets, add the face details with black and red icing or small candy pieces. Let them set at room temperature or in the fridge.
♥ The Misfit Tips!
- Do not skip the chill: Give the balls the full 30 minutes in the refrigerator before dipping.
- Thin the candy melts: Add a little more coconut oil if the coating feels thick like peanut butter.
- Make the faces after dipping: Add the details when the green coating turns tacky but not wet.
- Make them ahead: Store the finished pops in the refrigerator for a day, then bring them to room temperature before serving.
- Use a candy-coated stick: Dip the stick in melted candy before inserting it so it acts like glue
Perfect Pairings
These go perfectly with anything that involves sitting on a couch and pretending you are not eating your fourth one.
- A cold glass of milk balances a sweet cake pop.
- Hot cocoa with extra marshmallows turns dipping into an experience.
- A game day spread makes these grinch cake pops for christmas parties disappear faster than chips and dip.
- A holiday movie marathon feels complete when the Grinch appears on screen.
How to Store
❤
- Fridge: Store the cake pops in an airtight container for up to 5 days. The coating may sweat slightly, but they still taste great.
- Freezer: Freeze the pops in a single layer in a freezer bag for up to 2 months. Thaw them in the refrigerator overnight.
- Reheat: Do not reheat the cake pops. Serve them cold or at room temperature.
- Note: Keep perishable frosting or decorations refrigerated. The candy coating remains shelf-stable, but the cake inside does not.
Grinch Cake Pop Recipe
Ingredients
Equipment
Method
- Bake and Prepare the CakeBake the cake according to the package directions in a 9 × 13-inch pan. Remove it from the oven and let it cool for 2 minutes. Trim away any brown edges, then carefully transfer the hot cake to the bowl of a stand mixer using oven mitts.Mix on low speed until the cake is finely crumbled and the mixture holds together well enough to form a ball.
- Shape the Cake PopsUse a cake pop press or medium cookie scoop to portion the cake mixture. Roll each portion into a smooth ball and place it on a plate. Repeat until all the mixture has been shaped. Freeze the cake balls for about 10 minutes to help them firm up before dipping.
- Melt the ChocolateJust before removing the cake balls from the freezer, place the chocolate wafers in a microwave-safe bowl. Heat for 30 seconds, then stir. Continue heating in short intervals, stirring between each one, until the chocolate is smooth and fully melted.
- Attach the SticksDip the tip of each lollipop stick into the melted chocolate, then insert it into the center of a cake ball. Return the cake pops to the refrigerator or freezer until the chocolate around the sticks has set.
- Dip the Cake PopsPour the melted chocolate into a tall glass or narrow jar. Dip each cake pop until completely coated, then gently tap the stick against the edge of the container to remove excess chocolate. You can also gently spin the cake pop to help the excess drip off.
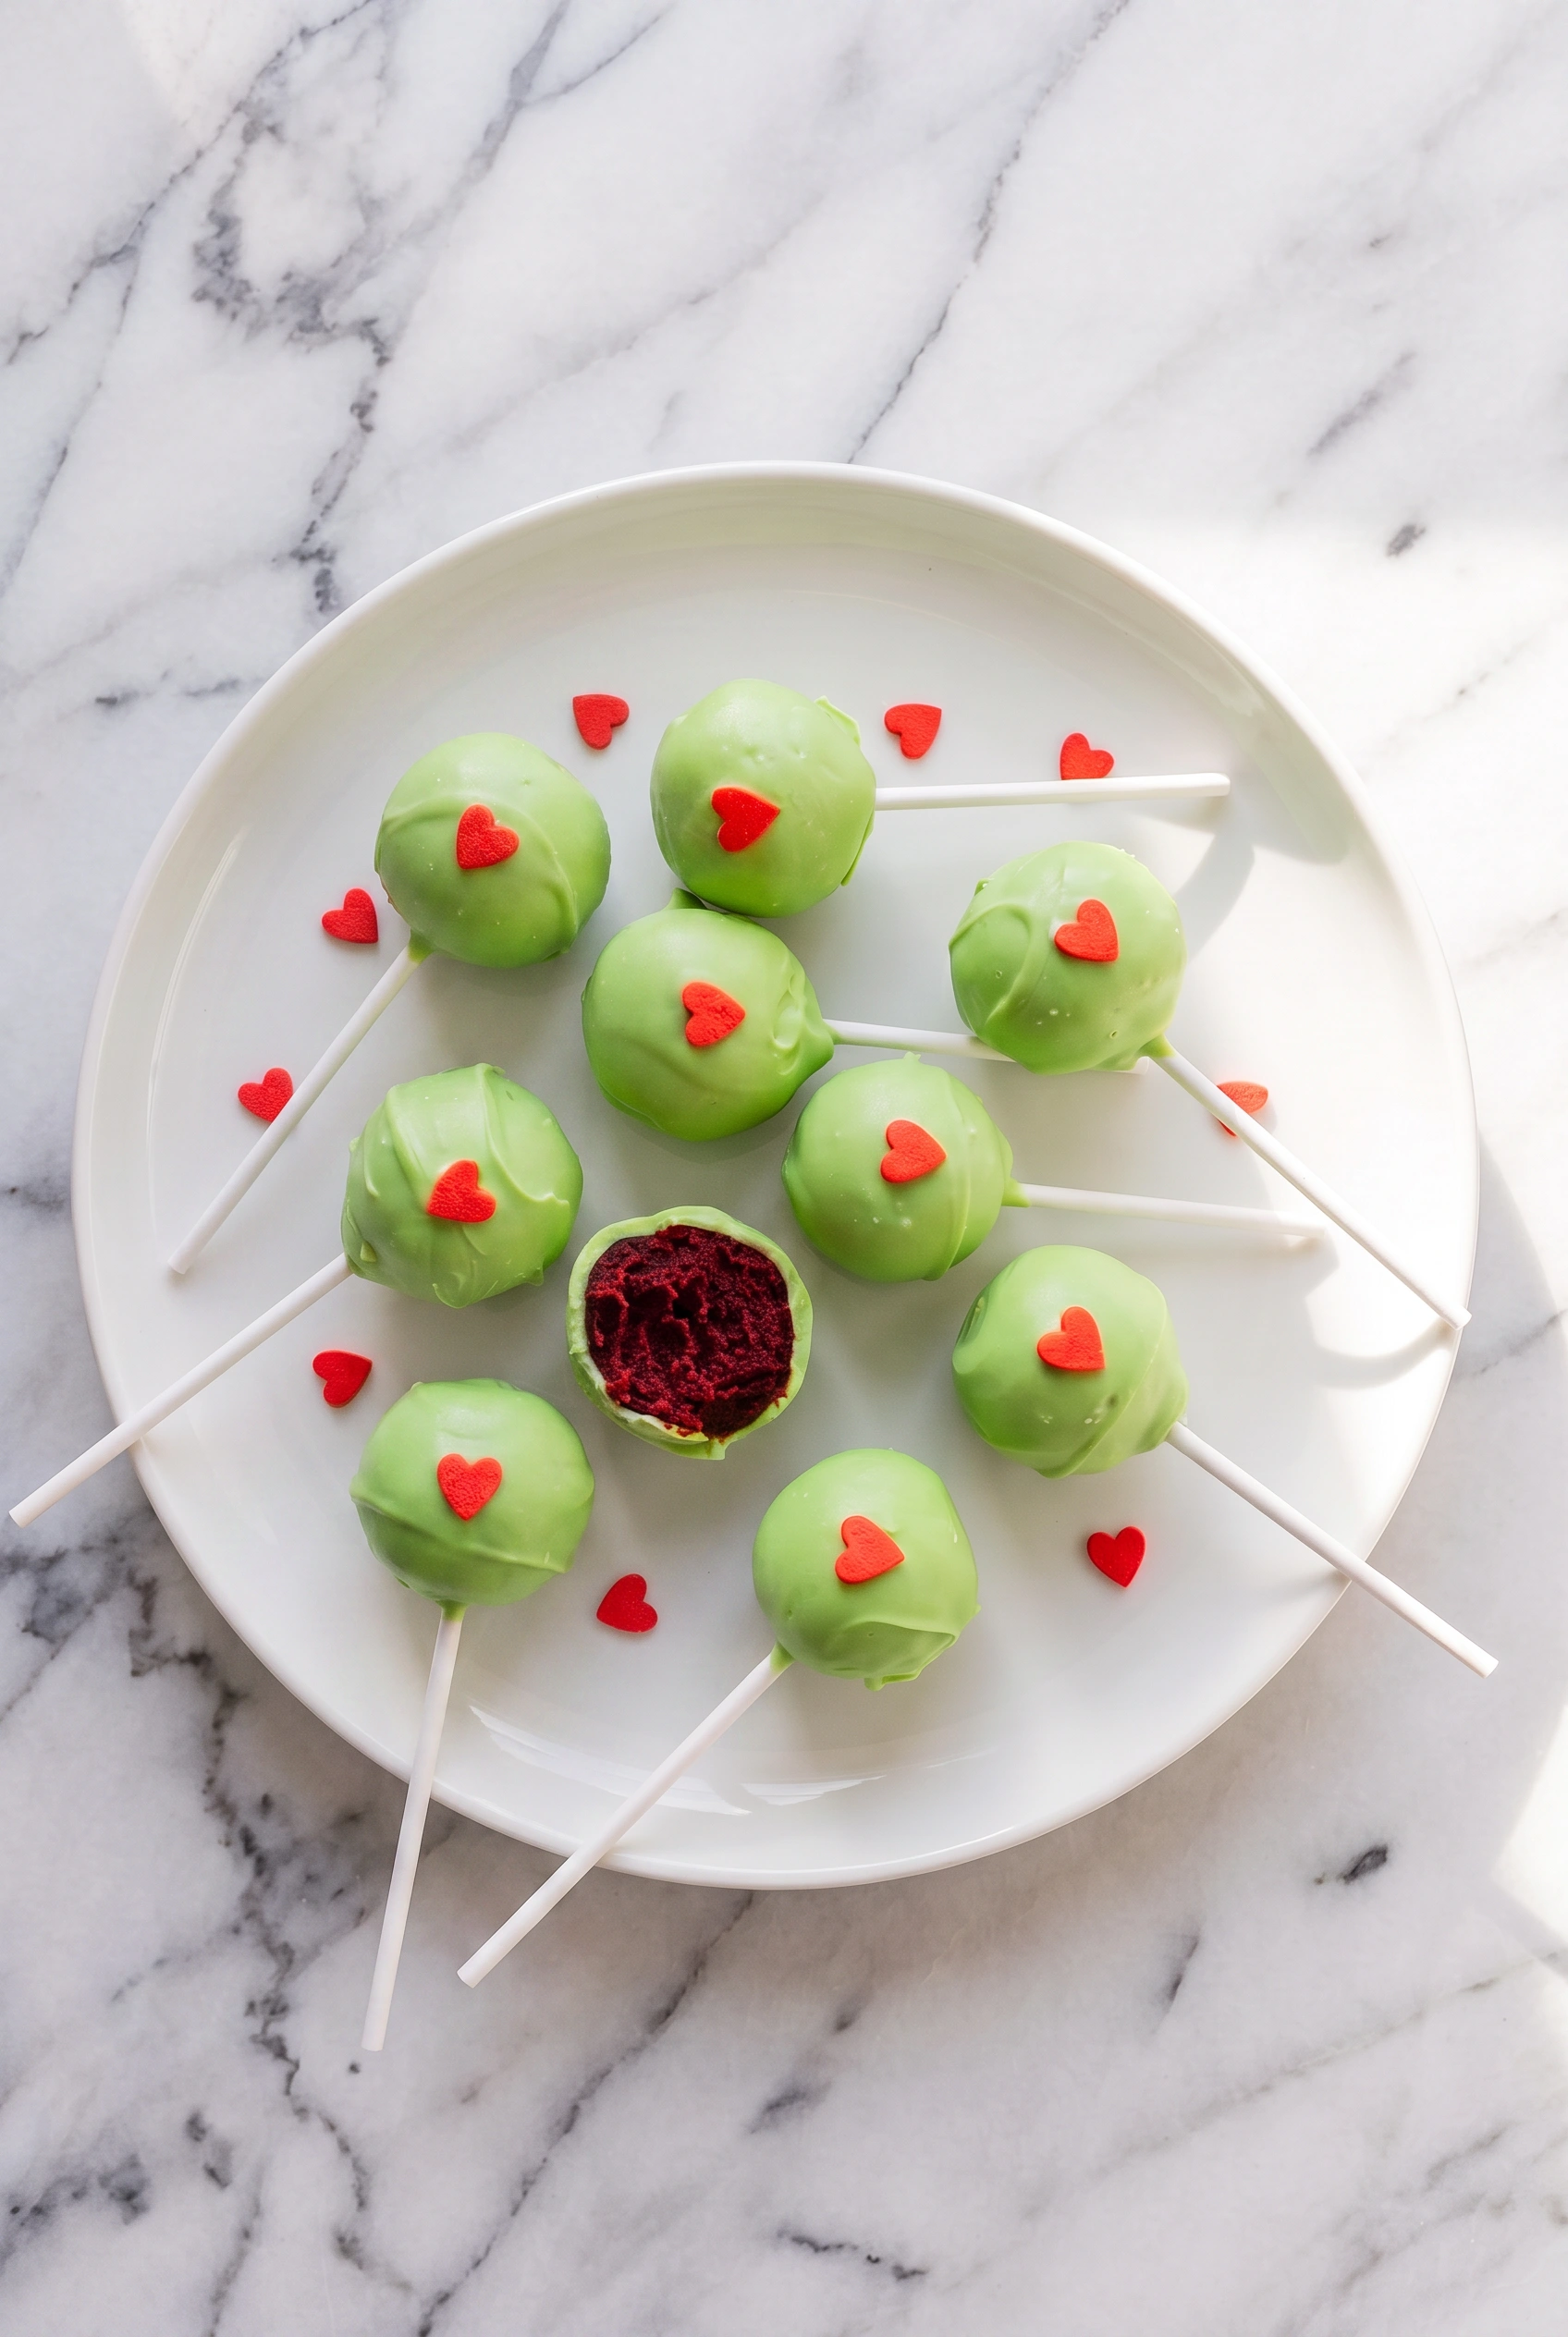
- Decorate and SetBefore the chocolate hardens, place a heart-shaped sprinkle in the center of each cake pop. Insert the sticks into a Styrofoam block or stand them upright in a glass filled with rice. Allow the chocolate coating to set completely, which takes about 1 hour.
- Store the Cake PopsStore the finished cake pops in an airtight container in a cool place for 3 to 4 days.