
Halloween treats are always more fun when they are cute, spooky, and easy to make. These Marshmallow Mummies are a playful little dessert that brings plenty of Halloween spirit to the table. I love making them because their adorable mummy design makes them perfect for Halloween parties, school celebrations, or a fun afternoon of baking with the family.
They are sweet, festive, and easy to add to a Halloween dessert spread. Whether you are making treats for kids or simply want something fun for your Halloween table, these Marshmallow Mummies are sure to bring a few smiles.
Why You’ll Love This Recipe
- Zero baking required: You need only a microwave and about fifteen minutes of active work.
- Three simple ingredients: Cereal treats, marshmallows, and candy eyes cover the main shopping list.
- Extremely kid-friendly: Children can help stretch the sticky marshmallow webs.
- Budget-friendly: One package creates a whole platter of spooky treats.
- Portable: Popsicle sticks make the mummies easy to carry and serve.
- Make-ahead friendly: You can prepare the treats the day before the party.
Tools You’ll Need
Nothing fancy, I promise.
- popsicle sticks You need these to turn the treats into lollipops, but if you don’t have them, you can just leave the mummies flat on a plate.
- Microwave-safe plate: A plate holds the marshmallow while it softens.
- Parchment paper: Parchment prevents the mummies from sticking.
- Airtight container: A container protects the marshmallow bandages during storage.
- Small bowl of cooking oil: A little oil can prevent sticky fingers.
Ingredients
- 8 each Rice Krispies Treats I use the pre-packaged ones to save time, but homemade works if you are feeling ambitious.
- 4 jumbo marshmallows Standard marshmallows work fine if you do not have the jumbo ones, you just might need a few extra.
- 16 candy eyeballs Crucial for the mummy effect, though mini chocolate chips can work in a pinch.
- 8 popsicle sticks Technically a tool, but essential for the full lollipop experience.
How To Make Marshmallow Mummies
Grab your microwave and prepare to get your hands gloriously sticky.
- Prep the bodies: Unwrap the Rice Krispies Treats and insert a popsicle stick into the bottom of each one. Gently press and shape the treats around the sticks in the shape of a mummy’s body and head. Do not push the stick all the way through the top, or your mummy will have a weird wooden antenna.
- Add the eyes: Press 2 candy eyeballs into the front of each Rice Krispies Treat near the top. Refrigerate for 1 hour to allow the treats to firm up on the popsicle stick. If they look a little crooked, they are monsters, it is totally fine.
- Melt the marshmallow: Place a jumbo marshmallow on a microwave-safe plate and microwave for 10 seconds, or until softened and very stretchy. Allow it to cool just enough to safely handle. Do not walk away from the microwave, ten seconds is literally all it takes before it expands into a sticky cloud.
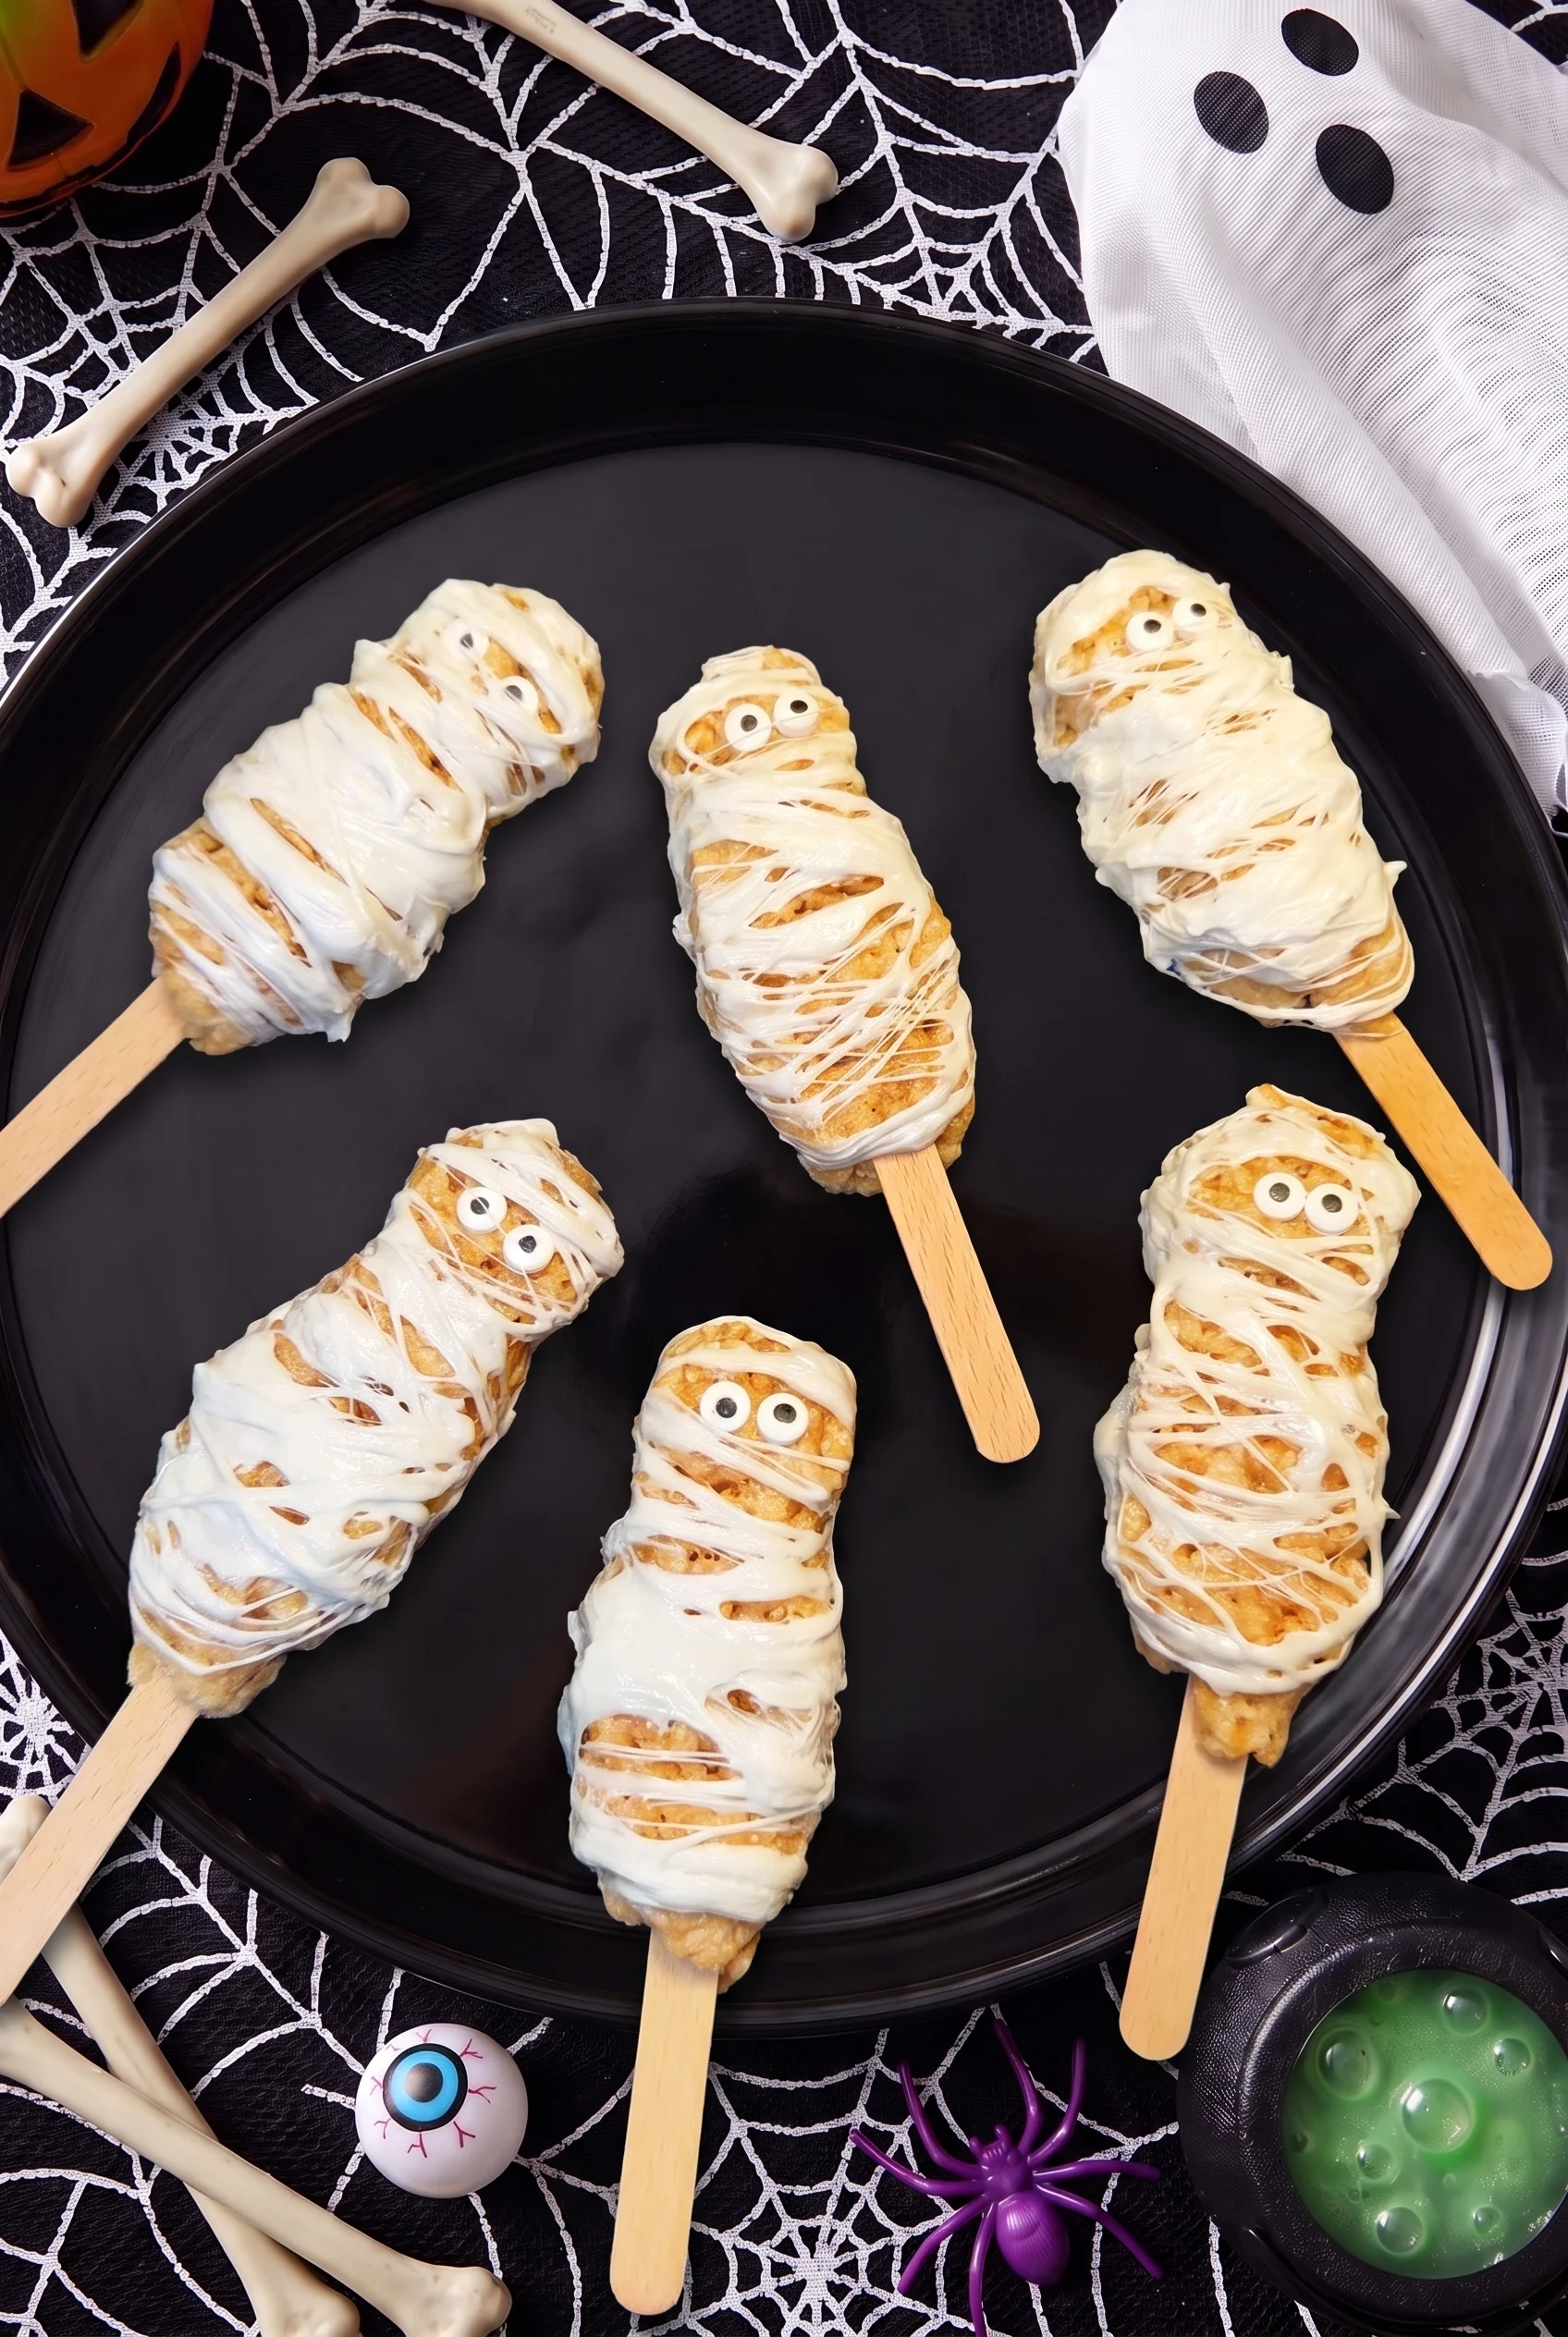
- Wrap the mummies: Using your fingers, pull and stretch the softened marshmallow into thin strands. Wrap the strands around the Rice Krispies Treat leaving the candy eyes visible to create the mummy bandages. You will feel exactly like Spider-Man doing this, enjoy it.
- Keep going: Repeat with the remaining treats, reheating the marshmallow or using a fresh marshmallow as needed. Wash your hands if they get too coated in sugar, it makes stretching the next batch way easier.
- Final chill: Place the finished mummies on parchment or wax paper and refrigerate until the marshmallow has set and is no longer sticky. If a few stick to the paper later, just peel them off gently, nobody will notice the back.
♥ The Misfit Tips!
- Respect the chill time: I once rushed the first chill, and the treats slid off the sticks during decorating.
- Grease your fingers: A tiny drop of cooking oil or butter keeps melted marshmallow from taking over your hands.
- Pack homemade treats tightly: Homemade cereal treats need a firm press and complete cooling before you add sticks.
- Use thin strands: Thin marshmallow creates cleaner bandages.
- Keep the eyes visible: Leave enough space between the strands so guests can see the mummy faces.
- Work in small batches: Softened marshmallow becomes difficult to handle as it cools.
Perfect Pairings
These pair perfectly with zero stress and a spooky movie marathon.
- A cold glass of milk, obviously.
- Warm apple cider on a chilly October afternoon.
- A neighborhood potluck where you want to look festive without cooking.
- A bowl of leftover Halloween candy because balance remains a myth.
- Hot chocolate for an extra sweet Halloween snack table.
How to Store
❤
- Fridge: Store the mummies in an airtight container for up to three days.
- Room temperature: Let chilled mummies sit at room temperature before serving.
- Freezer: Do not freeze the treats because the candy eyes can bleed and the marshmallow can turn chewy.
- Reheat: Do not reheat the mummies because the cereal treats can melt.
- Humidity note: Keep the mummies refrigerated in humid weather and remove them shortly before serving.
- Stacking: Place parchment between layers to protect the marshmallow bandages.
Marshmallow Mummies
These marshmallow mummies turn cereal treats, jumbo marshmallows, candy eyes, and popsicle sticks into spooky Halloween snacks without an oven. The stretchy marshmallow creates simple mummy bandages, while the candy eyes give each pop a playful personality. Make these easy Halloween treats for school parties, neighborhood gatherings, movie nights, or any Halloween dessert table when you need a festive snack with almost no preparation.
Ingredients
Equipment
Method
- Shape the Rice Krispies Treats: Unwrap each Rice Krispies Treat and carefully insert a popsicle stick into the bottom. Gently press and shape the treat around the stick to create a simple mummy body with a rounded head at the top.
- Add the Eyes: Press two candy eyeballs into the front of each treat, positioning them near the top of the mummy’s head. Refrigerate the treats for about 1 hour to help them firm up and stay securely on the sticks.
- Prepare the Marshmallow: Place one jumbo marshmallow on a microwave-safe plate and microwave for about 10 seconds, or just until it becomes soft and stretchy. Let it cool briefly so it is comfortable to handle while remaining flexible.
- Create the Mummy Bandages: Using your fingers, carefully pull and stretch small portions of the softened marshmallow into thin strands. Work gently, as the marshmallow will be sticky and stretchy.
- Wrap the Mummies: Drape and wrap the marshmallow strands around each Rice Krispies Treat, overlapping them slightly to create the look of mummy bandages. Keep the candy eyes uncovered so they remain clearly visible. If the marshmallow becomes too firm or difficult to stretch, microwave it briefly again or use a fresh marshmallow.
- Let Them Set: Place the finished mummy treats on parchment or wax paper. Refrigerate until the marshmallow has completely set and is no longer sticky. Serve once the decorations are firm.