
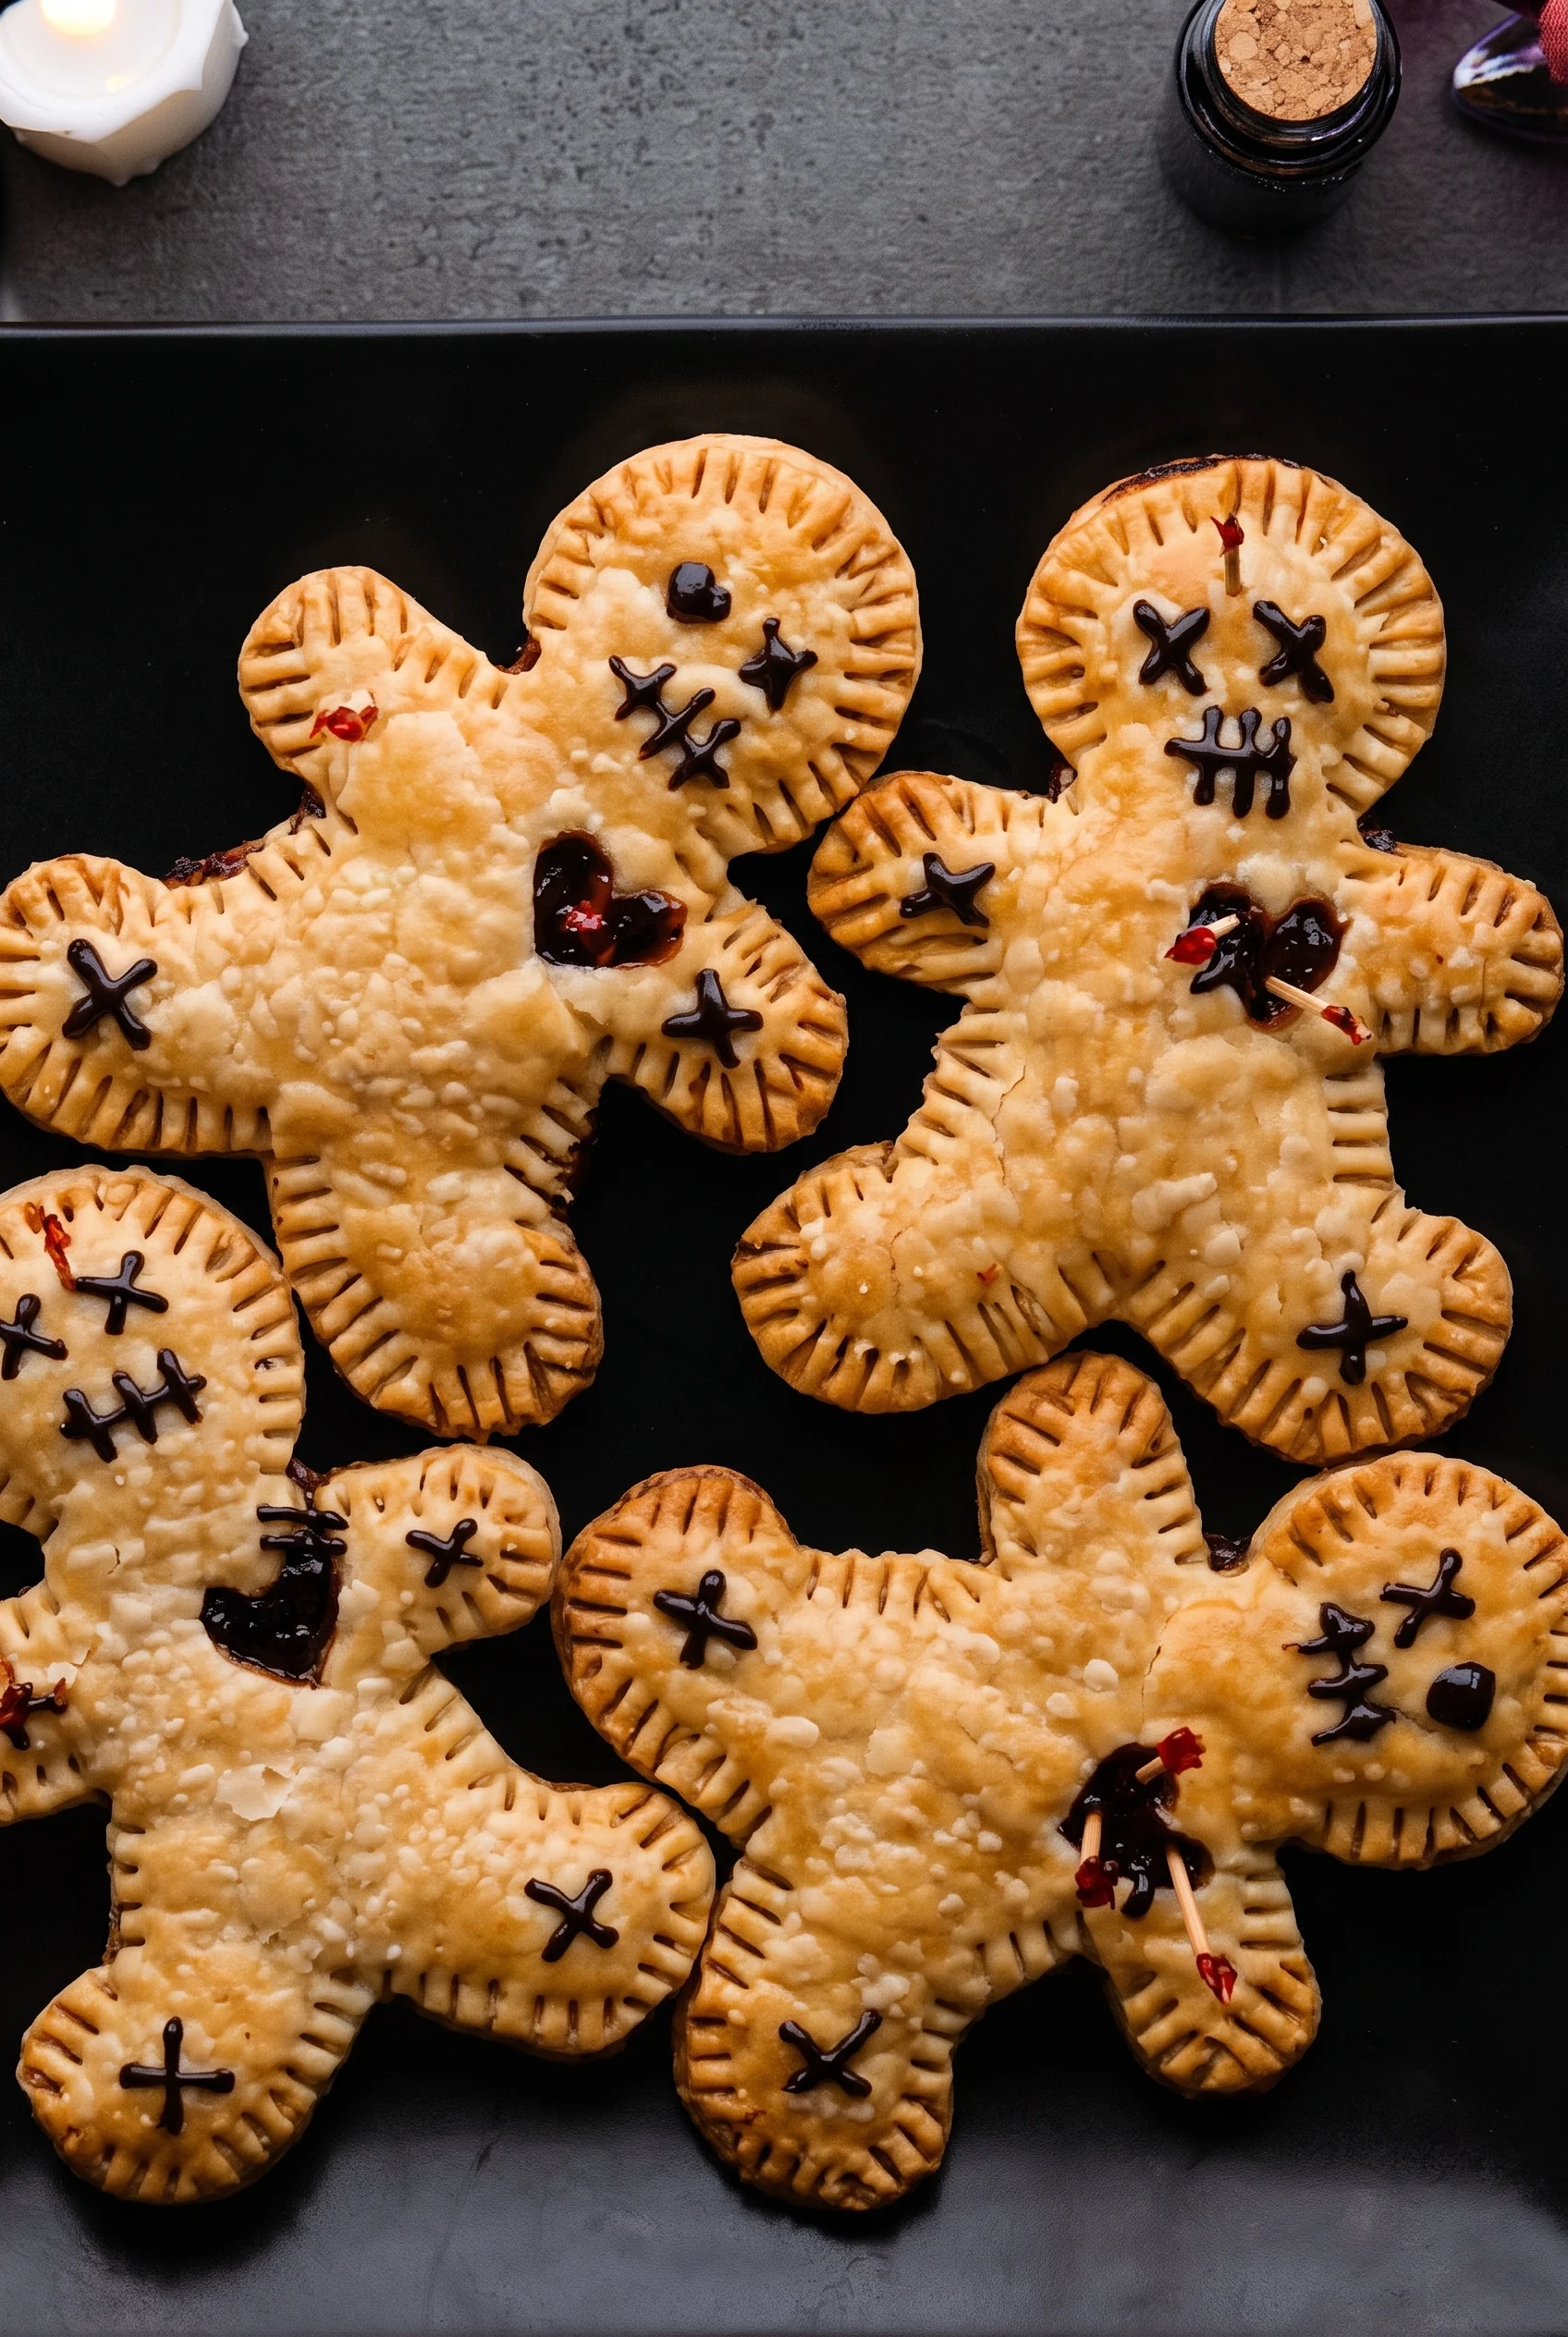
I made these Voodoo Doll Hand Pies on a Tuesday afternoon because I felt particularly petty, and stabbing a regular pie did not seem dramatic enough. Store-bought pastry keeps the preparation simple, while dark berry jam creates a dramatic filling that can leak just enough to look intentional. Licorice hair, fondant eyes, edible stitches, and a red sugar heart complete the creepy doll design.
The decoration does not demand perfection because every crooked stitch and cracked edge makes the pies look more distressed. Here is exactly how I make these Halloween hand pies.
Why You’ll Love This Recipe
- Zero dough drama: Store-bought pie crust lets you skip the stress of making dough from scratch.
- Mistake-friendly design: Crooked stitches and uneven edges make the dolls look more distressed.
- Pantry-friendly filling: You can use whatever dark jam sits half-empty in the refrigerator.
- Cheap therapy: You get to decorate the pies with tiny cocktail-stick “stitches.”
- Halloween-ready: The doll shapes make these spooky hand pies stand out on a dessert table.
- Easy to customize: You can change the jam, hair color, heart design, and facial expression.
Tools You’ll Need
Nothing fancy, I promise.
- Gingerbread man cookie cutter: The cutter creates the doll shapes.
- Coffee stirrer or straw: A stirrer makes holes for the licorice hair before baking.
- Parchment paper: Parchment protects the baking sheet from leaking jam.
- Small spoon or piping bag: Either tool adds a controlled amount of filling.
- Edible food markers: Markers create stitches and facial details.
- Small brush or toothpick: A small tool spreads corn syrup onto the decorations.
Ingredients
- 1 package store-bought pie crust – The kind with two crusts in the box. I use Pillsbury because life is short.
- 1 egg – Whisked up for an egg wash so they get golden and shiny in the oven.
- Jam of your choice – Blackberry or raspberry works best. You want it to look mildly ominous when it leaks out the sides.
- Grape licorice laces – For the hair. Black licorice tastes like despair to me, so I use grape, but you do you.
- 2 TBSP pre-made fondant – Just a tiny bit for the eyes. I buy it because making fondant is a hassle I refuse to engage in.
- Food edible pens – Because painting tiny stitches with a brush requires a steady hand that I simply do not possess.
- 2 TBSP corn syrup – Acts as edible glue for the eyes and the heart.
- Red sanding sugar – To make the little heart on the chest pop.
- Red heart cocktail sticks – The crucial stabbing element. Make sure you don’t chop off the pointy end if you trim them!
How To Make Voodoo Doll Hand Pies
Do not panic when you see the decorating steps; if I can manage this without throwing something across the kitchen, you definitely can.
- Prep the crust: Thaw the pie crust on the counter for about 10 minutes so it is pliable. If you try to unroll it cold, it will crack into a dozen pieces and you will cry.
- Cut the dolls: Cut out gingerbread people shapes. You will need to re-roll the scraps to get enough for the tops and bottoms.
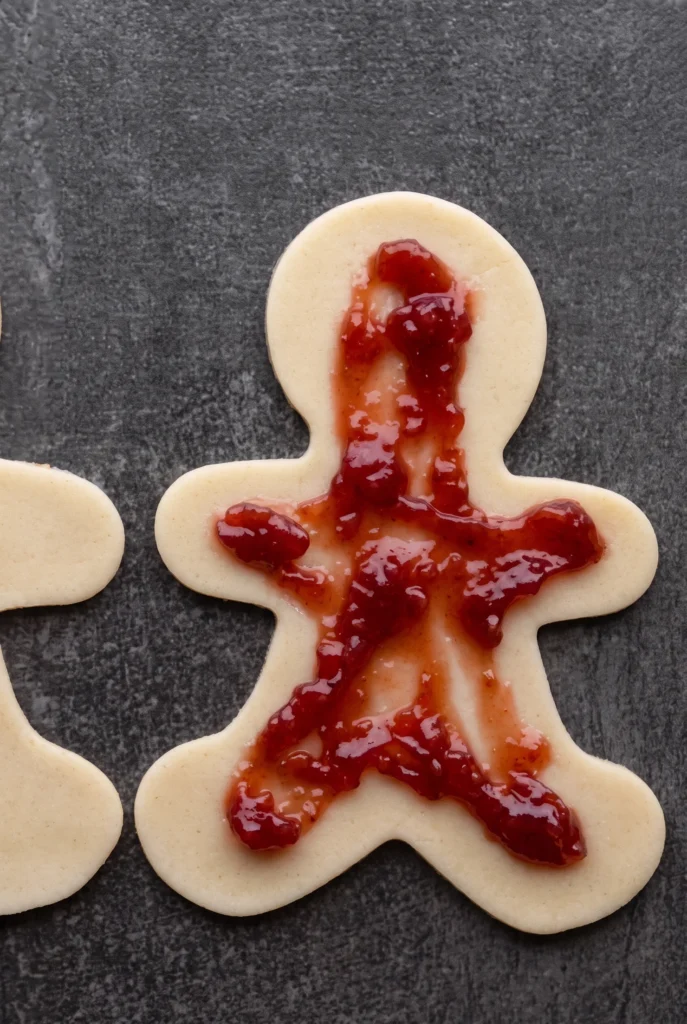
- Add the filling: Pipe or spoon a little stick-figure shape of jam onto the bottom crusts. Do not overfill them unless you want a massive fruit explosion in your oven.
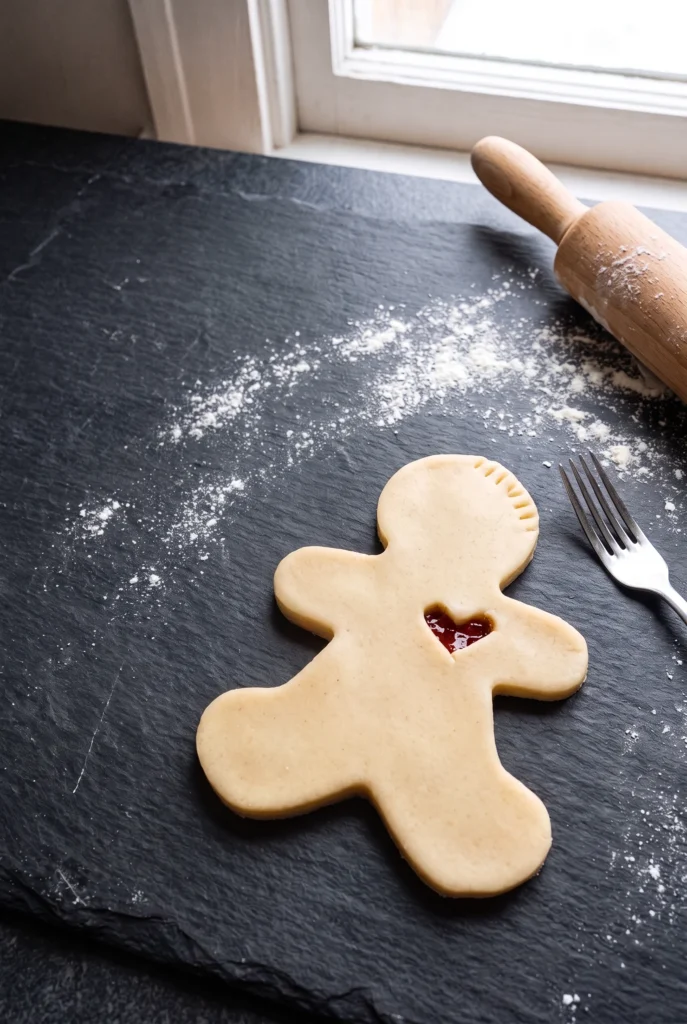
- Seal them up: Brush the edges with egg wash and press the top crust down. Seal with your fingers or a fork if it leaks a bit, that is between you and the baking sheet, nobody else needs to know.
- Poke the hair holes: Use a coffee stirrer to poke holes at the top of the head before baking. I tried doing this after they baked once and completely decapitated them.
- Bake and cool: Bake at 400°F for 10-12 minutes until golden brown, then let them cool completely. Hot jam will melt your fondant eyes instantly.
- Decorate the face: Thread the licorice hair through the holes, glue on fondant button eyes with corn syrup, and draw stitches with your edible marker. Remember, wonky stitches just make it look more authentic.
- Add the heart: Paint a small corn syrup heart on the chest, press on the red sanding sugar, and stab it with your cocktail stick. Therapy complete.
♥ The Misfit Tips!
- Do not overfill the jam: A small amount protects the seal and prevents burned filling.
- Use the correct marker: Food-safe markers designed for hard surfaces create cleaner stitches.
- Handle licorice gently: Pulling the laces too tightly can snap them.
- Cool the pies completely: Warm pastry melts the fondant and softens the licorice.
- Keep the pastry cool: Refrigerate the cut shapes if the dough becomes soft.
- Accept imperfect details: Uneven stitches make the dolls look creepier.
Perfect Pairings
These pair perfectly with a dark sense of humor and a sweet tooth.
- A cold glass of milk, obviously.
- A horror movie marathon with a pie leg as your snack.
- A Halloween party where you want guests to think you have serious pastry skills.
- Strong black coffee the morning after the sugar rush.
- Warm apple cider for a fall gathering.
How to Store
❤
- Fridge: Store the decorated pies in an airtight container for up to three days.
- Freezer: Freeze baked, undecorated hand pies for up to two months.
- Thaw: Thaw the pies at room temperature before decorating.
- Reheat: Do not reheat decorated pies because fondant and licorice can melt.
- Storage note: Keep the pies covered because licorice hair becomes stiff in open air.
- Decoration note: Add the fondant, licorice, sugar, and cocktail sticks after thawing.
Voodoo Doll Hand Pies
Ingredients
Equipment
Method
- Prepare the Pie DoughLet the pie crust thaw on the counter for about 10 minutes, just until pliable enough to cut. Line two large baking sheets with parchment paper.
- Cut and Fill the PiesUse a large gingerbread cutter to cut 8 gingerbread shapes from the dough, rerolling the scraps as needed. Arrange half of the shapes on the prepared trays and lightly brush the edges with egg wash.Pipe a small stick-figure shape of jam into the center of each piece, leaving plenty of space around the edges. Avoid overfilling, as the jam can leak during baking.
- Seal the PiesPlace the remaining dough shapes on top. Press the edges firmly to seal, then crimp with a fork or your fingers. Before baking, use a small straw or coffee stirrer to make the holes needed for the licorice hair.
- BakeBake at 400°F for 10–12 minutes, until golden brown. Let the pies cool completely before decorating.
- Add the Licorice HairThread licorice laces through the pre-made holes. Gather the strands at the top and gently tie them together with another piece of licorice. Avoid pulling too tightly, as the laces can break.
- Make the Button EyesRoll out the fondant and cut 12 small circles using the large end of a piping tip or a small bottle cap. Press a smaller lid into each circle to create a button detail.Brush a small amount of corn syrup onto each fondant piece and attach it to the pies as the eyes.
- Add the Stitch DetailsUse a black food-decorating pen or a fine brush with black food coloring to draw an X on each button eye. Add stitches to the body with one long line down the center, two stitches for the arms, and two for the feet.
- Create the HeartUse a tiny paintbrush to coat a heart shape on the left side of each doll's chest with corn syrup. If the syrup is difficult to see, tint it with a tiny drop of red food coloring.Cover the heart with red sanding sugar, gently pressing it into the syrup. Turn the pie on its side and tap off the excess sugar to reveal the heart shape.
- Finish the Voodoo Doll PiesIf using decorative heart-topped sticks, trim them carefully to the desired length while keeping the pointed end intact. Reattach the decorative heart with a little corn syrup if needed.Allow all decorations to set before serving. These pies require a little extra decorating time, but the finished Halloween treats are worth the effort.