Ingredients
Equipment
Method
- Prepare the Oven and Cake PansPreheat the oven to 350°F (175°C), or 325°F (165°C) if using a convection oven. Grease and flour three 7-inch round cake pans, then line the bottoms with parchment paper to help the cakes release easily after baking.
- Cream the Butter and SugarIn a large mixing bowl, beat the butter and sugar for about 4 minutes, until the mixture is pale, light, and fluffy. Scrape down the sides of the bowl as needed. Add the eggs one at a time, beating well after each addition. Mix in the vanilla extract until combined.
- Add the Dry Ingredients and MilkIn a separate bowl, whisk together the flour, baking powder, and salt. Add the dry ingredients to the butter mixture in three additions, alternating with the milk. Mix gently after each addition, beginning and ending with the dry ingredients. Stop mixing as soon as the batter is combined to keep the cake tender. Divide the batter evenly among the three prepared pans and smooth the tops.
- Bake the Cake LayersBake for 25–30 minutes, or until a toothpick inserted into the center of each cake comes out clean. Let the cakes cool in their pans for 10 minutes, then carefully turn them out onto a wire rack. Remove the parchment paper and allow the layers to cool completely, about 1 hour, before decorating. Warm cake can melt the buttercream and make the layers difficult to frost neatly.
- Make the White Chocolate ButtercreamIn a large bowl, beat the butter for about 5 minutes, until pale and fluffy. Gradually add the powdered sugar, mixing well between additions. Pour in the cooled melted white chocolate, then add the vanilla extract and milk. Beat until the buttercream is smooth, creamy, and easy to spread. Make sure the white chocolate has cooled before adding it so it doesn't melt the butter.
- Stack the Cake and Apply the Crumb CoatIf the cake layers have domed tops, carefully trim them with a serrated knife to create flat, even surfaces. Place the first layer on a cake board or serving plate and spread an even layer of white chocolate buttercream over the top. Add the second layer and another layer of frosting, then position the third layer on top.Spread a thin layer of buttercream over the entire cake, covering the top and sides. This crumb coat seals in loose crumbs and creates a base for the final frosting. Refrigerate until the coating is firm.
- Finish Frosting the CakeCover the chilled cake with the remaining white chocolate buttercream, smoothing it over the top and sides with an offset spatula. For a rustic finish, leave gentle spatula marks in the frosting rather than trying to make the surface perfectly smooth.
- Prepare the Chocolate Border FrostingIn a mixing bowl, beat the butter, powdered sugar, cocoa powder, and milk until smooth and creamy. Adjust the consistency with a small amount of milk if needed so the frosting is firm enough to hold its shape when piped. Transfer the frosting to a piping bag fitted with a star tip. Pipe tight rosettes around the base of the cake to create a decorative border.
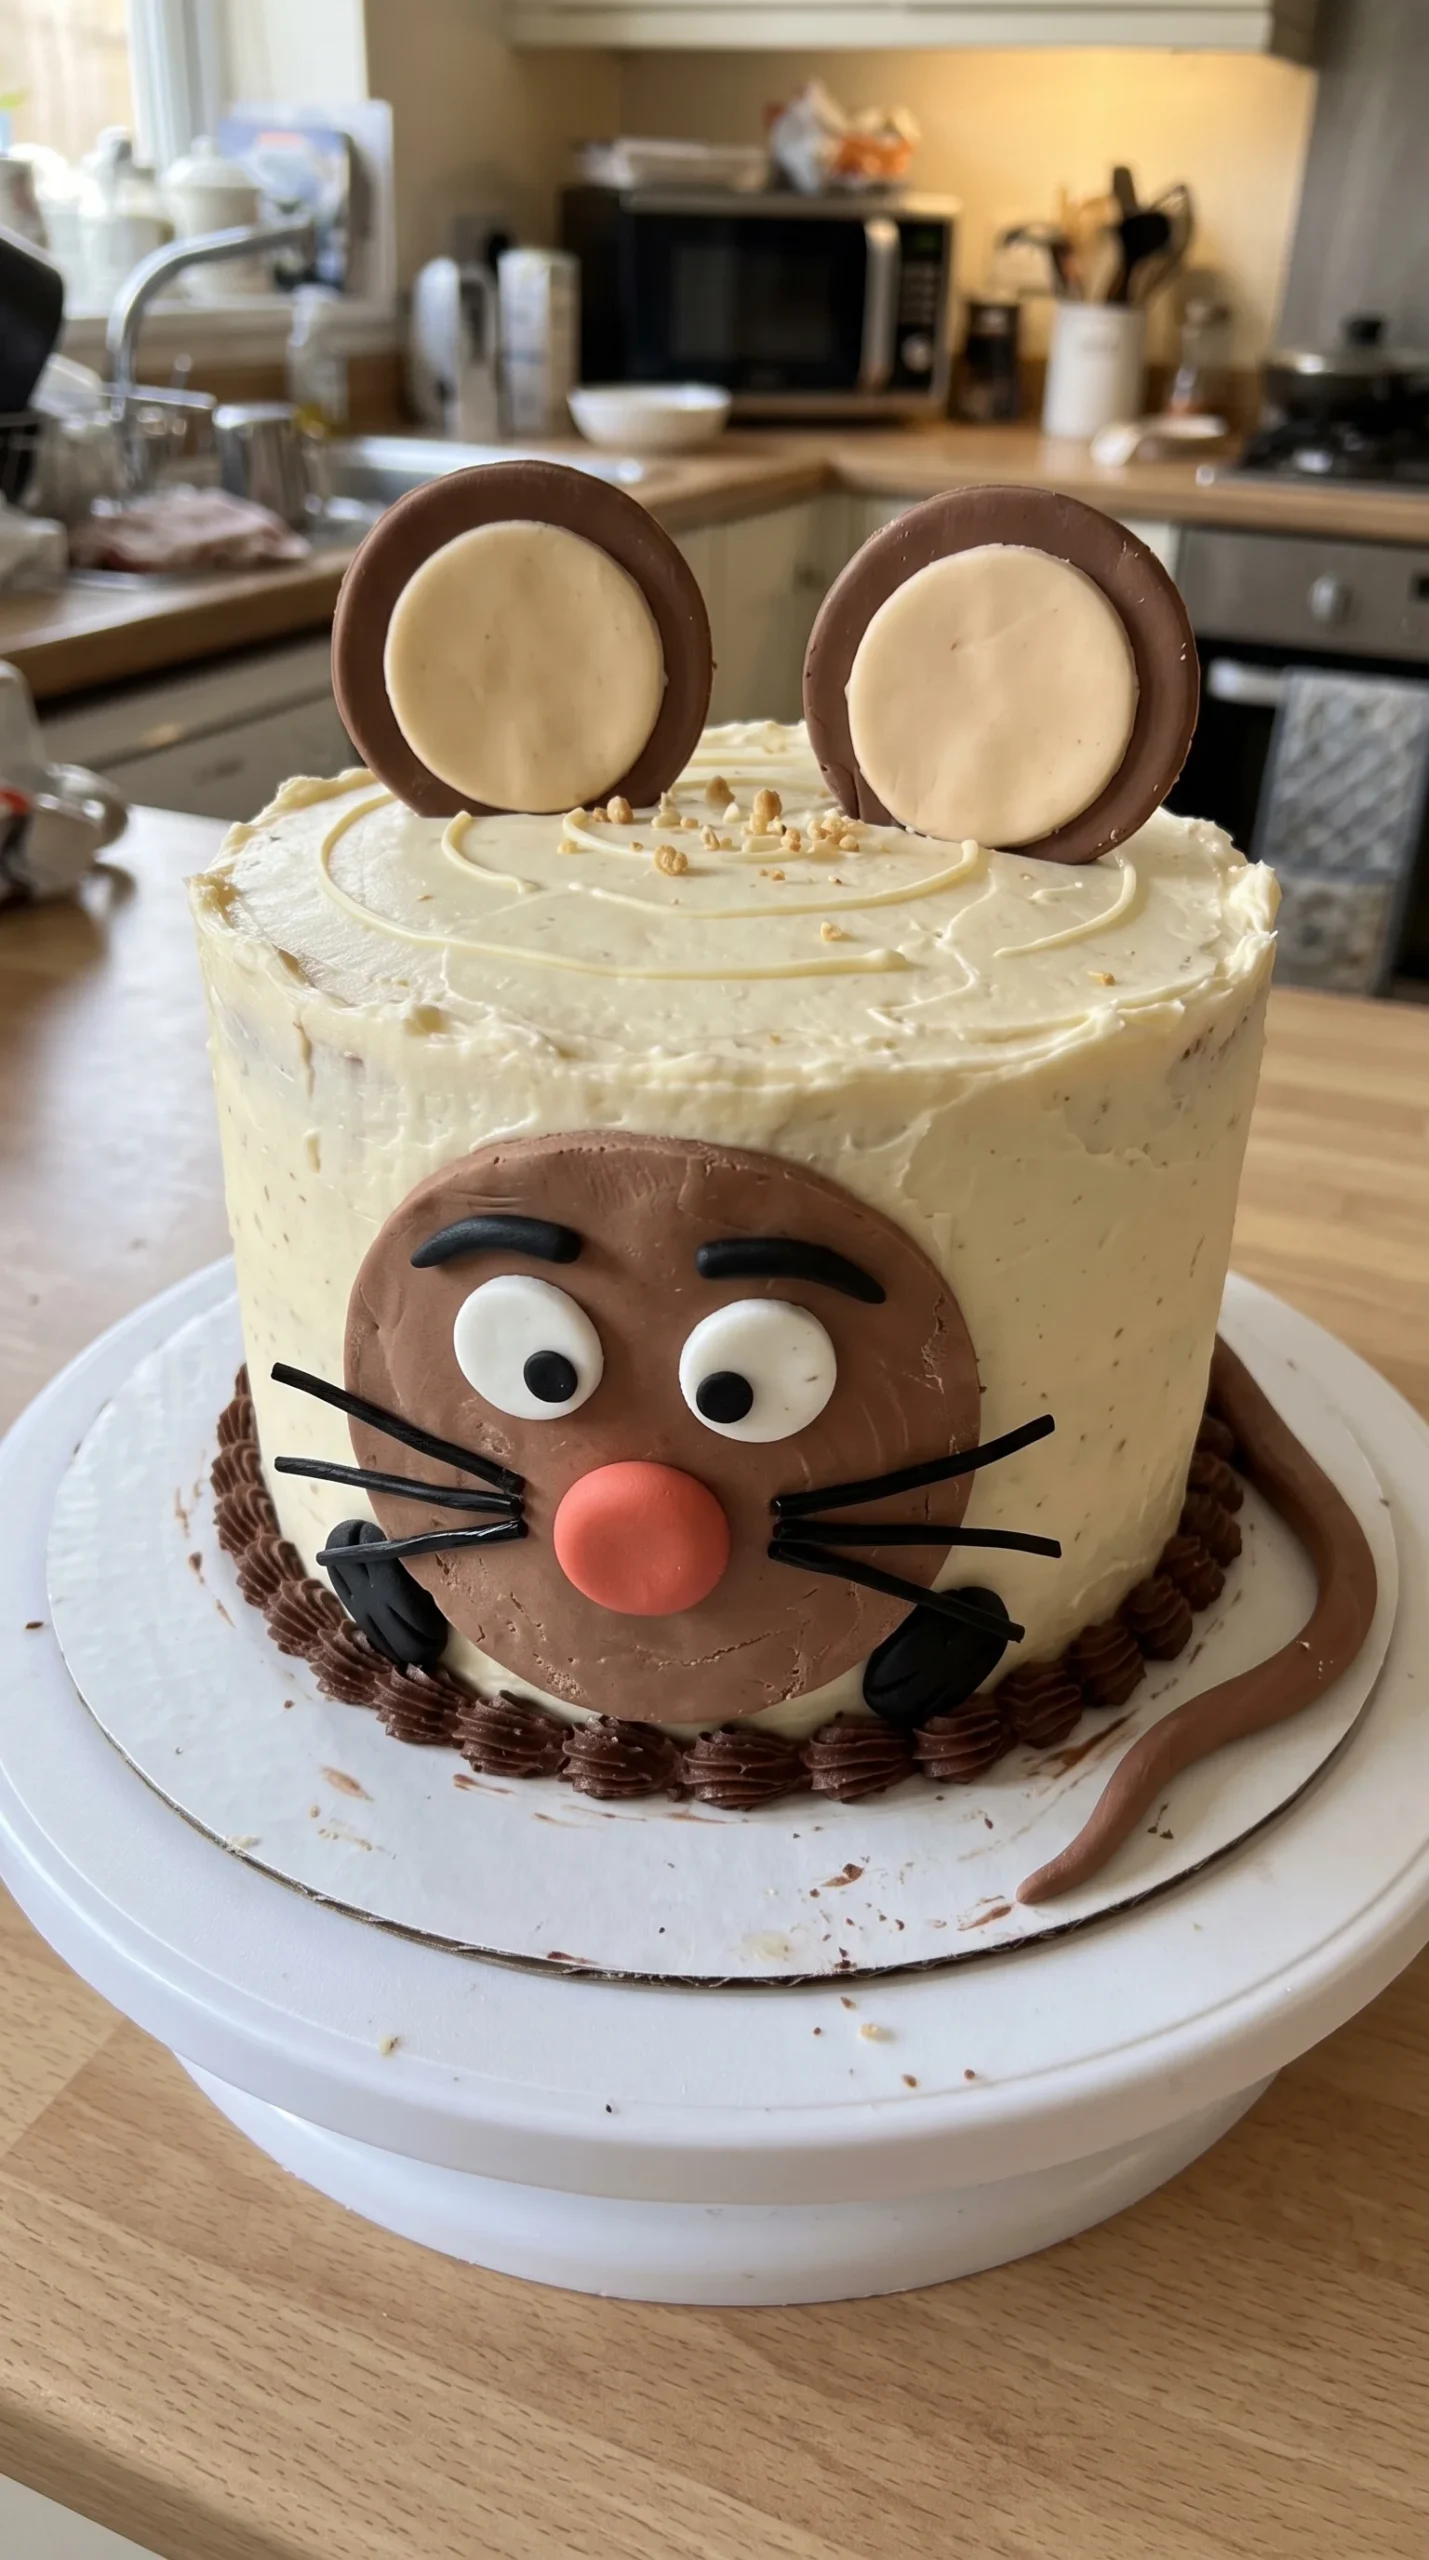
- Shape the Mouse Face and EarsRoll the brown fondant to approximately ⅙ inch thick on a lightly dusted work surface. Cut one 4-inch circle for the mouse's face and two 3-inch circles for the ears. Roll out the beige fondant and cut two 2-inch circles, pressing one onto each ear to create the inner-ear details. Set the ears aside to dry and firm up, ideally overnight, so they are sturdy enough to stand upright when attached to the cake.
- Make the Facial FeaturesRoll two small balls of white fondant and flatten them slightly to form the eyes. Add small black fondant pupils, then cut two thick eyebrows from the black fondant.
- Shape a small ball of coral fondant into the nose.Attach the brown fondant face to the side of the cake using a small dab of water. Add the eyes, eyebrows, and nose, pressing gently so each piece adheres securely.Cut the black licorice lace into six pieces and arrange them as whiskers on either side of the nose. Add two small black fondant paws near the bottom of the cake to complete the design.
- Shape and Attach the TailRoll the remaining brown fondant into a rope approximately 12 inches long, tapering one end to make it thinner. Place the tail on the cake board and gently curl it toward the cake so it appears to extend from behind the mouse. Adjust the curve to create a natural-looking tail.
- Decorate the Top of the CakeDrizzle melted white chocolate over the top of the cake in decorative swirls and curved lines. Sprinkle with crushed nuts while the chocolate is still soft so they adhere. Carefully position the dried fondant ears on top of the cake. Use wooden skewers or pieces of dry spaghetti to help support them upright, inserting them gently into the cake and ears as needed. Check that all the decorations are secure before serving.